
Tools
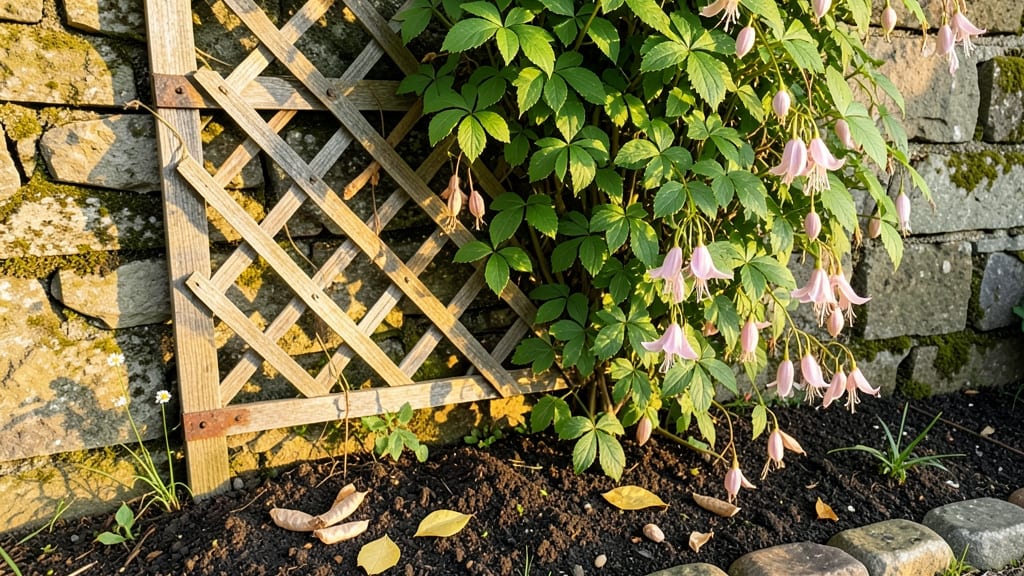
Behind the garden walls, transforming that blank brick wall into a lush, year-round privacy screen changed my backyard forever—now it’s a thriving green barrier that feels like a secret garden. 🌿 I’ve tested everything from fast-growing vines to modular planters, and the results are shockingly effective—even in tight spaces.
The key is matching plants to your wall’s sunlight and moisture. Sun-loving ivy or jasmine clings effortlessly to brick, while shade-tolerant ferns or herbs thrive in wood or concrete crevices. You’ll need sturdy hooks, trellises, or wall-mounted planters, but the setup is simpler than it looks—no heavy construction required.
Even small patches of greenery make a difference, and the payoff is instant privacy with zero fence clutter.
Imagine walking outside to a wall covered in velvety leaves or fragrant blooms instead of bare surfaces. The best part? You can mix edible herbs with ornamentals, creating a functional screen that doubles as a kitchen garden.
By late summer, you’ll have a living tapestry that blocks noise, filters dust, and even cools the air around your patio.
Works for any wall type, from urban balconies to rural property lines. The only limit is your imagination—and how high you want that green curtain to grow.
📚 In This Guide
- What you need
- Instructions
- Tips and common mistakes
- Wrapping up and next steps
What you need
- ● Plants: Fast-growing vines (e.g., Honeysuckle, Clematis, or Wisteria) – 3-5 plants per 6-foot section
- ● Evergreen shrubs (e.g., Holly, Boxwood, or Privet) – 1 plant per 2 feet
- ● Dense foliage plants (e.g., Bamboo, Ivy, or Arborvitae) – Quantity depends on wall height (1-2 plants per 3 feet)
- ● Soil & Amendments: High-quality potting mix or garden soil – 1 cubic yard per 10 linear feet of wall
- ● Compost or organic fertilizer (e.g., Fish emulsion or slow-release granules) – 1 bag per 5 plants
- ● Support Structures: Trellis or lattice panels (for vines) – 1 panel per 6 feet of wall
- ● Garden stakes or wire mesh (for climbing plants) – As needed
- ● Tools: Garden trowel or spade
- ● Pruning shears
- ● Measuring tape
- ● Gloves (for handling thorny plants)
- ● Watering can or hose with nozzle
- ● Mulch (to retain moisture and suppress weeds) – 1 bag per 10 linear feet
- ● Drip irrigation system (for low-maintenance watering)
- ● Decorative lights (to highlight your green screen at night)
- ● Plant food (liquid or granular) for faster growth
- ● A sturdy, weather-resistant wall (brick, wood, or metal)
- ● Access to sunlight (check plant light requirements)
- ● Time to plan spacing and plant growth patterns
- ● Patience—some plants take months to fill in!
Step-by-step instructions for creating a living green screen behind garden walls
Transform bare walls into lush privacy barriers with these simple, effective steps.
🌱 Step 1: Choose Fast-Growing, Privacy-Friendly Plants
Select plants that grow quickly and tolerate your climate. For quick coverage, I recommend bamboo, arborvitae, or evergreen shrubs—they grow 3-6 feet per year and stay dense year-round. If you prefer flowering options, clematis or climbing roses add beauty while providing privacy. Check each plant’s mature height to match your wall height.
For a 4-foot wall, plant arborvitae (3-4 feet tall at maturity) in a staggered row, spacing them 3-4 feet apart. This ensures they fill in quickly without leaving gaps. If your wall is taller, opt for bamboo—it can reach 12-15 feet and grows aggressively, creating an instant screen within a season.
🪴 Step 2: Prepare the Planting Area Along the Wall
Mark the planting line 6-12 inches away from the wall—this gives roots room to spread without crowding. Dig holes twice as wide and just as deep as the root ball of each plant. If your soil is heavy clay or sandy, mix in 2-3 inches of compost to improve drainage and fertility.
For a 4-plant screen, use the 4 gallons of potting mix you’ve set aside. Fill each hole halfway with soil, then place the plant in, ensuring the top of the root ball sits even with the ground level. This prevents water from pooling around the stems, which can cause rot. Tap the soil gently to remove air pockets.
☀️ Step 3: Plant and Water for Immediate Support
Backfill the holes with soil, pressing lightly to secure the plants. Water each one deeply—about 1 gallon per plant—until water runs out the bottom of the hole. This helps roots establish quickly. If planting in hot weather, water again in the evening to reduce stress.
For climbing plants like clematis or roses, install trellises or wire mesh along the wall before planting. Secure the vines as they grow to train them upward. Mulch the base with 2-3 inches of organic mulch to retain moisture and suppress weeds. Avoid piling mulch against the stems—keep it 2 inches away to prevent rot.
💧 Step 4: Maintain Watering and Prune for Density
Water deeply 2-3 times per week for the first month, then taper to once a week once established. You’ll know they’re getting enough water when the soil feels damp 2 inches below the surface. Overwatering is worse than underwatering—yellowing leaves or wilting mean you’re overdoing it.
Prune once a year in early spring to encourage bushier growth. For arborvitae, trim back 1/3 of the new growth to maintain shape. For bamboo, cut back any shoots that spread too far to keep the screen contained. This keeps your green wall looking neat and prevents it from becoming unruly.
✂️ Step 5: Monitor and Adjust for Year-Round Privacy
Check for pests like spider mites or aphids—they love new growth. Spray with neem oil if you spot them early. If your plants aren’t filling in as expected, add 1-2 more plants in gaps to speed up coverage. Evergreens like arborvitae stay green all winter, while deciduous options like clematis will need winter mulch for protection.
By year two, your screen should be fully dense, blocking views and adding beauty. If any plants outgrow their space, trim them back in late winter before new growth starts. With proper care, your living green screen will thrive for years, giving you year-round privacy and curb appeal.
Tips & tricks for perfect living green screens
Creating a lush living screen behind your garden walls is easier than you think—these practical tips will help you avoid common pitfalls and get the most out of your privacy project.
Plant Spacing Matters: When planting arborvitae for a 4-foot wall, that 3-4 foot spacing might feel generous, but trust me—it's perfect. This spacing gives each plant room to grow outward while filling in gaps naturally. If you're tempted to plant closer to save space, resist! Crowded plants struggle with airflow and are more susceptible to diseases. For bamboo, which grows aggressively, you can reduce spacing to 2-3 feet, but install root barriers to contain its spread.
Soil Preparation is Key: Don't skip the compost amendment if your soil is heavy clay or sandy. That 2-3 inches of compost makes all the difference in root establishment. For clay soil, it improves drainage; for sandy soil, it adds moisture retention. If you're working with poor soil, consider using a mix of 50% native soil and 50% potting mix in your planting holes. This gives your plants the best possible start.
Watering Wisdom: The first month is critical for root establishment, so stick to that 2-3 times per week deep watering schedule. A simple way to check if you're watering enough is to stick your finger 2 inches into the soil—it should feel damp, not soggy. I've seen many green screens fail because of inconsistent watering. Set a reminder on your phone if needed, but don't skip this step. For hot weather planting, that evening watering tip is golden—it prevents stress on young plants.
Pruning Strategy: That annual early spring pruning isn't just about shaping—it's about encouraging bushier growth. For arborvitae, cutting back 1/3 of new growth sounds drastic, but it stimulates multiple branches to form. For bamboo, be ruthless with those wandering shoots. I've seen bamboo take over entire yards when left unchecked. Trim aggressively in late winter before new growth starts to maintain your contained screen.
Pro Tips for Behind Garden Walls
- Creating a lush living screen behind your garden walls is easier than you think—these practical tips will help you avoid common pitfalls and get the most out of your privacy project.
- Plant Spacing Matters: When planting arborvitae for a 4-foot wall, that 3-4 foot spacing might feel generous, but trust me—it's perfect.
- Soil Preparation is Key: Don't skip the compost amendment if your soil is heavy clay or sandy.
Frequently asked questions
Behind Garden Walls: Year-Round Privacy With Living Green Screens
—here are some of the most common questions people ask when planning their own lush, private garden oasis.
What are the best plants for fast-growing privacy screens?
For quick results, opt for Bamboo (clumping types like Fargesia), Hornbeam, or Leyland Cypress. Vines like Wisteria or Clematis (with trellises) grow rapidly too. Evergreens like Arborvitae or Thuja offer year-round coverage but take 2–3 years to fill in.
How long does it take for a living wall to provide full privacy?
Timing depends on the plant! Fast growers like Bamboo or Wisteria can reach 6–10 feet in 1–2 years. Slower options like Boxwood hedges or Holly may take 3–5 years for dense coverage. Plan ahead—layering plants (tall + shrubby) speeds up results!
Are living green screens more expensive than fences or lattice?
Upfront costs vary: Bamboo or Vines are budget-friendly ($1–$5 per plant), while Arborvitae or Privet hedges cost $10–$30+. Long-term, they’re cost-effective—no maintenance fees like vinyl fences, and they boost property value! DIY planting cuts costs further.
How do I maintain a living wall without it looking unkempt?
Prune 2–3 times/year (spring, summer, fall) to encourage bushiness. Water deeply 1–2x/week for the first year, then adjust based on rainfall. Mulch the base to retain moisture. Watch for pests (aphids, spider mites)—neem oil or insecticidal soap helps. Evergreens need winter checks for snow damage.
Can I use living walls for urban or small-space gardens?
Vertical gardens (e.g., Ivy on trellises) or Dwarf Conifers work in tight spots. For balconies, try Climbing Roses or Jasmine in containers. Just ensure your plants get enough sunlight (check tags!) and choose non-invasive species to avoid overgrowth.
What’s the biggest mistake to avoid when planting a privacy screen?
Skipping proper spacing—crowded plants compete for nutrients and stunt growth. Follow spacing guidelines (e.g., Arborvitae: 3–5 feet apart). Also, avoid planting too deep (root collar should sit above soil) or ignoring soil prep (amend with compost!). Patience is key—rush jobs lead to sparse screens.
Wrapping up and next steps
Creating a living green screen behind your garden walls isn’t just about aesthetics—it’s a sustainable, low-maintenance way to reclaim privacy and beauty in any season.
Whether you’re planting fast-growing climbers, layering shrubs, or blending native species, the key is to start small, stay patient, and let nature do the work. 🌿
Ready to transform your outdoor space? Pick one plant or section to begin this weekend—your future self (and your neighbors!) will thank you. Need inspiration? Sketch a simple layout or snap photos of your garden for a personalized plan!