
Tools
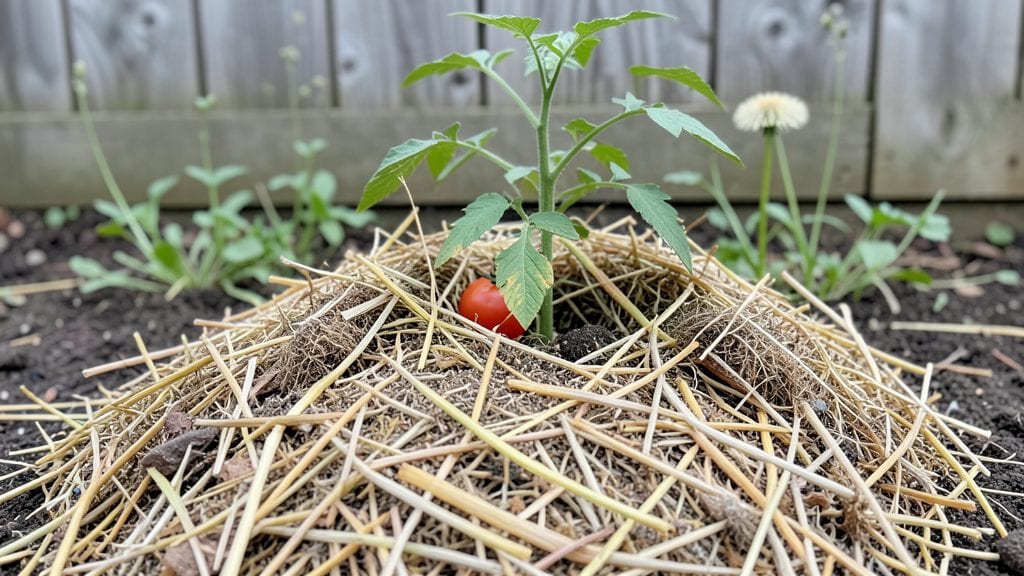
My hay garden bed transformed my backyard from a patchy mess to a thriving, low-maintenance oasis. This layered soil system uses straw or hay as a base to lock in moisture, block weeds, and feed plants over time—no tilling required.
The first time I saw my tomatoes flourish without constant watering, I knew I’d never go back to traditional beds.
You’ll need just three things: clean straw or hay (no seeds or weeds), compost or aged manure, and your chosen plants. The process takes about an hour, and the results speak for themselves—soil stays loose, roots breathe easier, and you’ll spend less time weeding.
It works especially well for heavy feeders like squash, peppers, and flowers that love rich, moist soil.
By summer’s end, you’ll have a garden that stays lush even during dry spells. The hay breaks down slowly, adding organic matter year after year, while the top layer keeps weeds at bay. Plus, it’s a game-changer for small spaces or poor soil—no digging, no fuss, just better growth.
Best part? This method keeps improving over time. Each season, you add a fresh layer of straw and compost, building fertility without the work. Perfect for beginners and seasoned gardeners alike—just give it a try and watch your plants thrive.
📚 In This Guide
- What you need
- Instructions
- Tips and common mistakes
- Wrapping up and next steps
What you need
- ● Hay or Straw: 4–6 bales (3–4 ft. bales for a standard 4’x8’ bed; opt for straw if you want slower decomposition).
- ● Compost: 2–3 cubic feet (well-aged, weed-free, and rich in organic matter).
- ● Topsoil or Garden Soil: 1–2 cubic feet (for the top layer).
- ● Garden Gloves: 1 pair (to protect your hands from prickly hay and sharp edges).
- ● Shovel or Spade: 1 (for digging and layering).
- ● Rake: 1 (to smooth out layers and remove debris).
- ● Water: Hose or watering can (to dampen hay and settle layers).
- ○ Twine or Landscape Fabric (optional but helpful): To secure hay bales if stacking vertically.
- ● Wood Chips or Mulch: 1–2 inches (to retain moisture and suppress weeds).
- ● Biochar or Perlite: Small amounts (to improve drainage and aeration).
- ● Plant Stakes or Markers: For labeling and supporting taller plants.
- ● Compost Tea or Fertilizer: To give your bed an extra nutrient boost.
Step-by-step instructions for building a hay garden bed
This layered approach creates rich, fertile soil that works harder than store-bought mixes.
Choose Your Location and Clear the Space
Pick a spot with at least 6 hours of sunlight daily—most vegetables and herbs thrive with full sun exposure. Clear the area of weeds, rocks, and debris, then mark the dimensions with stakes and string. A 4-foot by 8-foot bed gives you plenty of space for four plants while keeping maintenance manageable.
I like to lay down a 12-inch layer of cardboard over the cleared area to smother weeds and prevent grass from growing up into your new bed. Overlap the edges by 2-3 inches to ensure no gaps remain. This step is critical—skipping it means fighting weeds all season long.
Layer the Organic Materials
Start with a 4-inch base layer of straw or dry grass clippings to improve drainage and prevent compaction. This layer should be loose and fluffy—don’t pack it down. Next, add a 6-inch layer of well-aged hay, breaking it up into smaller pieces for faster decomposition. The hay should feel dry but not brittle; if it crumbles easily, it’s ready.
Top the hay with a 3-inch layer of compost—this is where the real magic happens. You’ll see worms and microorganisms start working immediately. Sprinkle a light layer of soil (about 1 inch) over the compost to create a seed-friendly surface for planting. This top layer keeps the bed from becoming too loose while still allowing roots to penetrate easily.
Water and Let It Settle
Give the bed a deep watering until the top 6 inches of material feels damp but not soggy. You’ll notice the layers compress slightly as moisture works its way down. This settling is normal—it means the materials are breaking down and integrating. Wait 24-48 hours before planting to allow the structure to stabilize.
Here’s the thing—don’t overwater. A hay bed should feel like a damp sponge, not a wet swamp. If water pools on the surface, you’ve gone too far. This step ensures your plants won’t drown in their own richness.
Plant and Maintain
Dig small holes in the top layer of soil, place your seedlings or seeds at the correct depth, and cover lightly. Water gently to settle the soil around the roots. Hay beds warm up faster in spring, so you can plant 2-3 weeks earlier than in regular garden soil. Just watch for first true leaves—that’s your signal the roots have taken hold.
Keep the bed lightly mulched with straw or grass clippings to retain moisture and suppress weeds. You’ll find the soil stays loose and crumbly, making it easy for roots to spread. Replenish the top layer of compost every fall or early spring to keep the fertility cycle going.
Monitor and Adjust
Check the moisture level weekly by sticking your finger 2 inches into the soil. If it feels dry, water deeply until moisture reaches 4-6 inches down. Hay beds dry out faster than traditional soil, so consistency is key. You’ll notice plants grow faster and with fewer pests—this bed’s natural balance keeps them healthy.
If you see mold or a sour smell, the bed is too wet. Fluff the top layer with a rake to improve airflow. This is rare but happens if you water too frequently or the hay wasn’t fully aged. A well-built hay bed should smell earthy, not rotten.
Tips & tricks for building a hay garden bed
A few key strategies will help you create a thriving hay garden bed that outperforms traditional soil. Here's what I've learned from years of building and maintaining these beds.
Location is Everything: While the instructions call for at least 6 hours of sunlight, I've found that most vegetables and herbs actually thrive with 8 hours or more. If your space gets afternoon shade, consider planting sun-loving crops like tomatoes and peppers on the sunny side and leafy greens on the shadier side. The 4-foot by 8-foot size recommendation is perfect for four plants, but you can easily extend it to 12 feet for a full row garden if you're working with more space.
Cardboard Layer Secrets: The 12-inch cardboard layer is non-negotiable for weed suppression, but here's the trick: use only plain, uncoated cardboard with no glossy finish. Glossy cardboard contains chemicals that can inhibit plant growth. Also, tear the cardboard into overlapping strips rather than laying it flat—this creates better air pockets and prevents compaction. I've seen people skip this step entirely and end up with weeds popping up through the hay layers within weeks.
Layering Technique: When building your 4-inch straw base and 6-inch hay layer, don't be afraid to mix in some leaf litter or shredded newspaper for extra nitrogen. This helps speed up decomposition and creates a more balanced environment for your plants. The compost layer is where you'll see the most activity—look for earthworms within days of watering. If you don't see any after a week, your compost might need more nitrogen or your bed might be too dry.
Timing is Critical: The 24-48 hour settling period before planting is essential for creating the right structure. During this time, the layers compress naturally, which prevents future settling that could damage plant roots. I've found that adding a thin layer of sand (about 1/4 inch) between the hay and compost layers helps with drainage and prevents compaction. This small addition makes a big difference in how well your bed holds up over time.
Pro Tips for Hay Garden Bed
- A few key strategies will help you create a thriving hay garden bed that outperforms traditional soil.
- Location is Everything: While the instructions call for at least 6 hours of sunlight, I've found that most vegetables and herbs actually thrive with 8 hours or more.
- Cardboard Layer Secrets: The 12-inch cardboard layer is non-negotiable for weed suppression, but here's the trick: use only plain, uncoated cardboard with no glossy finish.
Frequently asked questions
Got questions about creating or maintaining a hay garden bed? You’re not alone! Here are some of the most common queries—and their straightforward answers—to help you grow with confidence.
What’s the best hay to use for a garden bed?
Use straw (not hay—it’s too rich and can mold) like wheat or oat straw. Avoid alfalfa or clover hay, which may contain weed seeds or compete with your plants. Straw is lightweight, decomposes slowly, and provides excellent structure for layers. Pro tip: Check for seed contamination by soaking a small batch in water—if weeds sprout, skip it!
How long does a hay garden bed last before needing a refresh?
A well-built hay garden bed can last 1–3 years, depending on use and climate. Top off with fresh straw or compost every 6–12 months to maintain structure and fertility. Signs it’s time to refresh:
- Compacted layers
- Visible mold or foul smells
- Plants struggling despite regular watering
Can I use a hay garden bed for vegetables or just flowers?
You can grow both! Hay beds excel for root crops (carrots, potatoes), greens (lettuce, spinach), and herbs (basil, thyme). Avoid heavy feeders like tomatoes or peppers unless you supplement with compost—they’ll deplete nutrients faster. For flowers, try marigolds, zinnias, or sunflowers; their deep roots thrive in the loose layers.
Why is my hay garden bed smelling bad or getting moldy?
Bad smells or mold usually mean too much moisture or poor airflow. Fix it by:
- Fluffing layers with a fork to improve aeration
- Adding a 1-inch layer of coarse sand or perlite to drainage
- Using drier straw (avoid wet or compressed bales)
What’s a cheaper alternative to straw for garden beds?
If straw is pricey, try these budget-friendly options:
- Leaves (shredded): Free from yard waste programs; add nitrogen (like coffee grounds) to balance decomposition.
- Cardboard or newspaper: Use as a weed barrier under layers (ink-free only!).
- Pine needles: Acid-loving plants (blueberries, azaleas) love them—they decompose slowly and repel pests.
Wrapping up and next steps
A hay garden bed isn’t just a gardening trick—it’s a game-changer for nurturing healthy, vibrant plants with minimal effort. By layering straw, soil, and organic matter, you create a nutrient-rich, low-maintenance space that retains moisture and suppresses weeds.
Whether you're a seasoned gardener or just starting out, this method makes growing easier and more rewarding.
Ready to give it a try? Start small—pick a sunny spot, gather your materials, and begin layering! Your future plants (and your green thumb) will thank you. 🌱✨