Propagation
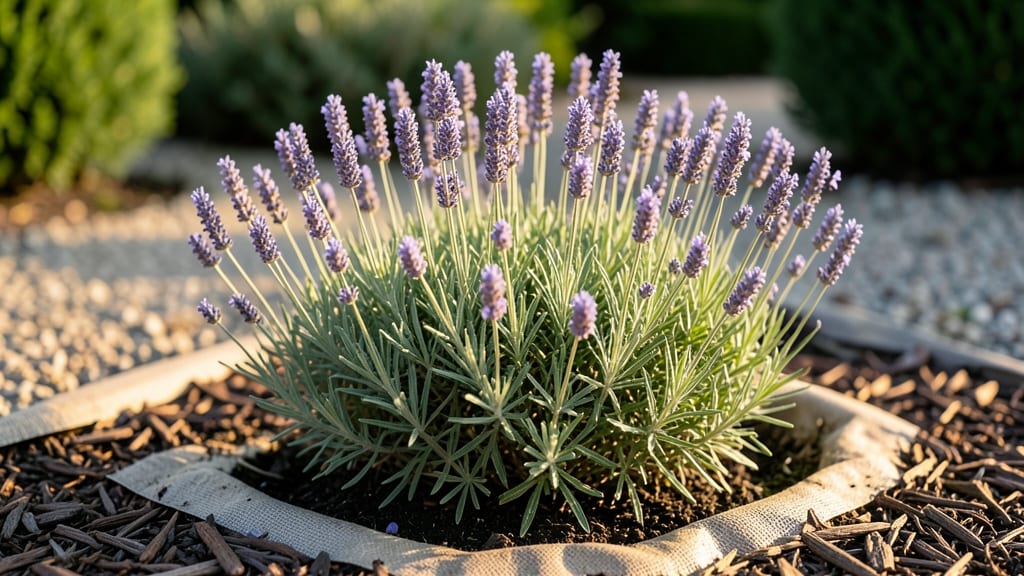
Learn how to prevent weeds from growing in your garden before they steal its spotlight. I’ve spent years perfecting a natural weed-blocking system that chokes out competition without harsh chemicals—just smart layering of mulch, shade, and root barriers.
The key isn’t brute force; it’s outsmarting weeds by cutting off their sunlight and space before they even sprout.
Start with a thick layer of cardboard or newspaper under mulch to smother existing weeds, then top with 3-4 inches of wood chips or straw—this blocks light while improving soil over time.
For stubborn patches, try black plastic or landscape fabric (cut holes for plants) to create a physical barrier roots can’t penetrate. The best part? This method works in veggie beds, flower gardens, and even between pavers.
Within weeks, you’ll see fewer weeds popping up, and your plants will thrive without the constant tug-of-war. The mulch breaks down slowly, feeding your soil while keeping weeds at bay for months at a time.
Plus, it cuts down on watering since the soil stays moist longer. Here’s how to adapt it for different garden types—no more pulling weeds by hand!
Fair warning: Some weeds (like creeping Charlie) are stubborn, so you’ll need to reapply mulch every 6-12 months. But once you switch to this system, you’ll wonder why you ever pulled weeds the old way. Let’s get your garden back—and keep it that way.
📚 In This Guide
- What you need
- Instructions
- Tips and common mistakes
- Wrapping up and next steps
What you need
- ● Landscape Fabric: 3–4 feet wide, 1–2 mm thick (permeable, not plastic). Quantity: Enough to cover your garden bed area.
- ● Mulch: Wood Chips: 2–3 inches deep (hardwood or pine). Quantity: ~1 cubic foot per 10 sq. ft.
- ● Straw or Grass Clippings: Dry, weed-free, and 2–3 inches thick. Quantity: Adjust based on bed size.
- ● Gravel or Pebbles: 1–2 inches deep (for decorative or pathway areas). Quantity: ~1 cubic foot per 10 sq. ft.
- ● Cardboard or Newspaper: Unbleached, shredded-free, and layered 2–3 sheets thick. Quantity: Cover entire garden bed.
- ● Edging Material: Metal, plastic, or stone (to keep mulch in place). Length: Match garden bed perimeter.
- ● Hand Trowel or Spade: For digging and smoothing edges.
- ● Rake: To spread mulch evenly.
- ● Garden Gloves: Protect your hands from rough materials.
- ● Living Mulch: Low-growing plants like clover or creeping thyme (plant between garden rows).
- ● Vinegar or Boiling Water: For spot-treating stubborn weeds before mulching.
- ● Compost: Mix with mulch to enrich soil over time.
- ● Heavy-Duty Plastic Sheeting: For temporary weed suppression (use sparingly—avoids smothering soil).
Step-by-Step instructions for creating natural weed barriers in your garden
Here’s how to stop weeds before they start—using simple, natural methods that work year after year.
Choose Your Barrier Material
Cardboard, newspaper, or thick layers of mulch work best for blocking light and roots. I like to use 4-6 sheets of flattened cardboard (no glossy ink) or 10-12 sheets of newspaper laid flat. Avoid plastic—it traps heat and can harm plants. If you’re using mulch, opt for 3-4 inches of wood chips or straw for long-term coverage.
Break down cardboard boxes into single layers and remove any tape or staples. Wet the layers before placing them down—this helps them stay in place and decompose slowly. If using newspaper, overlap sheets by 2-3 inches to prevent gaps where weeds can poke through.
Prepare the Garden Bed
Clear the area of existing weeds and loosen the soil with a rake or hoe. You want the surface to be smooth so your barrier sits flat. If you’re working in a raised bed, pull out any stubborn weeds first—they’ll just grow back through the barrier if left behind.
For best results, apply the barrier right after tilling or weeding. If you wait, new weeds will sprout and make the job harder. I like to work on a dry day so the soil holds the barrier in place without slipping.
Install the Barrier Correctly
Lay the cardboard or newspaper directly on the soil, overlapping edges by at least 2 inches. If using mulch, spread it evenly over the entire bed. For extra protection, I add a thin layer of compost on top of the barrier before mulching—this feeds the soil while keeping weeds out.
Secure the edges with rocks or bricks if needed, especially in windy areas. The goal is to block all light from reaching the soil—weeds need sunlight to grow, and without it, they’ll die within weeks. Check for gaps where sunlight might sneak through.
Add Mulch for Long-Term Protection
Cover the barrier with 3-4 inches of organic mulch, like wood chips, straw, or shredded leaves. This keeps the barrier in place and adds nutrients to the soil as it breaks down. Avoid pine needles or cedar chips—they can acidify the soil over time.
Refresh the mulch layer once or twice a year, especially in spring and fall. If you notice mulch thinning, add more to maintain the 3-inch depth. This ensures weeds stay blocked while your plants get the moisture and nutrients they need.
Maintain and Monitor
Check the barrier every few weeks for signs of weeds poking through. If you spot any, pull them immediately before they take root. Over time, cardboard and newspaper will decompose—replace them as needed, usually every 1-2 years depending on your climate.
For perennial weeds like creeping Charlie, add a thicker layer of mulch or consider a landscape fabric barrier underneath. The key is consistency—weeds give up when they can’t get light or space to grow.
Tips & tricks for effective natural weed barriers
Creating an effective weed barrier isn't just about throwing down some cardboard—it's about strategy and attention to detail that makes all the difference between a weed-free garden and one that's still fighting the same battle next season.
Material Selection Matters: When choosing between cardboard and newspaper, remember that cardboard is thicker and decomposes more slowly, making it ideal for long-term protection. For newspaper, use at least 10-12 sheets to ensure complete light blockage—single sheets won't cut it. I've found that corrugated cardboard with the fluted side up provides the best balance between durability and decomposition rate. The key is complete coverage without gaps, so don't skimp on layers.
Preparation is Half the Battle: The most critical step in Step 2 is removing existing weeds before installing your barrier. I've learned this the hard way—any weeds left behind will simply grow right through your new barrier. Take your time pulling weeds, especially from raised beds where they have more space to regrow. A dry day for installation is ideal because damp soil can cause your barrier to shift or even slide out of place when you walk on it.
Layering for Maximum Effect: In Step 3, that thin layer of compost I mentioned isn't just an afterthought—it's a game-changer. The compost acts as a buffer that helps maintain soil moisture while slowly breaking down to nourish your plants. When adding your 3-4 inches of mulch, make sure to spread it evenly across the entire area. Uneven mulching creates weak spots where weeds can sneak through. I like to use a rake to create a smooth surface before adding the final mulch layer.
Long-Term Maintenance Strategy: The once-or-twice-a-year refresh mentioned in Step 4 is non-negotiable for maintaining effectiveness. Set calendar reminders for spring and fall to check your mulch depth—thinning layers are the #1 reason weed barriers fail. For perennial weeds like creeping Charlie, consider adding a layer of landscape fabric underneath your cardboard or newspaper. This extra step might seem like overkill, but it's worth it for stubborn weeds that refuse to give up.
Pro Tips for Prevent Weeds From Growing In Garden
- Material Selection Matters: When choosing between cardboard and newspaper, remember that cardboard is thicker and decomposes more slowly, making it ideal for long-term protection.
- Preparation is Half the Battle: The most critical step in Step 2 is removing existing weeds before installing your barrier.
Frequently asked questions
about preventing weeds in your garden—because even the greenest thumbs need a little help! Here are answers to the most common questions to keep your garden looking pristine with minimal effort.What’s the best natural weed barrier for small gardens?
For small spaces, opt for cardboard or thick layers of newspaper (4-6 sheets) topped with mulch or compost. These break down over time while blocking light. Avoid plastic—it suffocates soil and harms microbes. A 3-inch layer of wood chips or straw also works wonders!
How often should I replace or refresh weed barriers?
Most organic barriers (like cardboard or mulch) last 1-2 seasons before decomposing. Check annually for gaps or thinning layers. Refresh with new mulch or compost in spring to maintain effectiveness. Pro tip: Top up with grass clippings for a free, nitrogen-rich boost!
Do weed barriers work in sunny vs. shady areas?
Yes! Light-blocking barriers (like cardboard or landscape fabric) work in both sunny and shady spots. However, mulch or gravel may dry out faster in full sun—water occasionally to keep them effective. For shady areas, focus on dense mulch layers (4+ inches) to suppress weeds long-term.
What if weeds keep growing through my barrier?
If weeds persist, your barrier might be too thin or torn. Patch gaps immediately with new cardboard or mulch. For stubborn weeds, try a vinegar spray (1 gallon vinegar + 1 tbsp dish soap)—just avoid spraying desired plants! Prevention tip: Layer barriers with landscape fabric under mulch for extra defense.
Are there any weeds that barriers won’t stop?
Some weeds (like bindweed or nutsedge) have deep roots or aggressive growth. For these, combine barriers with regular hand-pulling or vinegar treatments. Preemptive strike: Smother the area with black plastic for 4-6 weeks before planting to weaken persistent weeds.
Wrapping up and next steps
Keeping weeds at bay in your garden doesn’t have to be a battle—with the right natural barriers and a little consistency, you can create a thriving, low-maintenance space. 🌱 From mulching and landscape fabric to strategic planting, these methods block light, smother roots, and outcompete weeds without harsh chemicals.
The key is choosing techniques that fit your garden’s needs and sticking with them season after season.
You’ve got this! Start small—pick one or two methods to test this season, observe what works best, and gradually expand. Before you know it, your garden will be weed-free, lush, and easier to care for. Happy gardening! 🌿