
Tools
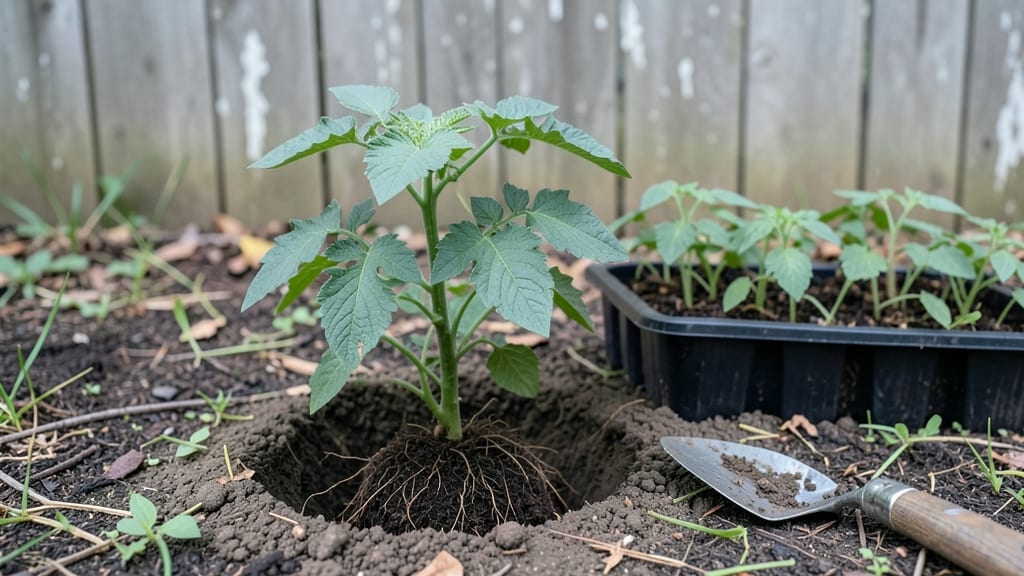
Digging a garden isn't just about moving dirt—it's about creating a foundation where plants can thrive like never before. 🌱 I learned the hard way that skipping soil prep means struggling with poor growth, even with the best plants.
The secret lies in layers: testing your soil, amending it right, and designing a space that works with your sunlight and climate.
Start with the basics: a sturdy shovel, gloves, and a soil test kit (or a simple DIY mix of compost and aged manure). Mark your garden layout with stakes and string to plan walkways and plant zones before you dig.
Most beginners overlook drainage—sloping beds slightly or adding sand helps prevent soggy roots that strangle growth.
When you finally dig, aim for 12-18 inches deep to give roots room to stretch. Mix in organic matter like compost or leaf mold to improve texture and fertility. The payoff? Plants that grow stronger, faster, and with fewer pests because their environment is tailored to their needs.
This method works for raised beds, in-ground plots, or even container gardens—just adjust depth and amendments. Whether you're clearing grass or starting fresh, these steps turn dirt into a thriving ecosystem. Let's get your garden ready to shine.
📚 In This Guide
- What you need
- Instructions
- Tips and common mistakes
- Wrapping up and next steps
What you need
- ● Shovel or spade: A sturdy digging shovel (18–24 inches long) for breaking ground.
- ● Garden fork: Heavy-duty (16–20 inches) for aerating soil and mixing layers.
- ● Garden rake: Bow rake (4–6 teeth per inch) to smooth soil after digging.
- ● Wheelbarrow or bucket: 3–5 cubic feet capacity for hauling soil and compost.
- ● Measuring tape or ruler: For marking garden beds (1–2 inches precision).
- ● Gloves: Heavy-duty work gloves (nitrile-coated for grip and protection).
- ● Soil layers (per 10 sq. ft. bed): Topsoil: 4–6 inches (sterile, nutrient-rich blend).
- ● Compost: 2–3 inches (aged, organic matter like blank">worm castings or leaf mold).
- ● Sand or perlite: 1–2 inches (for drainage, if clay-heavy soil).
- ● Water source: Hose with adjustable nozzle or watering can (1–2 gallons).
- ● Soil test kit: pH tester (6.0–7.0 ideal for most plants) or lab analysis for precision.
- ● Kneeling pad: Cushioned pad for comfort during layering.
- ● Laser level or string line: For perfectly straight garden edges.
- ● Mulch: Straw, wood chips, or shredded leaves (1–2 inches) to retain moisture.
- ● Plant markers: Stakes or labels for tracking layers and plant types.
Step-by-step guide to digging a garden with perfect soil layers
Here's how to create a thriving foundation—no guesswork, just science-backed layers.
🪴 Step 1: Mark and Clear the Garden Area
Use a garden hose or spray paint to outline your 4-foot wide garden bed (standard for easy reach). Remove any grass, weeds, or debris—this prevents competition for nutrients and reduces future weeding. I like to dig up grass in small sections first, then flip it over to dry out (it’ll die faster). For stubborn weeds, pull them by the roots, especially dandelions—they’ll regrow from any remaining pieces.
Check for rocks larger than 2 inches—remove them now. Big rocks disrupt drainage and make future digging harder. If you hit a lot of rocks, consider adjusting your garden layout or using raised beds instead. A quick test: if you can’t dig 6 inches deep without hitting obstacles, raised beds are your best bet.
🌱 Step 2: Loosen the Native Soil
Use a broadfork or digging fork to loosen the top 6-8 inches of soil. Push the tines in, then rock the fork back and forth to break up compacted layers without turning the soil. This improves drainage and root penetration. I work in 12-inch sections, moving systematically across the bed—skipping spots leads to uneven soil structure.
If the soil feels rock-hard or clumps tightly when squeezed, you’ve got clay soil. Amend it now by mixing in 2-3 inches of compost or aged manure (if available). For sandy soil, work in 1 inch of organic matter to help retain moisture. You’ll see the difference immediately—the soil should crumble easily between your fingers.
💧 Step 3: Build the Soil Layers
Start with a 2-inch layer of coarse sand or perlite at the bottom if your soil drains poorly. This prevents waterlogging while allowing roots to spread. Next, add a 3-inch layer of compost or well-rotted manure—this feeds microbes and improves soil structure. Spread it evenly, then lightly rake to blend with the native soil.
Top with 4-6 inches of your existing topsoil (the loose, nutrient-rich layer you uncovered). Mix this gently with the compost layer—don’t overwork it. The goal is to create a loamy texture: light enough to drain but rich enough to hold moisture. Press down lightly with your hands to settle the layers, but don’t compact it.
☀️ Step 4: Level and Prepare for Planting
Use a level or a straight board to check that your garden bed is flat. Adjust high spots by scraping off soil and filling low spots with a mix of topsoil and compost. A level bed ensures even water distribution and prevents puddles. I run a 2x4 board across the bed to catch high spots—any gaps wider than ½ inch need attention.
Finally, water the bed deeply until the soil is moist 6 inches down. This helps settle the layers and encourages roots to grow downward. Avoid walking on the bed now—your footsteps can compact the soil and undo all your hard work. You’ll know it’s ready when the surface feels firm but still springy under gentle pressure.
⏰ Step 5: Mulch and Protect the Soil
Spread 2-3 inches of organic mulch (like shredded leaves or straw) over the entire bed. This keeps soil moist, suppresses weeds, and regulates temperature. Leave a 1-inch gap around plant stems to prevent rot. I like to mulch right after planting—it’s one less step later and protects young roots from temperature swings.
Let the bed rest for 1-2 weeks before planting. This gives microbes time to colonize the new soil and breaks down any remaining weeds. You’ll see earthworms and other beneficial creatures moving in—that’s a good sign! When you’re ready to plant, dig small holes just deep enough to cover the roots, then water thoroughly to settle everything in place.
Tips & tricks for perfect garden soil layers
Here's what I learned after years of digging—and how to avoid the most common mistakes that ruin all your hard work.
The Tool Factor: Rent or borrow a broadfork if you don't own one—it's worth the investment for this technique. A digging fork works too, but the broadfork's wide tines break up compacted soil more efficiently without turning it over. I've tried shovels, and they just compact the soil more than they loosen it. For stubborn clay soil, rent a tiller for the initial breaking up, then finish with the broadfork to preserve soil structure.
Layering Secret: When building your 2-inch sand layer at the bottom, mix in a handful of perlite or vermiculite too if you have them. This adds extra drainage while keeping the soil loose. The key is to keep these layers distinct at first—blending them too much can disrupt the drainage gradient you're creating. Think of it like building a cake: each layer has a specific purpose that works best when kept separate initially.
Test Before Planting: Before planting, do this quick test: press your thumb into the soil about 1 inch deep. If it springs back slowly, your soil has the right balance of moisture and structure. If it stays indented, add more compost to the top layer and water again. If it crumbles completely, you need to add some organic matter to help retain moisture. This simple test saves you from guessing whether your soil is ready.
Mulch Timing: Don't wait until after planting to mulch—that's when I used to make the mistake. Apply your 2-3 inches of organic mulch right after building the soil layers. This prevents erosion during the 1-2 week resting period and keeps weeds from sprouting. Just remember to leave that 1-inch gap around plant stems when you do get around to planting. The mulch will break down over time, adding more nutrients to your soil.
Pro Tips for Dig A Garden
- Here's what I learned after years of digging—and how to avoid the most common mistakes that ruin all your hard work.
- The Tool Factor: Rent or borrow a broadfork if you don't own one—it's worth the investment for this technique.
- Layering Secret: When building your 2-inch sand layer at the bottom, mix in a handful of perlite or vermiculite too if you have them.
Frequently asked questions
Got questions about digging your garden? You’re not alone! Here are some of the most common concerns—and their straightforward solutions.
When is the best time to dig a garden?
The ideal time depends on your climate, but aim for early spring or fall when the soil is workable but not frozen or waterlogged. In warmer regions, dig in late winter before the heat sets in. Avoid digging when soil is soggy—wait for it to dry out slightly for easier work and less compaction.
What tools do I need beyond a shovel?
Start with a digging fork (for breaking up tough soil), a garden rake (to smooth the bed), and gloves (to protect your hands). For larger areas, consider a rototiller or broadfork. Don’t forget a soil knife for precise edging or removing weeds.
How deep should I dig?
Aim for 12–18 inches deep to loosen the soil and encourage root growth. Shallow digging (under 6 inches) can restrict plants like tomatoes or corn. For heavy clay or compacted soil, dig deeper or amend with compost to improve drainage and aeration.
Can I dig a garden in clay soil?
Clay soil drains poorly but holds nutrients well. Amend it with organic matter (compost, peat moss, or aged manure) to improve structure. Dig in layers, mixing amendments every 4–6 inches. Over time, this creates a looser, more fertile bed for plants.
What if my garden soil smells bad after digging?
A foul odor usually means anaerobic conditions (lack of oxygen) or excess organic matter breaking down. Fix it by:
- Adding coarse sand or perlite to improve aeration.
- Mixing in lime if the soil is overly acidic.
- Top-dressing with compost to balance decomposition.
Wrapping up and next steps
Digging your garden is more than just breaking ground—it’s about creating a thriving ecosystem where plants can flourish. By understanding layered soil science and choosing the right tools, you’re setting the stage for healthier roots, vibrant blooms, and bountiful harvests.
Whether you’re a seasoned gardener or just starting, every shovel full of effort brings you closer to a green thumb and a garden you’ll love.
Ready to get your hands dirty? Start small—pick one bed or a single plant—and let your curiosity grow! 🌱 Next up: Sketch a simple layout, gather your tools, and dig in with confidence. Happy gardening!