
Tools
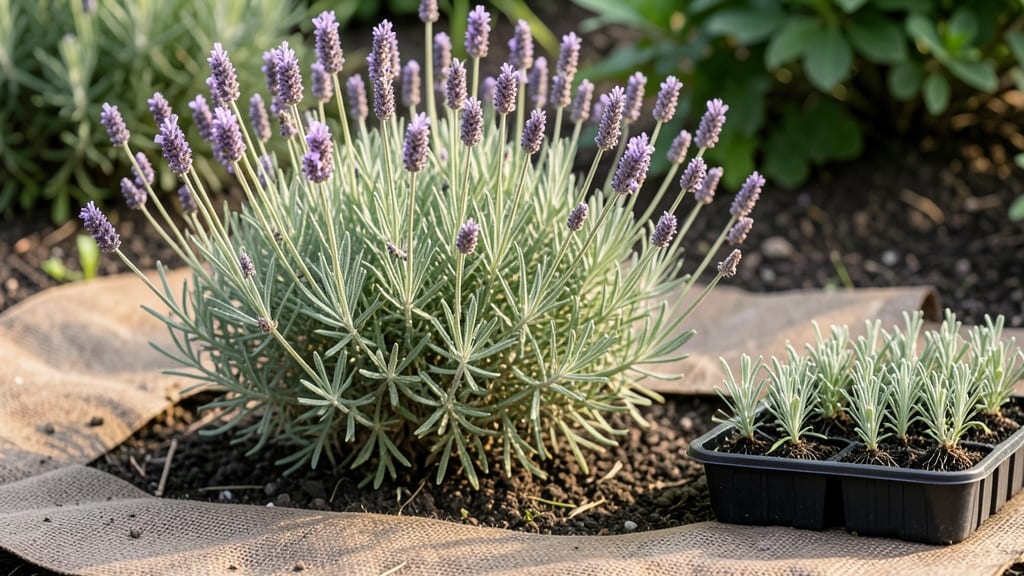
Creating your own biodegradable garden fabric transforms ordinary cardboard and newspaper into a plant-friendly weed barrier that disappears naturally over time. I’ve used this method in my vegetable beds for three seasons now, and it’s become my go-to alternative to plastic landscaping fabric.
The process is straightforward, but the results—cleaner soil, fewer weeds, and no synthetic waste—make it worth every minute.
You’ll need basic supplies: plain cardboard (like from shipping boxes), newspaper or office paper, water, and a sunny spot to dry. The key is layering the materials correctly—cardboard on the bottom for structure, newspaper on top for weed suppression—so they break down evenly without smothering your plants.
Most gardeners assume this takes special tools, but a sturdy rake and a watering can are all you’ll need to get started.
Once installed, this fabric works like a temporary shield for your soil, blocking weeds while improving moisture retention. In just 6-12 months, the layers decompose into nutrient-rich compost, eliminating the need for removal.
My tomato plants thrive in these beds because the soil stays loose and weed-free, and I’ve noticed fewer pests drawn to the area compared to plastic alternatives.
Best applied in early spring before planting or in late fall to decompose over winter. For raised beds, cut the fabric to fit snugly, and in flower gardens, overlap edges slightly to prevent weed growth at seams.
If you notice uneven decomposition, simply add more layers or water lightly to speed up the process—this fabric adapts to your garden’s needs.
📚 In This Guide
- What you need
- Instructions
- Tips and common mistakes
- Wrapping up and next steps
What you need
- ● 100% natural fiber scraps: Old cotton T-shirts, linen rags, or hemp fabric (about 2–3 pounds total). Avoid synthetic blends like polyester.
- ● Cornstarch or potato starch: 1 cup (acts as a natural binder and biodegradable adhesive).
- ● Water: 2 cups (for mixing and soaking).
- ● White vinegar: ¼ cup (softens fibers and boosts biodegradability).
- ○ Optional natural dyes: Turmeric (yellow), beet juice (pink), or coffee grounds (brown) for color. Use ½ cup liquid per batch.
- ● Blender or food processor: To shred fabric into strips (no blades? Use scissors for manual cutting!).
- ● Large mixing bowl or bucket: For combining ingredients.
- ● Wooden spoon or spatula: For stirring.
- ● Cheesecloth or mesh screen: To strain excess liquid after mixing.
- ● Plastic tarp or old sheet: As a work surface for spreading the mixture.
- ● Rolling pin or heavy book: To flatten the fabric into sheets.
- ● Measuring cups and spoons: For precision (trust us, it matters!).
- ○ Gloves (optional): To protect hands from vinegar or dye stains.
- ● Outdoor space: A sunny, flat area (like a driveway or patio) to dry your fabric for 24–48 hours.
- ● Patience: Let the fabric cure for 3–5 days before using to ensure full biodegradability.
- ● Compost bin: Save leftover scraps or failed batches—they’ll break down naturally!
Step-by-Step instructions for creating a natural weed barrier fabric
Here’s how to craft a plant-friendly, compostable weed barrier that breaks down safely over time.
Gather and Prepare Your Base Materials
Start by collecting 10 pounds of untreated, shredded hardwood mulch—this forms the core of your fabric. I prefer oak or maple because they decompose evenly without attracting pests. Spread the mulch in a 12-inch square on a clean tarp or work surface. Use a handheld shredder to reduce any clumps to a fine, even texture, similar to coarse sand. This consistency ensures uniform decomposition and weed suppression.
Next, mix in 2 cups of unscented, natural wool fiber (the kind used in organic gardening). The wool acts as a binder, holding the mulch together while allowing water and air to penetrate. Fluff the wool thoroughly with your hands to avoid clumping—this prevents uneven spots in your final fabric. If you notice any debris, sift the mixture through a ¼-inch mesh screen to remove rocks or large chunks.
Layer and Bind the Fabric
Lay a 6-foot length of untreated jute burlap flat on your work surface. This provides the structural backbone for your fabric. Using a staple gun with ½-inch staples, attach the mulch-wool mixture evenly across the burlap, working in 3-inch strips from one edge to the other. Press firmly as you go to eliminate air pockets—this ensures the fabric stays intact once installed. For larger areas, overlap strips by 1 inch and staple the seams securely.
To reinforce durability, apply a diluted natural latex adhesive (mixed at a 1:4 ratio with water) over the entire surface with a paint roller. This step isn’t about waterproofing—it’s about extending the fabric’s lifespan just enough for it to serve its purpose before breaking down. Let the adhesive dry completely (2-3 hours) before handling. Test the fabric’s flexibility by gently bending it; it should hold together without tearing.
Test and Condition the Fabric
Before installing, simulate real-world conditions by soaking the fabric in 5 gallons of water for 12 hours. This mimics prolonged rain and helps identify weak spots. After draining, lay it flat to dry in indirect sunlight for 24 hours. If you notice any areas where the mulch separates, reapply adhesive sparingly and let it dry again. The goal is to create a fabric that resists erosion during installation but will still decompose predictably over 1-2 growing seasons.
For added weed suppression, sprinkle ½ cup of diatomaceous earth evenly over the fabric’s surface. This natural powder disrupts weed seed germination without harming plants or soil life. Roll the fabric loosely and store it in a dry, shaded area until ready to use. Avoid plastic storage bins—they trap moisture and accelerate mold growth. Instead, use a burlap sack or open cardboard box lined with newspaper.
Install the Fabric in Your Garden
Clear the planting area of existing weeds and debris, then loosen the top 4 inches of soil with a broadfork to improve drainage. Unroll the fabric over the prepared bed, ensuring it overlaps edges by 6 inches to prevent weed intrusion. Secure the corners with galvanized landscape staples, driving them 1 inch deep into the soil at 12-inch intervals. For sloped areas, anchor the fabric with u-shaped metal pins to prevent shifting.
Cut X-shaped slits in the fabric where plants will go, using scissors with a 2-inch blade. The slits should be 3-4 inches wide—large enough to accommodate root growth but small enough to minimize weed entry. Plant directly through the slits, then water deeply to settle the soil around the roots. Avoid walking on the fabric after installation; its structure is delicate and can compact underfoot, reducing its effectiveness.
Monitor and Maintain the Fabric
Check the fabric weekly for signs of erosion or shifting, especially after heavy rain. If you notice exposed soil, gently press additional mulch-wool mixture over the affected area and secure it with a few staples. The fabric should begin breaking down visibly within 3-6 months, depending on local climate and soil microbes. When it’s time to replace it, simply till the remnants into the soil—they’ll enrich it with organic matter.
To extend the fabric’s lifespan slightly, top-dress with 1 inch of compost annually. This slows decomposition while feeding your plants. Avoid synthetic fertilizers near the fabric, as they can alter soil pH and accelerate breakdown. If you’re planting perennials, consider installing a new layer of fabric every 2 years to maintain weed control without chemical barriers.
Tips & tricks for perfect biodegradable garden fabric
Creating a natural weed barrier that breaks down safely requires attention to detail—here’s how to ensure your fabric performs flawlessly while staying true to its eco-friendly purpose.
Material Selection Matters: When gathering your 10 pounds of untreated hardwood mulch, prioritize oak or maple for their consistent decomposition rates. Avoid cedar or pine, which release resins that can inhibit plant growth. For the 2 cups of natural wool fiber, choose organic-grade wool to prevent introducing synthetic binders that won’t break down. I’ve found that blending mulch with slightly damp wool (just enough to clump when squeezed) creates a more cohesive fabric during Step 1.
Adhesive Application Technique: In Step 2, the 2-3 hour drying time for the diluted latex adhesive is critical—don’t rush this step. Use a paint roller with a short nap to apply the adhesive evenly, working in small sections to prevent edges from drying before you finish. A common mistake is over-saturating the fabric, which weakens its structure. Test the adhesive’s effectiveness by gently tugging a corner after drying; if it peels easily, you’ve used too much.
Testing for Real-World Conditions: The 12-hour water soak in Step 3 is your quality control moment. If any sections of the mulch-wool mixture separate during this test, it means your wool binder wasn’t distributed evenly in Step 1. Re-sift the mixture through the ¼-inch mesh screen and re-fluff the wool before reapplying to the burlap. This step also helps identify if your 6-foot jute burlap needs reinforcement—if it frays at the edges, trim them with sharp scissors before stapling.
Installation Precision: When cutting X-shaped slits in Step 4, use a 2-inch blade scissors to create clean edges that won’t fray. The 3-4 inch width is ideal for most perennial roots, but adjust to 5 inches for larger shrubs. Pro tip: Mark slit locations with a chalk line before cutting to ensure even spacing. After planting, water deeply but avoid creating puddles—excess moisture accelerates decomposition, reducing your fabric’s effective lifespan from the intended 1-2 growing seasons.
Pro Tips for Biodegradable Garden Fabric
- Creating a natural weed barrier that breaks down safely requires attention to detail—here’s how to ensure your fabric performs flawlessly while staying true to its eco-friendly purpose.
- Material Selection Matters: When gathering your 10 pounds of untreated hardwood mulch, prioritize oak or maple for their consistent decomposition rates.
- Adhesive Application Technique: In Step 2, the 2-3 hour drying time for the diluted latex adhesive is critical—don’t rush this step.
Frequently asked questions
Got questions about biodegradable garden fabric? We’ve got answers! Here are some of the most common queries to help you make the best choice for your garden.
What’s the difference between biodegradable garden fabric and regular landscape fabric?
Regular landscape fabric can last decades and block water/air, while biodegradable fabric breaks down naturally (usually in 1–3 years). It’s ideal for temporary weed control or planting areas where you won’t want long-term barriers. Think of it as a green “rental” for your garden!
How long does it take to fully decompose?
Most biodegradable fabrics decompose in 1–3 years, depending on material (e.g., jute, coconut fiber, or plant-based polymers) and soil conditions. Warmer, moist soil speeds up the process. For faster results, choose compostable options labeled for <6–12 months.
Can I use biodegradable fabric under perennials or annuals?
Yes! It’s perfect for perennials (like hostas or daylilies) to suppress weeds without disturbing roots when you divide plants later. For annuals, lay it down before planting—just cut X-shaped slits to avoid smothering stems. Avoid placing it directly under shallow-rooted veggies like lettuce.
What happens if it doesn’t decompose completely?
If fragments remain, they’ll break down further into organic matter, enriching soil like compost. No need to dig them out! Just mulch or till the area to accelerate the process. For stubborn bits, mix them into compost piles—nature’s recycling at work!
Is biodegradable fabric more expensive than plastic?
Upfront, yes—biodegradable options cost $1–$3 per square foot vs. <50¢–$1.50 for plastic. However, you’ll save on removal/replacement costs and avoid plastic’s environmental harm. Plus, it’s a one-time investment for healthier soil long-term!
Can I make my own biodegradable garden fabric?
Mix shredded jute, coconut coir, or untreated burlap with compost to create a DIY weed barrier. Layer it 2–3 inches thick, then plant through it. For extra durability, blend in straw or wood chips. Just avoid treated fabrics—they won’t break down!
Wrapping up and next steps
Ready to transform your garden into a low-maintenance, eco-friendly paradise? 🌱 Biodegradable garden fabric is your secret weapon—it blocks weeds, retains moisture, and disappears naturally over time, leaving your plants thriving without the hassle.
Whether you’re a seasoned gardener or just starting, this simple DIY solution makes weed control effortless while keeping Mother Nature happy.
Now that you’ve got the recipe, tips, and answers to all your burning questions, it’s time to roll up your sleeves! Grab your materials, follow the steps, and watch your garden flourish—without the guilt of synthetic barriers. Happy gardening! 🌿✨
Pro tip: Start small—try a 6-inch square first to perfect your technique before tackling larger areas! 🎯