
Vegetables
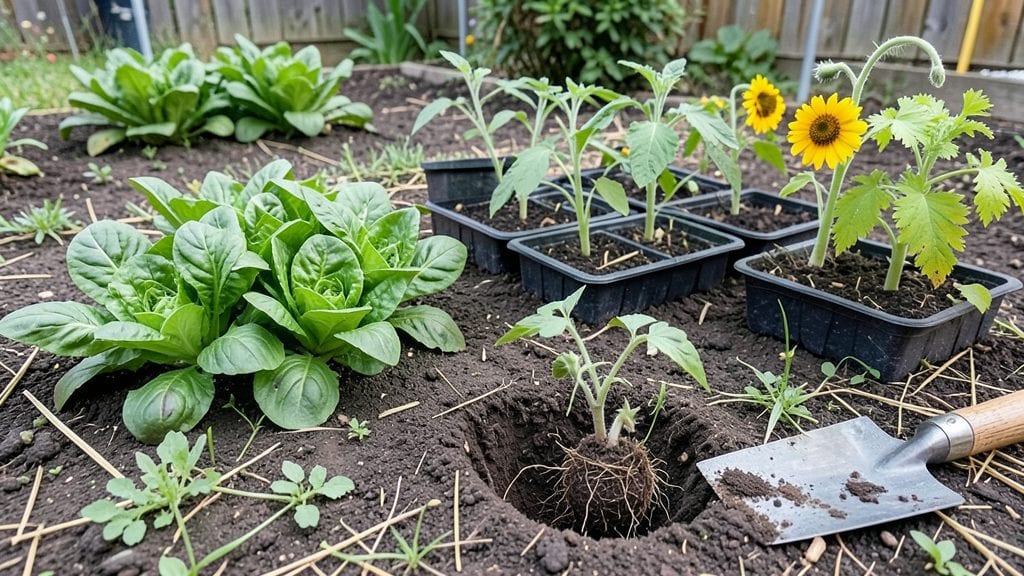
Building a community garden transforms empty lots into thriving green spaces where neighbors grow food together. 🌱 I started mine after seeing how a shared plot brought together people who'd never talked before—now we swap tomatoes, stories, and even seed-starting tips.
The magic isn't just in the harvest; it's in the connections made while kneeling in the dirt side by side.
You don't need a perfect location or deep pockets to begin. A sunny patch of land, basic tools shared among members, and a willingness to collaborate are all you need.
Start small with 5-10 plots, use raised beds for accessibility, and designate a central area for workshops or tool storage. Funding can come from grants, crowdfunding, or even a simple membership fee—what matters most is the shared vision.
Within a season, you'll see more than just plants taking root—neighbors will too. Kids learn where food comes from, seniors share decades of gardening wisdom, and everyone enjoys fresh produce without the grocery bill.
The garden becomes a living classroom, a gathering spot, and a source of pride for the whole community. Let's get those shovels in the ground!
From urban lots to rural fields, these gardens adapt to any space. Cold climates? Focus on cold-hardy greens and winter squash. Limited water? Try drought-tolerant herbs and mulching techniques.
The key is starting with what you have and growing from there—both plants and people. Here's how to take that first step together.
📚 In This Guide
- What you need
- Instructions
- Tips and common mistakes
- Wrapping up and next steps
What you need
- ● Soil & Compost: Topsoil: 2–3 cubic yards per 100 sq. ft. (well-draining, organic-rich)
- ● Compost: 1–2 bags per 10 sq. ft. (or homemade compost, turned regularly)
- ● Fencing & Barriers: T-posts or metal stakes: 6–8 per 10 ft. section (to deter critters)
- ● Wire mesh (18–24" tall): Enough to cover garden perimeter
- ● Irrigation: Drip irrigation kit: 1 per 50–100 sq. ft. (or soaker hoses)
- ● Hose bib or rainwater barrel: 1 per garden
- ● Tools: Shovels & trowels: 1 per 4–5 volunteers
- ● Rakes & hoes: 1 per 10 sq. ft.
- ● Wheelbarrow: 1–2 (for hauling soil/compost)
- ● Gloves & knee pads: Per gardener
- ● Mulch (straw or wood chips): 1–2 bags per 10 sq. ft. (retains moisture, suppresses weeds)
- ● Raised bed frames: Custom sizes (e.g., 4’x8’) (elevates plants, improves drainage)
- ● Seeds/seedlings: Varies by crop (check planting charts!)
- ● Trellises: For vining plants (e.g., cucumbers, beans)
- ● Signage: Plant labels, harvest rules, or donation jars
Instructions for building a thriving community garden
Here's how to create a space where neighbors grow together—and harvest together.
🌱 Step 1: Select and Prepare the Garden Site
Choose a sunny, level plot at least 10 feet by 10 feet for four community plots. Avoid low spots where water pools—community gardens need good drainage to prevent root rot and fungal diseases. I always check the site in both summer and winter to understand sun patterns and wind exposure.
Clear any grass or weeds by hand or with a hoe, then mark the plot boundaries with wooden stakes and string. This keeps the space defined and prevents accidental trampling. Test the soil pH using a kit—most vegetables prefer 6.0-7.0. If your soil is too acidic, add lime (follow package instructions) and mix it in with a shovel.
🪴 Step 2: Divide the Space Into Shared Plots
Split the plot into four equal sections, each 5 feet by 5 feet, using raised beds or simple wooden frames. Raised beds (12-18 inches deep) improve drainage and make gardening easier for people with mobility challenges. Line the bottom with cardboard or landscape fabric to suppress weeds, then fill each bed with 2-3 cubic yards of quality garden soil mixed with compost.
Leave 2-foot walkways between beds for easy access. I like to add gravel or mulch to the pathways to keep them dry and reduce mud. Label each plot with a small wooden sign or plant markers so community members can identify their space. This prevents confusion and encourages ownership.
☀️ Step 3: Plan a Seasonal Planting Schedule
Work with your group to decide on four easy-to-grow crops that thrive in your climate. I recommend starting with lettuce, tomatoes, zucchini, and herbs—they’re productive, shareable, and forgiving for beginners. Create a planting calendar that includes spring, summer, and fall crops, with space for winter greens if your climate allows.
Assign each plot to a different crop or variety to maximize diversity. For example, one plot could grow bush beans, another peppers, another kale, and the last radishes or carrots. Rotate crops yearly to prevent soil depletion and pest buildup. Share the schedule with everyone so they know what to expect and when to harvest.
💧 Step 4: Set Up Irrigation and Maintenance Systems
Install a drip irrigation system or soaker hoses to water the entire garden efficiently. Run lines along the edges of each bed and space emitters 12-18 inches apart. This ensures even watering without wasting resources. Test the system before planting—adjust flow rates so water drips slowly and evenly.
Set up a shared tool shed or designated storage area with basic supplies like gloves, trowels, pruners, and wheelbarrows. Keep a community notebook in the shed to track tasks, such as weeding days or pest control efforts. Schedule a weekly check-in where volunteers can water, weed, and harvest together. This builds camaraderie and keeps the garden thriving.
✂️ Step 5: Launch with a Community Planting Day
Host a kickoff event where everyone helps plant the first crops. Bring potting soil, seeds, and small plants to get started quickly. Divide tasks—some people can prep the soil, others can plant, and a few can set up signs or water. Play music, bring snacks, and keep the mood light. You’ll see how much more engaged people become when they’re part of the process from the beginning.
End the day with a harvest celebration—even if it’s just a few radishes or herbs. Share stories about what everyone hopes to grow and how they’ll use the produce. This sets the tone for future collaborations and reminds everyone that the garden is about more than just plants—it’s about people.
Tips & tricks for perfect community garden planning
Here's what I've learned after helping build—and maintain—multiple community gardens that thrive year after year.
Site Selection Secrets: In Step 1, when choosing your sunny plot, prioritize locations with at least 6 hours of direct sunlight daily—this is non-negotiable for most vegetables. I've seen gardens fail spectacularly when planted in "mostly sunny" spots that turned out to be just 4 hours. Use a sun calculator app to map your site's sunlight patterns throughout the day, especially if you're working with urban spaces that might have afternoon shade.
Raised Bed Game-Changer: For Step 2, if you're working with a group that includes people with mobility challenges, consider building raised beds that are 30 inches wide—this allows easy access from both sides. I've found that wider beds also reduce the need for frequent weeding since they dry out more slowly. Just make sure to keep those 2-foot walkways to prevent soil compaction from foot traffic.
Crop Rotation Strategy: When planning your seasonal schedule in Step 3, create a simple rotation chart that shows what goes where each year. For example, after tomatoes (which are heavy feeders), plant beans the next year—they'll fix nitrogen in the soil. I keep a physical poster of this in our tool shed so everyone can see at a glance. This prevents the soil depletion issues I've seen in gardens that plant the same crops year after year.
Irrigation Troubleshooting: Before testing your drip system in Step 4, place a bucket under each emitter to catch water and measure output. I've seen systems where emitters were too close together, causing some plants to get too much water while others dried out. Aim for 1 gallon per hour per emitter, and adjust spacing accordingly. Also, bury the main line at least 2 inches deep to protect it from freezing in winter.
Pro Tips for Building Community Gardens
- Here's what I've learned after helping build—and maintain—multiple community gardens that thrive year after year.
- Site Selection Secrets: In Step 1, when choosing your sunny plot, prioritize locations with at least 6 hours of direct sunlight daily—this is non-negotiable for most vegetables.
- Raised Bed Game-Changer: For Step 2, if you're working with a group that includes people with mobility challenges, consider building raised beds that are 30 inches wide—this allows easy access from both sides.
Frequently asked questions
Got questions about starting or maintaining a community garden?
Here are some of the most common ones—and their answers—to help you grow with confidence!
How do I find land for a community garden?
Start by reaching out to local parks departments, schools, churches, or even vacant lots. Many cities have programs to allocate unused land for gardens. Check community boards or social media groups for shared opportunities. Pro tip: Partner with nearby businesses—they might donate space or even sponsor tools!
When is the best time to start a community garden?
Spring (March–May) is ideal for planting, but you can prep soil and plan layouts in winter. If you’re starting from scratch, allow 3–6 months to organize permits, recruit volunteers, and design the space. Hot tip: Begin with low-maintenance crops like kale or lettuce if you’re late to the season!
How much does it cost to start a community garden?
Costs vary widely! Basic setups (tools, seeds, soil) may run $500–$2,000 for a small plot, while larger projects with fencing or irrigation can exceed $10,000. Fundraise via grants, crowdfunding, or local sponsorships. Money-saving hack: Repurpose materials like pallets for raised beds or ask for donations of compost!
How do I keep volunteers engaged long-term?
Schedule regular workdays with clear goals (e.g., “Weeding Wednesdays!”) and recognize contributions publicly. Assign roles (e.g., “Harvest Captain”) to foster ownership. Host social events like potlucks or harvest festivals to build camaraderie. Engagement boost: Share progress photos on social media to celebrate milestones!
What’s the best way to handle pests naturally?
Prevent pests with companion planting (e.g., marigolds repel aphids) and row covers. Introduce beneficial insects like ladybugs or use homemade sprays (e.g., neem oil). Avoid chemicals—they harm pollinators and soil health. Quick fix: Handpick pests early in the morning when they’re sluggish!
Wrapping up and next steps
Building a community garden is more than just planting seeds—it’s about nurturing connections, sustainability, and shared joy. 🌱 Whether you’re a seasoned green thumb or a curious beginner, every small effort—from soil prep to harvest sharing—creates lasting impact.
Start small, invite neighbors, and watch your garden (and community) grow together!
Ready to take the next step? Host a planning meeting or reach out to local groups to turn your vision into reality. Your green oasis is waiting!