Pruning
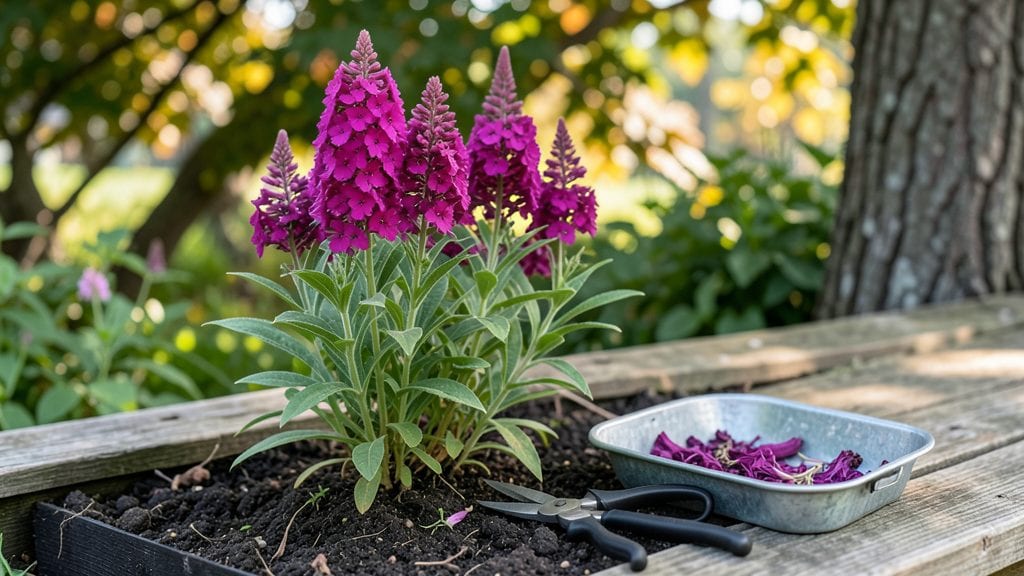
Deadheading garden phlox isn't just about tidying up—it's the secret to nonstop blooms from early summer through fall. 🌸 I learned the hard way that skipping this step means waving goodbye to those lush clusters by August, but once I mastered the timing and technique, my phlox kept flowering like it was June all season long.
The key is simplicity: grab sharp pruners and snip just above the first set of healthy leaves on each spent bloom stem. Do this every 7-10 days during peak flowering, and you'll encourage the plant to redirect energy into new buds instead of seed production.
Most gardeners overthink it—this isn't brain surgery, just a quick trim to keep things looking fresh and productive.
What you'll get is weeks of vibrant color that turns heads at neighborhood walks. The flowers stay larger, the stems stay sturdy, and you avoid the leggy, sparse look that happens when phlox puts all its energy into making seeds.
Plus, the plant stays healthier overall with better air circulation from regular trimming.
Works for all phlox varieties—dwarf, border, or tall—and even saves you money by extending your season without buying new plants. Here's how to do it without turning your garden into a chopping block.
📚 In This Guide
- What you need
- Instructions
- Tips and common mistakes
- Wrapping up and next steps
What you need
- ● Pruning shears or sharp scissors: Clean, sharp tools make the job easier and prevent damage to stems. A bypass pruner (with 5- to 6-inch blades) is ideal for precision cuts.
- ○ Gloves (optional but recommended): Thick gardening gloves protect your hands from thorns and rough stems. Choose nitrile-coated gloves for durability.
- ● Disinfectant (rubbing alcohol or 10% bleach solution): A small spray bottle or wipe to sterilize tools between cuts and prevent disease spread.
- ● Trash bag or bucket: A small container to collect spent blooms and debris. A 1-gallon capacity is plenty for a single phlox plant.
- ○ Water spray bottle (optional): Helps rinse off tools mid-task and keeps dust down.
- ● Dry, sunny day: Avoid deadheading after rain or when plants are wet to reduce disease risk.
- ● Identified phlox plants: Ensure you’re working with garden phlox (Phlox paniculata)—not other flowers like bee balm or shasta daisies.
- ● Patience: Take your time! Rushing can lead to uneven cuts or missed blooms.
Step-by-Step instructions for deadheading garden phlox
Here’s the simple method I use to keep my phlox flowering all summer long.
✂️ Step 1: Identify and Remove Spent Blooms
Wait until at least 2-3 blooms per stem have faded—this signals the flower is done producing seeds. Grab a sharp pair of pruning shears or clean scissors and cut the stem just above the first set of healthy leaves below the faded bloom. This ensures you’re not removing any new buds that might be forming.
Don’t cut too close to the base—you want to leave enough foliage to keep photosynthesizing. If you see a cluster of spent blooms, cut the entire stem back to a healthy leaf node. This keeps the plant looking tidy while encouraging new growth.
✂️ Step 2: Trim for Shape and Encourage New Growth
After removing the spent blooms, take a step back and assess the plant’s shape. Phlox naturally grows in a rounded bush, so trim any leggy or overgrown stems to maintain that form. Cut back about one-third of the plant’s height if it’s looking unruly—this promotes bushier growth and more flowers.
I like to do this on a dry morning so the cuts heal quickly. Avoid trimming in the heat of the day, as it can stress the plant. If you notice any stems with no new growth, cut them back completely—they’re not contributing to the plant’s energy.
💧 Step 3: Water and Fertilize After Trimming
After deadheading, give your phlox a deep watering to help it recover. The roots need moisture to support the new growth you’ve encouraged. Water at the base of the plant, avoiding the foliage to prevent fungal issues. You’ll know it’s enough when water runs out the drainage holes if it’s in a pot, or when the soil feels moist 2 inches down.
Feed with a balanced, water-soluble fertilizer (like 10-10-10) diluted to half strength. This gives the plant a gentle boost to produce more blooms. I fertilize every 4-6 weeks during the growing season, but skip it if you’ve recently added compost to the soil.
☀️ Step 4: Monitor for New Blooms and Repeat
Within 7-10 days, you should see new buds forming at the base of the trimmed stems. This is your reward for deadheading! Keep an eye out for any stems that stop producing new growth—cut those back to encourage energy to focus on the healthier parts of the plant.
Repeat the process every 2-3 weeks throughout the blooming season. The key is consistency—regular deadheading keeps phlox flowering until frost. If you notice fewer blooms later in the season, it might be time to cut back the entire plant by half to rejuvenate it for next year.
Tips & tricks for perfect phlox deadheading
Here's what I've learned after years of keeping my garden phlox blooming all season—simple tricks that make a huge difference.
Timing is Everything: The key to successful deadheading is patience. Waiting until at least 2-3 blooms per stem have faded ensures you're not removing potential new buds. I've made the mistake of cutting too early and ended up with sparse blooms—don't rush it! The plant needs to signal it's ready through those faded flowers.
Cutting Technique Matters: When trimming in Step 1, always cut just above a healthy leaf node—not too close to the base where new growth emerges. I learned this the hard way when I accidentally cut too low and lost potential blooms. Think of it like pruning a tree: you want to leave the energy-producing leaves to keep the plant thriving.
Shape Maintenance: In Step 2, when cutting back about one-third of the plant's height, focus on creating an open center. This allows air to circulate, preventing fungal issues while encouraging new growth from the base. I find that phlox naturally grows in a rounded shape, so I just need to trim any leggy stems that disrupt this form.
Seasonal Strategy: For late-season phlox, consider a more dramatic trim. If you notice fewer blooms as summer progresses, cut back the entire plant by half. This rejuvenates the plant and often results in a second flush of flowers before frost. I do this around early September in my zone 6 garden, and it always gives me a nice late-season display.
Pro Tips for Deadheading Garden Phlox
- Here's what I've learned after years of keeping my garden phlox blooming all season—simple tricks that make a huge difference.
- Timing is Everything: The key to successful deadheading is patience.
- Cutting Technique Matters: When trimming in Step 1, always cut just above a healthy leaf node—not too close to the base where new growth emerges.
Frequently asked questions
about deadheading garden phlox can help you keep your blooms thriving with confidence! Here are answers to common queries:When is the best time to deadhead garden phlox?
Deadhead phlox regularly—typically every 3–5 days—once blooms start fading. Aim to trim early in the morning when flowers are dry to reduce disease risk. For late-summer bloomers, continue until frost, but stop if buds aren’t forming (a sign of dormancy).
How do I deadhead phlox without damaging the plant?
Use clean, sharp pruners or fingers to pinch off spent blooms at the first set of leaves or buds (about ¼ inch above). Avoid cutting into old wood or stems—this prevents woody growth. For large clumps, trim back ⅓ of the oldest stems annually to encourage new growth.
Will deadheading make my phlox bloom longer?
Deadheading redirects the plant’s energy from seed production to new flower buds, often extending the blooming season by weeks. Some varieties (like Phlox paniculata) may rebloom if given consistent care and proper spacing for airflow.
What if my phlox stops blooming after deadheading?
Check for these issues: over-trimming (leave at least 2–3 sets of leaves), poor sunlight (phlox needs 6+ hours daily), or nutrient deficiency. Fertilize lightly with a balanced 10-10-10 mix in early spring and mulch to retain moisture. If buds form but don’t open, it may be too hot—provide afternoon shade.
Can I skip deadheading and just let phlox go to seed?
Yes, but expect fewer blooms and potential self-seeding (which may spread aggressively). If you prefer low-maintenance, deadhead only the worst-looking stems or let a few go to seed for wildlife. For showy displays, though, regular deadheading is key!
Wrapping up and next steps
Deadheading garden phlox is a simple yet powerful way to keep your blooms vibrant and your garden thriving! By removing spent flowers regularly, you encourage stronger growth, more abundant blooms, and healthier plants.
Think of it as a small investment of time that pays off with weeks of stunning color—your garden will thank you!
Ready to give it a try? Grab your pruners and head outside—your phlox won’t deadhead itself! 🌸 For even more tips, check out our guide on seasonal phlox care to keep those blooms coming all summer long.