Tools
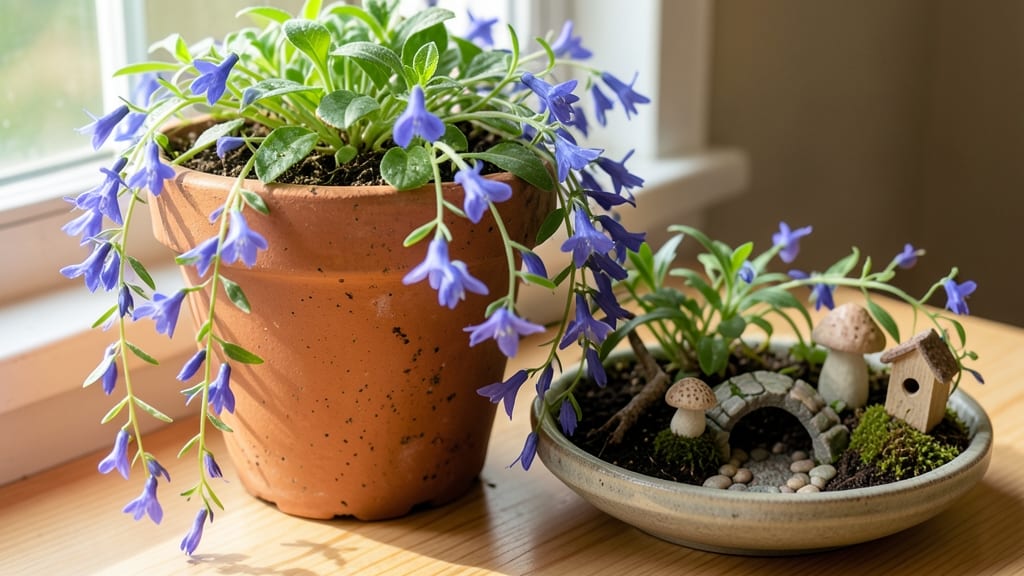
Creating a fairy planter garden turns ordinary containers into a magical vertical escape. 🌿 I still remember the first time I spotted a tiny mushroom house in a thrift-store planter—it sparked an obsession that now fills my balcony with miniature worlds.
The secret isn’t just the plants; it’s the storytelling through textures, colors, and hidden details that make it feel alive.
Start with containers that match your vision: shallow dishes for mossy fairy pools, hanging baskets for cascading ferns, or stacked terracotta pots for tiered cottages.
Miniature plants like creeping thyme, dwarf ferns, and mosses create the lush foundation, while decorative elements—tiny pebbles for pathways, acorn caps as stepping stones, or a teacup as a fairy café—bring the fantasy to life. The best part?
These gardens thrive on neglect, needing only occasional watering and an occasional dusting of fairy glitter.
You’ll end up with a living storybook that changes with the seasons. In spring, tiny blooms peek out like hidden secrets, summer brings vibrant foliage, and autumn adds crunchy leaves for texture.
The magic happens when you add movement—a small solar-powered light or a tiny wind chime—and watch neighbors pause to admire your green fairyland. This isn’t just gardening; it’s creating a tiny world that feels like home.
Perfect for balconies, windowsills, or even indoor shelves, these gardens adapt to any space. Whether you go for a rustic cottage theme or a modern minimalist fairy haven, the key is letting your imagination run wild. Here’s how to start building yours today—no green thumb required, just a little whimsy.
📚 In This Guide
- What you need
- Instructions
- Tips and common mistakes
- Wrapping up and next steps
What you need
- ● Fairy Planters: 3–10 small, lightweight planters (3–5 inches wide) with drainage holes. Choose from ceramic, terracotta, or even repurposed teacups!
- ● Vertical Garden Structure: Wall-mounted planter pockets (adjustable for spacing) OR
- ● A wooden pallet, trellis, or DIY frame (untreated wood preferred).
- ● Potting Soil: 1–2 bags of lightweight, well-draining potting mix (avoid garden soil—it’s too dense!).
- ● Succulents/Small Plants: 3–10 low-maintenance plants like sedum, echeveria, or moss (fairy-friendly!).
- ● Fastening Supplies: L-brackets or screws (for wall-mounted setups) OR
- ● Heavy-duty zip ties or landscape fabric (for pallet gardens).
- ○ Decorative Touches (Optional but Magical!): Miniature garden stakes, pebbles, or fairy figurines.
- ● Twinkling solar lights or fairy string lights (battery-operated for safety).
- ● Drill or screwdriver (for mounting).
- ● Measuring tape + pencil (to mark placement).
- ● Scissors or pruners (for trimming plants).
- ● Spray bottle (for misting succulents).
- ● Level (to ensure your garden is straight!).
Step-by-Step instructions for building a fairy planter garden
Transform your tiny space into a magical vertical retreat with this easy, creative approach.
🪴 Step 1: Gather and Prepare Your Containers
Start with your 4 planters—I like using a mix of sizes and shapes for visual interest. If they’re new, give them a quick rinse with warm, soapy water to remove any manufacturing residues. For thrifted or vintage containers, scrub them thoroughly and let them dry completely before planting.
Check the bottom of each planter for drainage holes. If they’re missing, drill ¼-inch holes along the base using a small drill bit. This prevents root rot and keeps your fairy garden healthy. Place a 1-inch layer of pebbles in the bottom of each container before adding soil—this creates extra drainage and prevents clumping.
🌱 Step 2: Layer Soil and Plant Your Miniature Plants
Fill each planter ¾ full with the potting mix, leaving room at the top for your tiny plants. Gently press the soil down to remove air pockets, but don’t pack it too tightly—you want it loose enough for roots to grow easily. I like to sprinkle a light layer of compost on top before planting to give my greenery a nutrient boost.
Place your 4 miniature plants in the soil, spacing them so they have room to grow without crowding. Use your finger to press the soil around the base of each plant, firming it gently to secure them. Water lightly after planting to help the soil settle and eliminate air gaps around the roots.
☀️ Step 3: Arrange Decorative Elements for Whimsy
Now comes the fun part—adding the magical touches! Start by placing your 4 decorative stones strategically around the plants. I like to cluster them near the base of taller plants to create a natural-looking foundation. Next, sprinkle the fairy sand around the edges and between plants for a soft, dreamy texture.
Place the 4 tiny figurines in spots that feel balanced—maybe one near the center, one tucked behind a plant, and others along the edges. Add the 2 moss balls to soften the look and fill any empty spaces. Step back and adjust until everything feels cohesive and enchanting.
💧 Step 4: Water and Position Your Fairy Garden
Give your fairy garden a gentle watering using a spray bottle or small watering can. Focus on the soil around the plants, avoiding the decorative elements to prevent them from shifting. Water until the soil feels moist but not soggy—you should see water trickle out the drainage holes at the bottom.
Choose a spot for your planters that gets 4-6 hours of indirect sunlight daily. A windowsill, small shelf, or outdoor wall will work perfectly. If placing them outside, make sure they’re sheltered from strong winds and direct afternoon sun, which can dry out the soil too quickly.
⏰ Step 5: Maintain and Refresh Your Garden
Check your fairy garden every 2-3 days to ensure the soil stays lightly moist. Tiny plants dry out faster than larger ones, so a quick misting with water keeps them thriving. If you notice any decorative elements shifting, gently readjust them to keep the scene looking intentional.
Once a month, add a small handful of compost to the soil to replenish nutrients. Trim any overgrown plants with sharp scissors to maintain the whimsical, miniature look. With a little care, your fairy planter garden will stay magical and inviting for months to come!
Tips & tricks for perfect fairy planter gardens
Creating a magical fairy planter garden is all about the little details—and avoiding common pitfalls that can turn your dreamy vision into a messy disaster. Here's what I've learned after building (and fixing!) dozens of these enchanting spaces.
Drainage is Everything: In Step 1, that 1-inch layer of pebbles isn't just decoration—it's your secret weapon against root rot. If you skip this, water will pool at the bottom and suffocate your tiny plants. I've seen beautiful fairy gardens ruined by soggy soil, so don't cut corners here. For extra insurance, add a small layer of activated charcoal on top of the pebbles to prevent bacterial buildup.
The Soil Secret: When filling your planters ¾ full in Step 2, resist the urge to pack the soil tightly. You want it airy enough for those miniature roots to breathe. I like to mix my potting soil with a little perlite or vermiculite (about 10%) to improve drainage without sacrificing moisture retention. This helps prevent the soil from becoming compacted over time, which can stunt your plants' growth.
Light Placement Matters: That 4-6 hours of indirect sunlight in Step 4 is non-negotiable for most miniature plants. If your space gets less light, consider these alternatives: Place your fairy garden near a bright window with sheer curtains, or supplement with a small LED grow light for 4-6 hours daily. I've had success with succulents in lower-light spots, but they won't grow as vigorously as they would with proper sunlight.
Composition Tips: For Step 3's decorative arrangement, think about creating visual pathways. Place one figurine near the front edge to draw the eye in, then arrange others to create a sense of depth. I like to use the "rule of thirds" when positioning elements—imagine your planter divided into thirds both horizontally and vertically, then place key elements along those lines for a balanced look. This simple technique makes your fairy garden feel more intentional and professional.
Pro Tips for Fairy Planter Garden
- Creating a magical fairy planter garden is all about the little details—and avoiding common pitfalls that can turn your dreamy vision into a messy disaster.
- Drainage is Everything: In Step 1, that 1-inch layer of pebbles isn't just decoration—it's your secret weapon against root rot.
- The Soil Secret: When filling your planters ¾ full in Step 2, resist the urge to pack the soil tightly.
Frequently asked questions
Got questions about creating your own fairy planter garden? You’re not alone—these magical vertical spaces spark curiosity! Here are some of the most common queries (and their answers) to help you bring your tiny green oasis to life.
What’s the best time of year to start a fairy planter garden?
Spring or early summer is ideal for most fairy gardens! This gives plants time to establish roots before cooler weather. However, succulents and drought-resistant plants can thrive year-round in containers. If starting in fall, use a grow light or move planters indoors during frost.
Can I use regular pots or do I need special fairy garden containers?
Nope! While fairy garden containers (like tiered shelves or repurposed teapots) add charm, you can use any small pots, hanging baskets, or even upcycled items (think colanders, boots, or old shoes). Just ensure they have drainage holes to prevent root rot. Get creative—thrift stores are goldmines for unique planters!
What if my plants look sad or stop growing?
Common issues include overwatering, poor drainage, or insufficient light. Check soil moisture (stick your finger in—if it’s damp, wait!), ensure pots drain well, and place your garden near a sunny window or under grow lights. Moss and ferns love shade, while succulents and herbs need bright light. Rotate planters occasionally for even growth.
How do I keep pests (like ants or slugs) out of my fairy garden?
Pests hate natural barriers! Sprinkle diatomaceous earth around the base of planters, or use crushed eggshells for a gentle deterrent. For slugs, place a ring of coffee grounds or copper tape near edges. Avoid chemical pesticides—they can harm your tiny ecosystem. A spray bottle of soapy water (1 tsp dish soap + 1 quart water) works for stubborn critters.
Are fairy planter gardens good for apartments or small balconies?
They’re perfect for small spaces. Opt for vertical planters, wall-mounted shelves, or hanging gardens to maximize square footage. Even a windowsill can host a thriving fairy scene. Just ensure your space gets enough light—most fairy plants thrive with 4–6 hours of sunlight daily. No yard? No problem!
What’s a budget-friendly way to start without buying new supplies?
Repurpose what you have! Use old teacups, tin cans (with holes drilled), or broken terracotta pots as containers. Collect pinecones, pebbles, and bark from nature for decor. Check dollar stores for affordable tools, and swap seeds with plant-loving friends. A fairy garden can be as simple (or elaborate!) as you’d like—imagination is the only limit!
Wrapping up and next steps
A fairy planter garden isn’t just a charming decor piece—it’s a magical way to bring life, color, and joy to even the smallest spaces! Whether you’re a gardening newbie or a seasoned green thumb, these vertical oases prove that creativity thrives where space is limited. 🌿✨
Ready to turn your tiny corner into a fairy-tale escape? Start by gathering your supplies, sketch a simple design, and let your imagination run wild. Plant, paint, and play—your whimsical garden awaits!