Fertilization
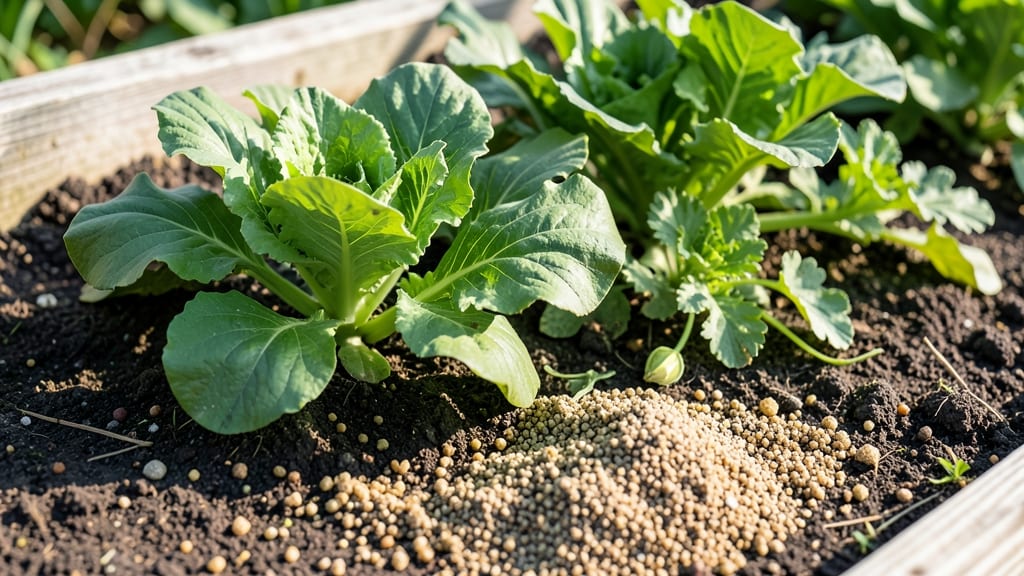
My garden soil finally stopped looking like lifeless dirt after I learned how to fertilize it properly—layer by layer. The difference between sad, stunted plants and shockingly lush growth often comes down to what’s hidden beneath the surface, not just what you see above ground.
I’ve tested everything from cheap synthetic mixes to homemade compost tea, and the right approach depends on your soil’s starting point and what your plants actually need.
You don’t need a PhD in soil science to get this right. Start with a simple soil test kit (they’re cheap and available at garden centers) to check your pH and nutrient levels.
Then match your fertilizer to those results—organic options like compost or worm castings build long-term health, while quick-release synthetics give plants an instant boost when they’re struggling. The key is balance: too much fertilizer burns roots, but too little leaves plants starving for nutrients.
By the end of this, your garden beds will hold moisture better, support stronger root systems, and produce vibrant green growth that actually thrives—not just survives. We’ll cover how to apply nutrients without wasting them, when to feed different plants, and how to tell if you’re overdoing it.
Your soil will thank you with every harvest.
This works for vegetable gardens, flower beds, and even container plants—just adjust the amounts based on space. Let’s get your soil working for you, not against you.
📚 In This Guide
- What you need
- Instructions
- Tips and common mistakes
- Wrapping up and next steps
What you need
- ● Compost: 2–3 inches of well-aged, nutrient-rich compost (homemade or store-bought). Aim for a balanced mix of greens (nitrogen) and browns (carbon).
- ● Organic Fertilizers: 1–2 cups of bone meal (phosphorus for root growth)
- ● 1–2 cups of kelp meal (potassium for flowering/fruiting)
- ● ½ cup of worm castings (mild, slow-release nutrients)
- ○ Soil Amendments (Optional but Helpful): Peat moss or coconut coir (for moisture retention, 1–2 cups)
- ● Perlite or vermiculite (for aeration, ½ cup)
- ● Wood ash (sparingly, for pH adjustment—test soil first!)
- ● Garden fork or trowel (for turning soil without compacting it)
- ● Garden gloves (to keep hands clean and protected)
- ● Wheelbarrow or large bucket (for mixing materials, 5+ gallons)
- ○ pH testing kit (optional but recommended to check soil acidity/alkalinity)
- ● Watering can or hose (for post-fertilization hydration)
- ○ Test your soil’s current nutrient levels (optional but highly recommended). Many local extension offices offer free/low-cost testing!
- ● Choose a dry, mild day (avoid rain for 24–48 hours post-application).
- ● Clear the garden bed of weeds, rocks, or debris before adding amendments.
Step-by-Step instructions for layering nutrients in garden soil
Here's how to build rich, fertile soil that keeps plants thriving season after season.
Test Your Soil First
Before adding anything, grab a small soil sample from your garden bed—about 2 inches deep—and send it to your local extension office for a test. This tells you exactly what nutrients your soil lacks, so you're not just guessing. I always test in early spring because results take 2-3 weeks, giving you time to plan.
Look for three key numbers: nitrogen (N), phosphorus (P), and potassium (K). If your soil is heavy clay or sandy, the test will also show organic matter percentage. This helps you decide whether to focus on bulk organic material or targeted amendments. For example, if phosphorus is low, you'll need bone meal or rock phosphate later.
Clear and Loosen the Soil
Remove any weeds, rocks, or debris from the garden bed you're working on. Use a garden fork or tiller to loosen the top 6-8 inches of soil. This breaks up compaction and lets nutrients penetrate deeper. I like to work in dry-ish conditions—wet soil sticks to tools and makes everything messy.
If your soil is extremely compacted, add 1-2 inches of coarse sand or perlite to improve drainage before proceeding. You'll know it's loose enough when you can push your finger 3-4 inches into the soil without resistance. This step prevents nutrient runoff and ensures roots can access everything you add.
Layer Organic Matter for Long-Term Fertility
Spread a 2-inch layer of well-aged compost across the entire bed. This is your base nutrient source, providing slow-release organic matter that feeds soil microbes. I like to mix in 1-2 inches of leaf mold or shredded hardwood mulch next—these add structure and improve water retention without compacting like fresh grass clippings.
For beds where you'll grow heavy feeders like tomatoes or peppers, add a 1-inch layer of worm castings on top of the compost. Worm castings are packed with microbial life that breaks down nutrients into forms plants can absorb immediately. Lightly rake everything together until you see a 1-inch mix of dark organic material throughout the top 4-6 inches of soil.
Add Targeted Nutrient Amendments
Based on your soil test, sprinkle 1 pound per 100 square feet of the appropriate slow-release fertilizer. For nitrogen-deficient soil, use cottonseed meal (10-0-0). If phosphorus is low, add bone meal (3-15-0). Potassium shortages respond well to greensand (0-0-10). I always apply these in early spring because they take 4-6 weeks to become fully available to plants.
For beds where you'll plant vegetables, mix in 1 cup of kelp meal per 25 square feet to boost trace minerals. This step is optional but makes a noticeable difference in plant vigor and disease resistance. Avoid overdoing it—too much fertilizer burns roots and attracts pests. You'll know you've done enough when the soil looks darker and smells earthy, not chemical.
Top Dress and Mulch for Retention
Finish by spreading a 2-inch layer of finished compost or well-rotted manure across the surface. This top dressing feeds the soil as it breaks down and prevents nutrient loss from rain or wind. I like to use straw mulch next because it breaks down slowly and improves soil structure over time.
Leave 1-2 inches of space between the mulch and plant stems to prevent rot. Water the bed deeply after finishing to help everything settle. You'll see the first signs of improvement in 2-3 weeks when new growth appears darker green and more vigorous. This layered approach builds fertility that lasts for years, not just one growing season.
Tips & tricks for perfect fertilizing garden soil
Building fertile soil takes patience, but these tips will help you get the most out of your layered approach every time.
Soil Test Timing: If you're short on time, consider using a home soil test kit instead of sending samples to the extension office. These give results in about 24 hours and can help you make quick decisions. Just remember that professional tests provide more detailed nutrient breakdowns, which is especially helpful if you're dealing with unusual soil conditions like high salinity or unusual pH levels.
Loosening Technique: When working with clay soil in Step 2, I've found that adding 1-2 inches of coarse sand or perlite makes a world of difference. The key is to mix it in thoroughly with your fork or tiller until the soil feels like crumbly cake batter. This prevents compaction and allows roots to penetrate easily. For sandy soils, focus more on adding organic matter to improve water retention.
Compost Quality Check: Not all compost is created equal. Look for well-aged compost that's dark brown or black and has a crumbly texture. Avoid compost that smells strongly of ammonia or has visible mold. If you're using homemade compost, make sure it's fully decomposed—you shouldn't be able to identify the original materials. The 2-inch layer mentioned in Step 3 should be spread evenly across your entire bed before adding other amendments.
Layering Strategy: For vegetable gardens, I recommend starting with a 1-inch layer of worm castings on top of your compost in Step 3. This gives your heavy feeders like tomatoes and peppers an immediate nutrient boost while the compost builds long-term fertility. The worm castings also introduce beneficial microbes that help break down other organic materials more efficiently.
Pro Tips for Fertilizing Garden Soil
- Building fertile soil takes patience, but these tips will help you get the most out of your layered approach every time.
- Soil Test Timing: If you're short on time, consider using a home soil test kit instead of sending samples to the extension office.
- Loosening Technique: When working with clay soil in Step 2, I've found that adding 1-2 inches of coarse sand or perlite makes a world of difference.
Frequently asked questions
Got questions about fertilizing your garden soil? You’re not alone! Here are answers to some of the most common concerns—whether you're a beginner or a seasoned green thumb.
How often should I fertilize my garden soil?
Most gardens benefit from fertilization every 4-6 weeks during the growing season (spring to fall). However, slow-release organic fertilizers can last 2-3 months. Over-fertilizing can burn plants, so follow package guidelines and observe your soil’s health. Pro tip: Test your soil first to avoid overdoing it!
When is the best time to fertilize?
The ideal time is early spring before planting, as plants need nutrients to establish roots. For established gardens, fertilize in early spring and mid-summer. Avoid fertilizing in late summer or fall, as plants prepare for dormancy. Hot tip: Water soil thoroughly before and after applying fertilizer to prevent root burn.
What’s a budget-friendly alternative to store-bought fertilizers?
Try compost, manure (well-aged!), or kitchen scraps like coffee grounds, eggshells, or banana peels. DIY options:
- Compost tea: Steep compost in water for a nutrient-rich liquid.
- Green manure: Plant cover crops like clover or vetch, then till them into the soil.
- Epsom salt: Sprinkle 1 tbsp per plant for magnesium boost (great for flowering plants!).
Why are my plants wilting after I fertilized?
Wilting can signal over-fertilization or root burn. If this happens:
- Flush the soil with water to dilute excess salts.
- Pause fertilization for 2-4 weeks and monitor plants.
- Switch to a low-concentration organic fertilizer next time.
Does synthetic fertilizer harm the environment?
Synthetic fertilizers can leach harmful chemicals into waterways, disrupting ecosystems. Opt for organic or slow-release options to reduce runoff. Eco-friendly swaps:
Synthetic
Organic Alternative
Chemical nitrogen (e.g., urea)
Blood meal or fish emulsion
Synthetic phosphorus
Bone meal or rock phosphate
Potassium chloride
Wood ash or greensand
Wrapping up and next steps
Fertilizing your garden soil doesn’t have to be complicated—just consistent and intentional. 🌱 By layering organic matter, compost, and targeted nutrients, you’re giving your plants the best foundation for growth.
Whether you’re a beginner or a seasoned gardener, small steps like testing your soil and choosing the right amendments can make a big difference.
Now that you’re armed with knowledge, roll up your sleeves and get growing! Start with one bed or pot, observe how your plants respond, and adjust as needed. Happy gardening—your green thumb is closer than you think! 🌿