Landscaping
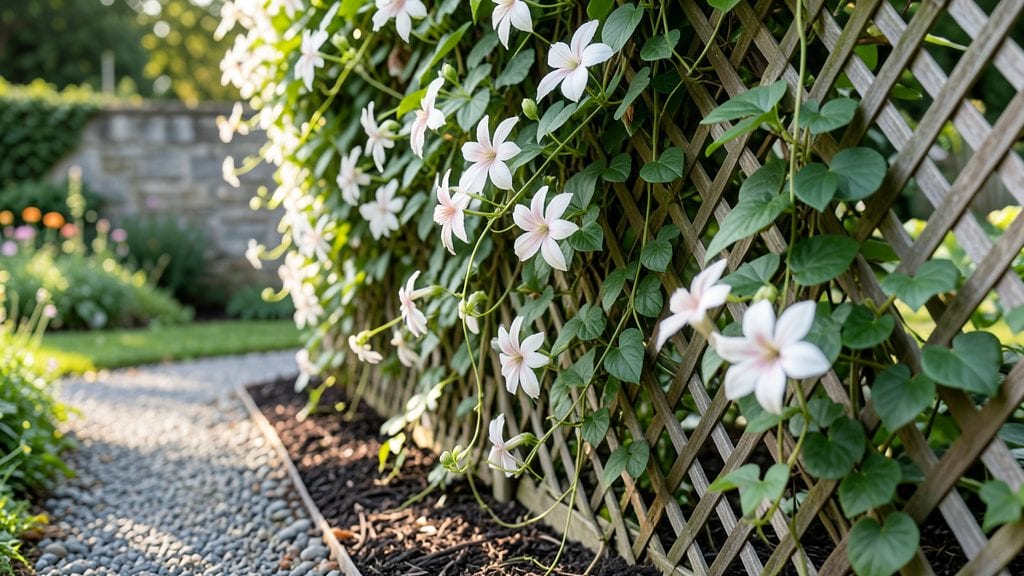
A garden fence design that blends privacy with rustic charm can transform your yard from ordinary to extraordinary. 🌿 I learned this the hard way after installing a plain vinyl fence that looked like every other neighbor’s—until I swapped out the panels for weathered cedar and added climbing roses.
The difference wasn’t just visual; it created a cozy, functional space that feels like an extension of the house.
The best designs balance form and function. You’ll want materials that weather well (think cedar, black iron, or composite wood) paired with styles that suit your garden’s vibe—whether that’s classic picket for a cottage feel or sleek lattice for modern lines.
Privacy comes down to height (6–8 feet works for most yards) and smart additions like trellises or evergreen shrubs along the base. My favorite trick? Painting the top rail a bold color to draw the eye upward and make the space feel taller.
By the end, you’ll have a fence that does more than just mark your property—it frames your garden like a living picture. Imagine morning coffee under the shade of a wisteria vine trained along the lattice, or crisp autumn evenings with golden light filtering through the slats.
The right design turns a functional barrier into a feature that enhances every season. Let’s break down how to make it happen without breaking the bank.
Even small adjustments—like staggered panel heights or mixed materials—can elevate the look. And don’t overlook the soil: plant low-maintenance perennials or ground covers at the fence line to soften the transition between hardscape and garden.
The key is to let the fence work with your plants, not against them. Ready to get started?
📚 In This Guide
- What you need
- Instructions
- Tips and common mistakes
- Wrapping up and next steps
What you need
- ● Fence Panels: Choose between: Wooden panels (cedar, redwood, or pressure-treated pine) – 6–8 ft tall × 4–6 ft wide (adjust based on yard size).
- ● Vinyl or composite panels – Low-maintenance, 6–8 ft tall (pre-cut or custom sizes).
- ● Metal or wrought iron (for a classic touch) – Pre-assembled or custom fabrications.
- ● Posts: Wooden posts (4x4 or 6x6) – 8 ft long, treated for durability (1 post per 6–8 ft of fence).
- ● Concrete footings – 5-gallon buckets or pre-cast forms (for securing posts).
- ○ Metal T-posts (optional) – For temporary or lightweight designs.
- ● Hardware: Galvanized or stainless steel screws/nails – 2.5–3.5 inches long.
- ● Hinges and latches (if adding gates) – Heavy-duty, weather-resistant.
- ○ Post caps (optional) – For a polished look.
- ● Extras for Rustic Charm: Stained or painted wood (if customizing panels).
- ● Decorative lattice or trellises – For climbing plants.
- ● Natural stone or brick accents – For base or post wraps.
- ● Essential: Circular saw or miter saw – For cutting panels/posts.
- ● Drill/driver – Cordless for convenience.
- ● Level – 4-ft for accuracy.
- ● Post hole digger or auger – Manual or rented.
- ● Shovel and wheelbarrow – For mixing concrete.
- ● Measuring tape – 25+ ft for large projects.
- ○ Optional (but helpful): Chainsaw – For rough-cut wood.
- ● Staple gun – For attaching lattice or fabric.
- ● Safety gear – Gloves, goggles, ear protection.
- ● Paintbrush or sprayer – For finishes.
- ● Permits: Check local regulations—some areas require permits for fences over 6 ft tall.
- ● Property Lines: Mark boundaries with stakes or hire a surveyor to avoid disputes. 💡Pro tip: Call 811 to check for underground utilities!
- ● Weather Window: Aim for dry, mild days to speed up curing (especially for concrete).
- ● Helper(s): Fences are heavy—buddy up for lifting panels or mixing concrete!
Step-by-Step guide for designing a privacy fence with rustic charm
Here’s how to craft a functional, stylish fence that blends seamlessly with your garden’s natural beauty.
🪴 Step 1: Define Your Fence Layout and Materials
Start by sketching your fence’s path on paper or digitally, marking any curves, corners, or gates. Measure the perimeter and note obstacles like trees or slopes. For a rustic look, I recommend using cedar or redwood planks—they resist rot and age beautifully. If you’re working with vinyl or metal panels, choose a matte finish to soften the modern appearance.
Check local building codes for height restrictions (typically 6 feet for privacy fences) and setback requirements. Most rustic designs use 4x4 posts spaced 6-8 feet apart for stability. Mark post locations with stakes and string lines to keep everything straight—trust me, crooked posts will ruin the whole look.
☀️ Step 2: Prepare the Ground and Install Posts
Dig holes for your posts using a post hole digger or auger—12 inches deep for stability, especially if you’re in a windy area. The hole should be 3-4 inches wider than the post diameter. For cedar or redwood, I like to treat the bottom 6 inches with a wood preservative to prevent rot at ground level.
Set each post in the hole, then mix concrete (about 2 bags per post) with water to a thick slurry. Pour it around the post, tapping it firmly to remove air bubbles. Use a level to ensure posts are perfectly vertical—this is your foundation, so don’t skimp. Let the concrete cure for 24 hours before attaching fence panels.
🌿 Step 3: Attach Panels or Planks for Privacy
For a rustic vibe, vertical planks (spaced 1-2 inches apart) let light filter through while still blocking views. If you prefer solid privacy, use 6-foot-wide panels with a staggered pattern—offset each row by 1-2 feet to create visual interest. Secure panels to posts with galvanized screws (hidden behind the planks) or exposed decking screws for a more rustic look.
Leave a ½-inch gap at the top of panels for drainage—this prevents water damage over time. If using lattice or trellis sections, attach them to the top of the fence for climbing plants like clematis or jasmine, adding greenery and softening the structure. Double-check that all panels sit level before securing them permanently.
✂️ Step 4: Add Finishing Touches for Longevity and Style
Seal the wood with a semi-transparent stain (like cedar tone) to protect it from weather while keeping the natural grain visible. For metal or vinyl, skip sealing—just clean with a mild soap solution once a year. Install post caps (like copper or wood ones) to shield the tops from rain damage and add a polished finish.
Add lighting for safety and ambiance—solar-powered post lights or string lights woven through lattice sections create a warm glow at night. If your fence borders a garden bed, plant evergreen shrubs (like boxwood or holly) along the base for year-round greenery. This softens the fence line and adds texture.
⏰ Step 5: Maintain for Long-Term Appeal
Inspect your fence twice a year—spring and fall—for loose screws, warped planks, or signs of rot. Tighten screws and replace any damaged sections immediately. For wood fences, reapply sealant every 2-3 years to prevent graying or cracking. If you notice mold or mildew, scrub it off with a 50/50 vinegar-water mix and let it dry completely before resealing.
Prune climbing plants once a year to keep them from overwhelming the fence structure. If you added lattice, trim back any overgrowth to maintain airflow and prevent moisture buildup. With minimal upkeep, your rustic fence will stay sturdy and stylish for 10+ years—worth the effort!
Tips & tricks for perfect garden fence design
A few simple strategies can transform your privacy fence from basic to breathtakingly charming. Here's what I've learned building these myself:
Precision Matters in Step 1: When marking post locations in Step 1, use a laser level instead of just a string line for absolute straightness. I learned this the hard way after realizing my first fence had a subtle curve no one noticed until it was too late. For extra stability, drive a small stake at each post location before digging—this prevents shifting when you're measuring. The 6-8 foot spacing between posts is perfect for most cedar planks, but if you're using wider panels, you can stretch to 8-10 feet between posts.
Concrete Curing in Step 2: That 24-hour concrete cure time in Step 2 is non-negotiable for stability, but here's the secret: add a bit of waterproofing admixture to your concrete mix. It costs almost nothing and prevents moisture wicking that can cause rot at the post base. After pouring, use a rubber mallet to gently tap the post every few inches as you fill the hole—this eliminates air pockets that could compromise strength. If you're working in freezing temperatures, use a concrete warmer or wait until above 40°F.
Plank Spacing Hack in Step 3: For that perfect rustic look with vertical planks, use a spacer block between each plank to maintain that 1-2 inch gap consistently. I cut these from scrap wood to exactly 1.5 inches thick. Pro tip: alternate the spacing pattern—some planks 1 inch apart, others 2 inches—for visual interest without sacrificing privacy. When attaching lattice for climbing plants, leave the bottom 6 inches clear so plants can grow up naturally without being crushed.
Maintenance Shortcut in Step 5: Instead of waiting for mold to appear, treat your wood fence once a year with a mixture of 1 part vinegar to 3 parts water and a few drops of dish soap. Spray it on, let it sit for 10 minutes, then rinse. This prevents mold before it starts and keeps your fence looking fresh. For the twice-yearly inspections, set reminders for early spring and late fall—these are the times when weather changes most affect wood. I keep a small toolkit with extra screws, a level, and some wood filler handy for quick repairs.
Pro Tips for Garden Fence Design
- A few simple strategies can transform your privacy fence from basic to breathtakingly charming.
- Precision Matters in Step 1: When marking post locations in Step 1, use a laser level instead of just a string line for absolute straightness.
- Concrete Curing in Step 2: That 24-hour concrete cure time in Step 2 is non-negotiable for stability, but here's the secret: add a bit of waterproofing admixture to your concrete mix.
Frequently asked questions
Got questions about crafting the perfect garden fence? You’re not alone! Here are answers to the most common concerns—from practical tips to troubleshooting—so you can design with confidence.
What’s the best time of year to install a garden fence?
Installing a fence in early spring or fall is ideal—soil is workable, weather is mild, and you avoid extreme heat or frost. Avoid winter (frozen ground) or peak summer (drought stress). If you’re in a warm climate, late fall can also work well.
How much does a rustic-style garden fence cost?
Costs vary widely: wooden privacy fences average $15–$35 per linear foot, while vinyl or metal options range from $20–$50+. Rustic charm (e.g., cedar shakes, lattice, or reclaimed wood) may add $5–$15/ft for custom details. Always get quotes for labor and materials in your area!
Can I install a fence myself, or should I hire a pro?
DIY is doable for simple, short fences (under 6 ft) with basic tools, but pros handle permits, digging, and structural integrity. If your fence is tall, curved, or requires concrete footings, hire a licensed contractor to avoid costly mistakes.
What’s the most low-maintenance fence material for privacy?
For rustic charm + durability, try:
- Cedar or redwood: Naturally rot-resistant, needs sealing every 2–3 years.
- Vinyl: Never needs painting, but lacks natural texture.
- Composite wood: Mimics wood’s look with zero upkeep.
For year-round appeal, pair materials with climbers (e.g., ivy or roses) to soften lines.
How do I fix a fence that’s leaning or sagging?
Start by checking posts—if they’re loose, dig deeper and add gravel for support. For sagging panels, tighten screws/bolts or replace rotted wood. If the issue persists, reinforce with additional posts or braces. Pro tip: Inspect annually after storms or seasonal shifts!
What are some creative ways to add privacy without a full fence?
Mix it up with:
- Living walls: Fast-growing plants like bamboo or arborvitae.
- Lattice panels: Mount on existing fences or walls for partial privacy.
- Trellises + vines: Train climbers (e.g., clematis) for a romantic, green screen.
- Decorative screens: Pergolas or bamboo rolls for a temporary, stylish barrier.
Perfect for renters or small spaces!
Wrapping up and next steps
Designing the perfect garden fence blends privacy, rustic charm, and year-round appeal—and you’ve got all the inspiration to make it happen! 🌿 From natural materials like cedar and lattice to bold colors and creative textures, your fence can be both functional and stunning.
Whether you prioritize seclusion, curb appeal, or low maintenance, there’s a solution tailored just for you.
Ready to transform your outdoor space? Start by sketching a rough design, gathering samples, and reaching out to local experts for personalized advice. With the right plan, your garden fence will become the showstopper of your yard—enjoy the process! 🚀