
Planting
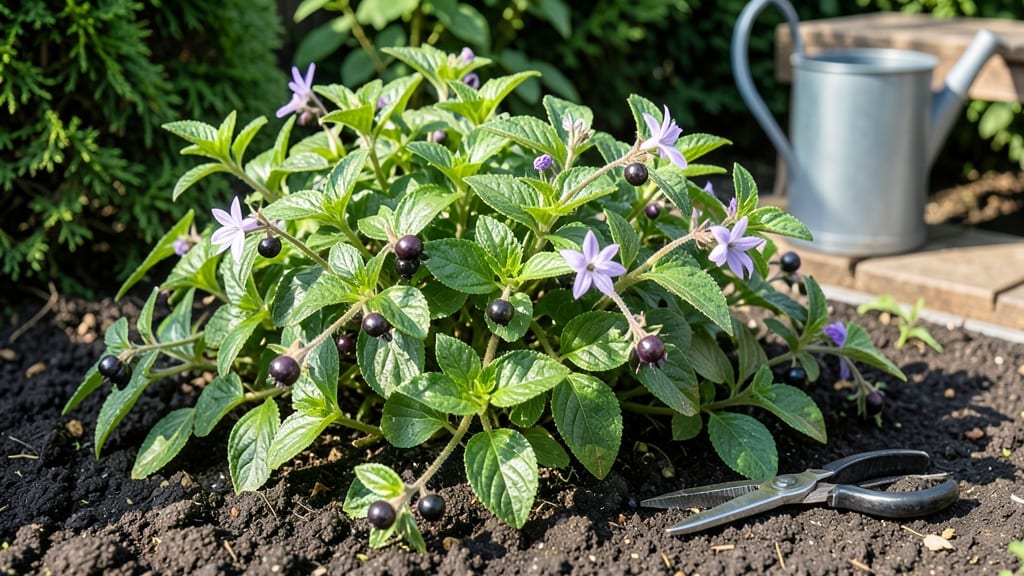
Growing garden huckleberry thrives where others fail—deep shade, poor soil, and neglect. ✨ I planted mine under a maple tree last spring, and by midsummer, it was covered in glossy leaves and tiny black berries. This hardy plant turns shady corners into productive spaces with almost no effort.
The secret lies in its adaptability: it tolerates 60% shade or less, thrives in average garden soil, and even handles drought once established. You’ll need 3-4 hours of indirect light daily, but it won’t complain if you forget to water for a week.
Perfect for beginners or gardeners with tricky spaces.
By late summer, you’ll harvest clusters of edible berries—tart, slightly sweet, and packed with antioxidants. The plants spread gently, creating a lush ground cover that suppresses weeds. Prune lightly after fruiting to keep it tidy, and watch it bounce back year after year.
Works in USDA zones 3-10, making it one of the most versatile shade-loving edibles. Whether you’re filling a dark corner or adding a low-maintenance crop, this plant delivers. Let’s get yours growing!
📚 In This Guide
- What you need
- Instructions
- Tips and common mistakes
- Wrapping up and next steps
What you need
- ● Garden huckleberry seeds or seedlings: 3–5 plants (start with a small batch to test your space). Look for organic, non-GMO seeds if possible.
- ● Well-draining potting mix: 1–2 bags (5–10 lbs each). A blend of peat moss, perlite, and compost works best.
- ● Containers or garden bed: For containers: 5–10-gallon pots with drainage holes (1 per plant). Terracotta or fabric pots are ideal.
- ● For in-ground planting: A partially shaded spot with loose, fertile soil (amend with compost if needed).
- ● Watering can or hose with gentle spray nozzle: For consistent moisture without over-saturating roots.
- ○ Mulch (optional but recommended): 1–2 bags of shredded bark or straw to retain moisture and suppress weeds.
- ● Garden trowel or small shovel: For planting and soil prep.
- ● Pruning shears: To trim leggy growth or harvest berries.
- ○ pH testing kit (optional): Ideal soil pH: 6.0–7.0. Adjust with lime (to raise pH) or sulfur (to lower) if needed.
- ● Gloves: Protect your hands from prickly stems (especially when harvesting!).
- ● Time commitment: Low-maintenance, but check soil moisture 2–3 times weekly until established.
- ● Patience: Seeds take 6–8 weeks to germinate; seedlings may take 3–4 months to bear fruit.
- ● Sunlight awareness: Garden huckleberries thrive in partial shade (4–6 hours of dappled sunlight daily).
Instructions for planting and cultivating garden huckleberry
Here's how to establish your shade-loving huckleberry with confidence—minimal fuss, maximum berry production.
🌱 Step 1: Select the Perfect Planting Site
Garden huckleberries (Solanum scabrum) thrive in partial to full shade, making them ideal for understory plantings or northern exposures. Choose a location with 4-6 hours of dappled sunlight daily—direct afternoon sun will scorch the delicate leaves. I always test the spot by observing how nearby plants grow; if they're lush but not leggy, it's perfect.
Ensure the soil drains well but retains moisture—huckleberries despise soggy roots. Amend heavy clay with 2-3 inches of compost mixed into the top 12 inches of soil. The roots will spread aggressively, so space plants 3-4 feet apart to allow for full growth without competition.
🪴 Step 2: Plant Bare-Root or Container-Grown Starts
Spring is the best time to plant, but you can also establish huckleberries in early fall if your climate stays mild. Dig a hole twice as wide as the root ball but only as deep—burying too deeply suffocates the crown. Gently loosen the roots if they're circling in a container, then position the plant so the top of the root ball sits just below soil level. This prevents rot while allowing airflow.
Backfill with native soil mixed with 1 part compost to encourage mycorrhizal fungi, which boost root health. Water deeply immediately after planting to eliminate air pockets, then mulch with 2 inches of shredded bark to suppress weeds and retain moisture. Avoid fresh wood chips—they can tie up nitrogen for years.
☀️ Step 3: Maintain Moisture and Light Balance
Huckleberries need consistently moist but not waterlogged soil—think of a well-wrung sponge. Water 2-3 times weekly in dry spells, aiming for 1 inch of water per week, but adjust based on rainfall. You'll know it's right when the top 2 inches of soil feel damp but not slick. Overwatering causes yellowing leaves, while underwatering leads to brittle stems and poor fruiting.
Fertilize lightly in early spring with ½ cup of 5-10-10 granular fertilizer per plant, worked into the soil. Too much nitrogen produces leafy growth at the expense of berries. I skip fall feeding—huckleberries enter dormancy naturally, and extra nutrients just encourage late-season vulnerability to frost.
✂️ Step 4: Prune for Airflow and Fruit Production
Prune in late winter or early spring before new growth begins. Remove dead, diseased, or crossing branches first—these compete for energy and invite pests. Then, thin out 10-20% of the oldest canes to the ground; this rejuvenates the plant and encourages robust new growth. Use clean, sharp pruners and make cuts at a 45-degree angle just above a bud or lateral branch.
Watch for suckers (shoots growing from the base) and remove them promptly—they drain energy from the main plant. After pruning, apply a 2-inch layer of mulch around the base to protect roots and retain moisture. You'll see new shoots emerge within 3-4 weeks, signaling successful renewal.
🍓 Step 5: Harvest and Overwinter Strategically
Berries ripen in late summer to early fall, turning from green to deep purple-black. Harvest when they're plump and fully colored—they won't improve after picking. Wear gloves; the stems are prickly! I use small scissors to snip clusters, leaving a ½-inch stem to prevent bruising. Store in the fridge for up to 5 days or freeze for longer preservation.
In fall, reduce watering as growth slows, but keep the soil slightly moist until the first hard frost. Huckleberries are semi-evergreen in mild climates but may drop leaves in colder zones. In winter, add 3-4 inches of mulch to insulate roots—this protects against freeze-thaw cycles and keeps the soil temperature stable.
Tips & tricks for perfect garden huckleberry cultivation
Here's what I've learned after years of growing these shade-loving berries—details that make all the difference between decent plants and thriving bushes.
Soil Preparation is Non-Negotiable: The 2-3 inches of compost mixed into the top 12 inches of soil isn't just decoration—it creates the perfect moisture-retaining environment while preventing compaction. I've found that adding a handful of perlite to heavy clay soils prevents waterlogging, which is huckleberries' biggest enemy. Test your soil's drainage by digging a hole and filling it with water—if it doesn't drain within 2 hours, you need more amendments. The goal is that "well-wrung sponge" moisture level mentioned in Step 3.
Planting Depth Matters More Than You Think: Positioning the root ball just below soil level (not buried deeper) prevents crown rot while allowing proper airflow to the roots. I've seen many gardeners bury the plant too deeply, thinking it needs support, only to watch it struggle. After planting, press the soil gently around the roots—this eliminates air pockets that can strangle new growth. The 2-inch mulch layer isn't just for looks; it regulates soil temperature and prevents moisture loss, especially during those hot summer afternoons.
Watering Strategy That Actually Works: The 2-3 times weekly watering guideline assumes average conditions, but your local climate matters. In my zone 7 garden, I water every other day during summer heatwaves, while my colleagues in zone 5 stick to the 2-3 times weekly schedule. The key is checking soil moisture—stick your finger 2 inches down. If it's dry, water; if it's damp, wait. Overwatering is the #1 cause of yellowing leaves, while underwatering leads to those telltale brittle stems that scream "stress!"
Pruning Timing is Everything: That late winter/early spring pruning window is critical because it allows the plant to heal before new growth begins. I've made the mistake of pruning in fall, and the plants struggled through winter. When thinning those oldest canes, look for ones that are thinner than a pencil—these are the energy vampires sucking resources from your berry production. And those 3-4 weeks for new shoots to emerge? That's your plant's way of telling you it's ready to fruit again.
Pro Tips for Garden Huckleberry Plant
- Here's what I've learned after years of growing these shade-loving berries—details that make all the difference between decent plants and thriving bushes.
- Soil Preparation is Non-Negotiable: The 2-3 inches of compost mixed into the top 12 inches of soil isn't just decoration—it creates the perfect moisture-retaining environment while preventing compaction.
- Planting Depth Matters More Than You Think: Positioning the root ball just below soil level (not buried deeper) prevents crown rot while allowing proper airflow to the roots.
Frequently asked questions
Got questions about growing garden huckleberries? You’re not alone! Here are answers to the most common queries—from planting to troubleshooting—so you can enjoy these shade-loving berries with confidence.
Can garden huckleberries grow in full shade?
One of their biggest perks is thriving in partial to full shade (2–6 hours of sunlight daily). They’re perfect for under trees, north-facing yards, or even containers near shady patios. Just ensure they get humus-rich soil and consistent moisture—shade helps retain soil dampness naturally.
How long does it take for garden huckleberries to produce berries?
Patience pays off! With proper care, you’ll see first berries in 1–2 years, but full harvests take 3–5 years. Young plants focus on root and leaf growth, so avoid over-pruning. Evergreen varieties (like Gaultheria shallon) tend to fruit sooner than deciduous types.
What’s the difference between garden huckleberries and wild huckleberries?
Garden huckleberries (Gaultheria spp.) are non-toxic, edible berries (unlike Vaccinium huckleberries, which are wild and tart). They’re sweeter, larger, and bred for culinary use—think jams, sauces, or fresh snacks. Wild huckleberries are harder to cultivate and often grow in forests.
Why are my garden huckleberry leaves turning yellow?
Yellow leaves usually signal overwatering, nutrient deficiency, or fungal issues. Check soil moisture—huckleberries hate soggy roots. For nutrients, amend soil with peat moss or compost annually. If spots appear, prune affected leaves and improve airflow. Powdery mildew is common; treat with neem oil if needed.
Can I grow garden huckleberries in containers?
Yes! They’re great for pots (12–18 inches deep) with well-draining soil and a mix of peat and perlite. Choose a container with drainage holes and place it in partial shade. Repot every 2–3 years and fertilize lightly in spring. Dwarf varieties like ‘Berry Heavy’ are ideal for container gardening.
Pro Tip:
Mulch around your huckleberries with pine needles or wood chips to mimic their natural forest habitat—this retains moisture, suppresses weeds, and keeps roots cool. Bonus: The mulch also deters slugs, a common pest!
Wrapping up and next steps
Growing a garden huckleberry plant is a rewarding way to add beauty and low-maintenance charm to your shaded spaces! 🌿 These hardy shrubs thrive with minimal fuss, offering lush foliage, delicate flowers, and edible berries—perfect for both beginners and seasoned gardeners.
Whether you’re drawn to their ornamental appeal or their practical benefits, this shade-loving plant is a fantastic addition to any garden.
Ready to get started? Grab your supplies, choose a spot, and plant your huckleberry today! With just a little care, you’ll be enjoying its benefits in no time.