
Tools
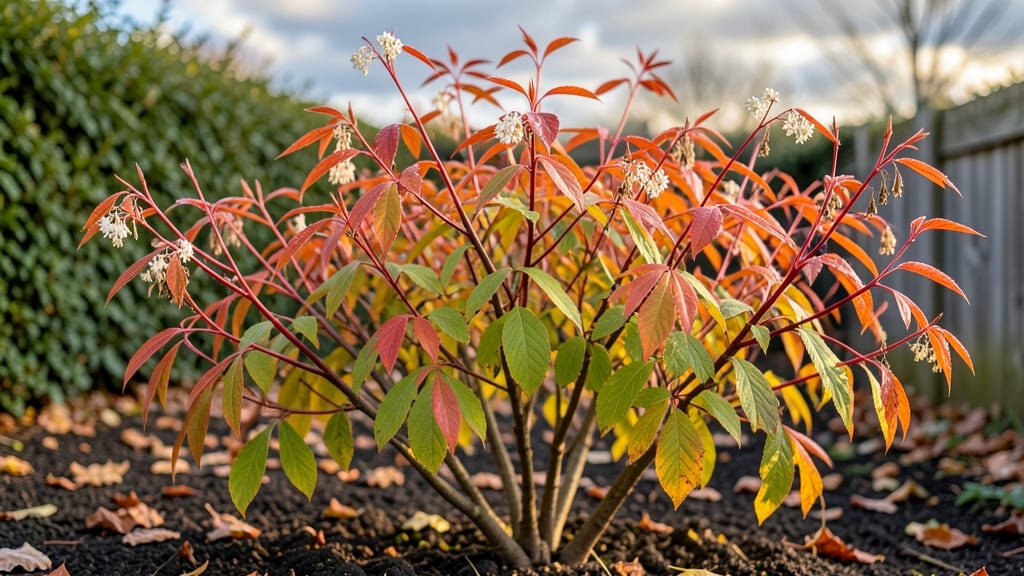
A garden in fall can be your yard’s centerpiece—just pick the perfect plants and timing for bold, long-lasting displays with cool-season annuals and ornamental grasses. 🌿 I used to dread autumn—until I discovered how easy it is to create showstopping autumn planters.
The secret isn’t expensive pots or rare plants, but matching foliage colors to your home’s palette and extending the season with frost-tolerant blooms.
Start with containers that hold at least 3 gallons—larger pots stay moist longer in drying winds. Mix in 1/3 potting soil with 1/3 perlite for drainage, and top with a slow-release fertilizer.
My go-to plants? Mums for color, ornamental kale for texture, and pansies that thrive in 40°F temps. These combinations last from October through Christmas with minimal care.
By early November, you’ll have planters that look like they cost thousands but cost less than $50 total. The velvety burgundy of ‘Black Beauty’ pansies contrasts perfectly with the chartreuse edges of kale, while mums add pops of yellow and orange.
Even better? These plants keep blooming until frost, giving you 6-8 weeks of curb appeal without spring’s upkeep.
Works for porches, patios, or entryways—just adjust plant sizes for scale. Pro tip: Add 1/2 inch of mulch on top to insulate roots from temperature swings. Now let’s get those planters prepped for your fall photo ops!
📚 In This Guide
- What you need
- Instructions
- Tips and common mistakes
- Wrapping up and next steps
What you need
- ● Planters: 2–4 medium-to-large containers (12–18" diameter or width) with drainage holes. Options: Terracotta, ceramic, or weather-resistant resin.
- ● Potting Soil: 1–2 bags (1–2 cubic feet each) of high-quality, well-draining fall-specific mix (or regular potting soil amended with perlite).
- ● Mulch: 1–2 bags of shredded bark or pine straw (for moisture retention and aesthetics).
- ● Fertilizer: Slow-release granular fertilizer (10-10-10 ratio) or organic compost (1–2 cups per planter).
- ● Tools: Trowel or small shovel
- ○ Garden gloves (optional but recommended!)
- ● Watering can or hose with a gentle spray nozzle
- ● Pruning shears (for trimming plants)
- ● Decorative Elements: Pebbles or river rocks (for drainage and texture)
- ● Miniature pumpkins or gourds (real or faux)
- ● Fall-themed figurines (e.g., scarecrows, acorns, or pinecones)
- ● Lighting: Solar-powered LED string lights or small spotlights (for evening ambiance).
- ● Plant Food: Liquid feed (like fish emulsion) for a mid-season boost.
- ● Weather Protection: Clear plastic covers or frost cloth (if extending the season in chilly climates).
Step-by-Step instructions for designing stunning fall planters
Transform your outdoor space with bold seasonal color using this foolproof planter design method.
🪴 Step 1: Select the Right Containers and Drainage
Fall planters need durable containers that can handle seasonal weight from moisture and frost. I recommend fiberglass or resin pots—they won’t crack under winter’s freeze-thaw cycles and resist moisture better than terra cotta. Choose pots with multiple drainage holes to prevent root rot from fall rains. If your containers lack holes, drill ¼-inch holes along the bottom using a masonry bit.
For a cohesive look, standardize container sizes—14-16 inches wide works perfectly for four plants per pot. Place a 2-inch layer of gravel in the bottom of each container before adding soil. This creates a reservoir for excess water while keeping roots elevated above soggy conditions. Test your drainage by filling the pot with water—it should empty completely within 10-15 minutes. If water pools, add more gravel or consider a different container.
🌿 Step 2: Layer Soil and Amendments for Fall Growth
Fill containers with high-quality potting mix mixed with ½ cup slow-release fertilizer per pot. This blend ensures nutrients last through fall’s shorter growing season. I like to add 1 cup of compost to each pot for extra organic matter—it improves drainage while feeding beneficial microbes. Mix everything thoroughly with a trowel until the soil looks uniformly dark and crumbly.
Press the soil down gently but firmly to eliminate air pockets. The surface should feel firm enough to support plants but still allow water to penetrate. Leave 1 inch of space between the soil surface and the pot’s rim—this prevents overflow when watering and gives plants room to establish without crowding. For extra insurance against fall’s unpredictable weather, top with ½ inch of decorative mulch (like pine bark fines) to retain moisture and suppress weeds.
☀️ Step 3: Choose and Plant Fall-Friendly Specimens
Select plants with contrasting textures and colors—think deep burgundy heuchera, golden sedum, and fiery red coleus. For height, add 1-2 ornamental grasses like fountain grass or little bluestem. Place the tallest plants in the center-back of the pot, followed by medium-height varieties, and finally trailing plants like sweet potato vine along the edges. Dig holes twice as wide as each plant’s root ball but only as deep as the container’s original soil line.
Gently remove plants from their nursery pots and tease apart any circling roots. Set each plant in its hole and backfill with soil, pressing lightly around the base to eliminate air gaps. Water deeply until moisture seeps from the drainage holes—this helps settle the soil and removes any remaining air pockets. Space plants 3-4 inches apart for optimal airflow, which reduces fungal diseases common in fall’s damp conditions.
💧 Step 4: Water and Position for Maximum Impact
Water planters thoroughly every 2-3 days until the top 2 inches of soil feel dry to the touch. Fall’s cooler temperatures mean less evaporation, but containers dry out faster than in-ground beds. Use a soaker hose or watering wand to deliver moisture evenly without displacing soil. Avoid overhead watering—it can spread fungal spores and wash away mulch.
Position planters where they’ll receive 4-6 hours of sunlight daily. South or west-facing spots work best for fall color, but avoid harsh afternoon sun that can scorch tender foliage. Group containers together to create a visual impact—this mimics the cohesive look of professional landscaping. If frost threatens, move pots to a sheltered location or cover them with frost cloth at night. Most fall plants tolerate light frosts, but a sudden deep freeze can damage tender varieties like coleus.
✂️ Step 5: Maintain Through Fall’s Final Weeks
Deadhead spent blooms regularly to encourage new growth and extend the season. Use clean, sharp pruners to snip just above a set of healthy leaves. This redirects the plant’s energy toward new foliage rather than seed production. Remove any yellow or brown leaves immediately—they signal stress and can attract pests. I also like to rotate planters weekly to ensure even exposure to light, which prevents lopsided growth.
As temperatures drop below 40°F, reduce watering to once every 4-5 days unless rainfall is abundant. Overwatering in cool weather leads to root rot, which is harder to detect in containers. Monitor for pests like spider mites or aphids—fall’s dry air can make plants more vulnerable. If you spot trouble, treat with neem oil or insecticidal soap, following label instructions precisely. With proper care, your fall planters will stay vibrant until the first hard frost.
Tips & tricks for perfect garden-inspired fall planters
A few strategic moves will transform your fall planters from ordinary to show-stopping. These are the secrets that elevate seasonal displays from "nice" to "wow."
Drainage is Non-Negotiable: That 10-15 minute drainage test in Step 1 isn't just about preventing root rot—it's about creating the perfect reservoir system. If water pools after 15 minutes, you're either using the wrong container or not enough gravel. I've seen terra cotta pots crack during fall freezes because they weren't properly drained, so fiberglass or resin is worth the investment. Pro tip: Place a small piece of landscape fabric over the gravel before adding soil to prevent fines from clogging your drainage system.
Soil Science Matters: The combination of high-quality potting mix, slow-release fertilizer, and compost in Step 2 creates the perfect fall growing environment. That ½ cup of fertilizer per pot might seem modest, but it's carefully calibrated for fall's shorter growing season. For an extra boost, I like to mix in a handful of worm castings—it adds beneficial microbes without overwhelming the soil's structure. Press the soil firmly but don't compact it too much; you want it to feel like a well-packed sponge.
Plant Placement Strategy: The center-back to edge arrangement in Step 3 isn't just about looks—it's about creating an airflow system that prevents fungal diseases. That 3-4 inch spacing between plants might seem generous, but it's crucial for fall's damp conditions. I always place the tallest plants slightly off-center to create visual interest while maintaining that perfect triangular planting pattern. For trailing plants, leave extra space—they'll spread 12-18 inches beyond the pot's edge.
Light Management: Those 4-6 hours of sunlight in Step 4 are the golden window for fall color development. South or west-facing spots work best because they capture morning sun without the intense afternoon heat that can scorch tender foliage. If your space only gets morning sun, choose shade-tolerant varieties like heuchera or astilbe. And remember: group containers together to create visual mass—single pots look like afterthoughts, while clusters create impact.
Pro Tips for Garden In Fall
- A few strategic moves will transform your fall planters from ordinary to show-stopping.
- Drainage is Non-Negotiable: That 10-15 minute drainage test in Step 1 isn't just about preventing root rot—it's about creating the perfect reservoir system.
- Soil Science Matters: The combination of high-quality potting mix, slow-release fertilizer, and compost in Step 2 creates the perfect fall growing environment.
Frequently asked questions
Got questions about creating stunning garden-inspired fall planters? You’re not alone! Here are answers to the most common queries to help you nail your seasonal display—no green thumb required.
What’s the best time to plant fall containers?
For most regions, late summer to early fall (around August–September) is ideal. This gives plants time to establish roots before cooler weather. In warmer climates, you can extend planting into October—just monitor frost dates!
Can I reuse last year’s soil in my fall planters?
Not always! Soil can compact or harbor pests over time. Refresh with a 50/50 mix of fresh potting soil and compost to ensure nutrients and drainage. Pro tip: Sterilize old soil by baking it at 200°F for 30 minutes if reusing.
How do I keep my fall planters looking fresh for weeks?
Water consistently (check soil moisture daily), fertilize every 2–3 weeks with a balanced liquid fertilizer, and prune wilted foliage. Deadhead blooms to encourage new growth. Bonus: Rotate planters occasionally for even sun exposure!
What are the easiest fall flowers/plants for beginners?
Start with low-maintenance picks like mums, ornamental kale, pansies, or sedum. These thrive in cool weather, add color, and forgive occasional neglect. Herbs like rosemary or thyme also work well!
My planter leaves are turning yellow—what’s wrong?
Yellowing leaves often signal overwatering, poor drainage, or nutrient deficiency. Check for soggy soil, adjust watering, and top-dress with compost. If yellowing persists, test soil pH—fall plants prefer slightly acidic (6.0–7.0) conditions.
Still stumped? Drop your question in the comments—we’re happy to help your fall planters shine!
Wrapping up and next steps
Fall is the perfect time to transform your outdoor space with vibrant, low-maintenance planters that bring warmth and beauty to your garden. 🍂 Whether you’re a seasoned gardener or just starting out, these seasonal designs prove that stunning landscaping doesn’t require a green thumb—or a big budget.
With the right materials and a little creativity, you can create a showstopping display that rivals professional work.
Now that you’re armed with tips, tricks, and answers to common questions, why not start small? Pick one planter or container this weekend, gather your supplies, and let your fall garden shine. The coziest season is calling—your outdoor oasis is waiting!