
Tools
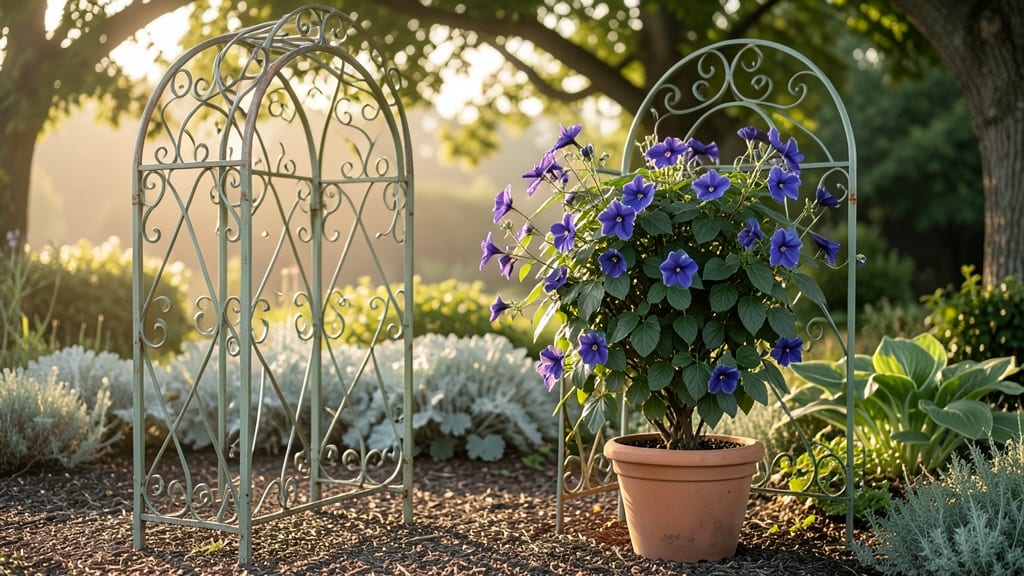
My garden iron arbor transformed a bare corner into a lush, romantic focal point—just by giving vines a place to climb. 🌿 The wrought iron curves instantly added architectural interest, while roses and clematis turned it into a living sculpture over the season.
It’s not just a trellis; it’s the centerpiece that ties your garden together.
You don’t need a sprawling yard to make this work—these arbors fit seamlessly into cottage gardens, modern landscapes, or even vertical spaces. The key is matching the design to your style: ornate scrollwork for a vintage look, sleek lines for contemporary spaces, or weathered finishes for rustic charm.
I chose a powder-coated finish to keep it looking fresh, but options range from classic black to soft pastels.
Pair it with the right plants for maximum impact: roses for fragrant blooms, clematis for dramatic height, or ivy for year-round greenery. A well-placed arbor can frame a path, highlight a seating area, or even create a privacy screen.
The best part? It grows more beautiful every year as the vines mature, giving you a living work of art without the upkeep of cut flowers.
Whether you’re designing a new garden or refreshing an old one, an iron arbor adds instant sophistication. Start small—even a single trellis can make a difference—and watch how it elevates your outdoor space. The possibilities are endless, and the results are pure garden magic.
📚 In This Guide
- What you need
- Instructions
- Tips and common mistakes
- Wrapping up and next steps
What you need
- ● Wrought iron pipes or rods – 2–3 inches in diameter, enough for: 4 vertical posts (8–10 ft tall)
- ● 2–4 horizontal beams (for frame structure)
- ○ Decorative lattice or trellis panels (optional but recommended)
- ● Concrete or metal footings – 4–6 bags of quick-setting concrete or pre-cast metal bases for stability.
- ● Galvanized or powder-coated metal connectors – 10–15 pieces (e.g., pipe clamps, brackets, or welds if DIY-friendly).
- ● Metal lattice or trellis sheets – 2–4 panels (6–8 ft wide) for vine support.
- ● Rust-proofing supplies – Paint, primer, or galvanized coating (e.g., spray paint or metal sealant).
- ● Measuring tape and level (for precision cuts and alignment).
- ● Pipe cutter or hacksaw (for clean cuts on wrought iron).
- ● Drill with metal bits (for connectors or pre-drilling).
- ● Wrench set (adjustable and socket wrenches for tightening bolts).
- ● Safety gear – Gloves, goggles, and a dust mask (iron filings fly!).
- ○ Optional: Welding kit (if custom designs are on the menu) or clamp set for extra stability.
- ● Location scouted – Ensure your arbor site is level and has 6+ feet of clearance for vines to thrive.
- ● Permits checked – Some areas require approval for structures over 4 ft tall.
- ● 💡 Pro Tip: Pre-drill holes in connectors to prevent cracking during assembly.
- ● 🌡️ Weather watch: Avoid assembly on wet or windy days—safety first!
Step-by-Step guide to installing a wrought iron arbor
Here's how to create a stunning focal point for your climbing vines—simple, sturdy, and elegant.
🪴 Step 1: Choose the Perfect Location
Pick a spot with 6+ hours of sunlight daily—most climbing vines thrive in full sun. Check the ground for levelness; an uneven surface will make installation tricky. I like to mark the corners with wooden stakes and string to visualize the arbor's footprint before digging.
Keep the arbor at least 3 feet from sidewalks or driveways to avoid tripping hazards. If your yard has slopes, opt for a slightly smaller arbor or reinforce the base with extra concrete. The goal is a stable structure that won't shift with seasonal weather changes.
☀️ Step 2: Prepare the Base and Assemble the Arbor
Dig four holes at the marked corners, each 12 inches deep and 6 inches wide. The holes should be slightly larger than the arbor's base posts to allow for concrete settling. Place the arbor's base plates into the holes and use a level to ensure they're perfectly even.
Mix the concrete according to package instructions—typically 1 part water to 3 parts dry mix. Pour the concrete into each hole, filling it to 2 inches below ground level. Insert the base posts into the wet concrete, tapping them gently to remove air bubbles. Let the concrete cure for 24 hours before proceeding.
🌱 Step 3: Attach the Arbor Structure
Once the base is fully set, attach the arbor's crossbars and lattice panels using the provided hardware. Start by securing the horizontal crossbars to the vertical posts with ½-inch galvanized screws. Tighten the screws firmly but don’t overtighten—wrought iron can warp if overstressed.
Install the lattice panels last, ensuring they’re evenly spaced and securely fastened. If your arbor has decorative finials or caps, attach these now. Give the structure a gentle shake to test stability—it should hold firm without wobbling. This is the moment that matters: a sturdy arbor will last for years.
💧 Step 4: Plant Your Climbing Vines
Dig holes for your vines 12-18 inches deep, spacing them 3-6 feet apart depending on the vine's mature size. Place each plant in its hole, ensuring the soil line matches the vine's original depth. Water deeply to settle the soil around the roots.
Gently weave the vine stems through the arbor’s lattice panels as they grow. For fast climbers like morning glories, you can loosely tie them to the lattice with soft twine. Avoid wrapping the stems tightly—this can restrict growth. Watch for new leaves emerging near the top of the arbor; that’s your signal the vines are establishing well.
✂️ Step 5: Maintain and Train the Vines
Prune vines regularly to encourage bushier growth and prevent overcrowding. In late winter or early spring, trim back any dead or weak stems to just above a healthy bud. This ensures fresh, vigorous growth when the season starts.
Check the arbor’s hardware annually for rust or loose screws. A quick wipe-down with a damp cloth and a light coat of outdoor paint will keep it looking sharp. Real talk: the more you tend to both the arbor and the vines, the more dramatic your garden will look by summer’s end.
Tips & tricks for perfect garden iron arbor installation
A few simple strategies will help you create a sturdy, beautiful arbor that lasts for years.
The Leveling Secret: In Step 1, when using your level to check the ground, don't just check once! Uneven ground can cause the arbor to tilt over time. I like to check levelness in both directions (north-south and east-west) at each corner stake. A tiny difference of 1/4 inch can make a big difference in stability over time. This is where most amateur installations go wrong.
Concrete Curing Wisdom: That 24-hour cure time in Step 2 is non-negotiable for a strong foundation. If you're impatient, don't rush it! I've seen people try to install the arbor after just a few hours, and the base posts shift when they test the structure. For extra peace of mind, you can actually let the concrete cure for 48 hours in hot weather or if you're using a particularly large arbor. The extra time prevents settling over time.
Screw Tightening Technique: When attaching the crossbars in Step 3, use a power drill with a torque setting or just your hands to tighten the ½-inch galvanized screws. Over-tightening can warp the delicate wrought iron. I learned this the hard way—my first arbor had a slight bend in the crossbars because I used a power drill without controlling the torque. A gentle hand and consistent pressure work best.
Vine Training Tip: In Step 4, when weaving vine stems through the lattice, don't be afraid to get creative with placement. I like to start by weaving the main stems vertically up one side, then horizontally across the top, creating a natural trellis effect. This gives your vines more surface area to climb and creates a beautiful architectural look. For fast-growing vines, you can even train them to spiral around the lattice for a more dramatic effect.
Pro Tips for Garden Iron Arbor
- A few simple strategies will help you create a sturdy, beautiful arbor that lasts for years.
- The Leveling Secret: In Step 1, when using your level to check the ground, don't just check once!
- Concrete Curing Wisdom: That 24-hour cure time in Step 2 is non-negotiable for a strong foundation.
Frequently asked questions
Got questions about your garden iron arbor?
Here are some of the most common ones—plus expert answers to help you make the most of your climbing vine haven!
What’s the best time of year to install a garden iron arbor?
The ideal time is early spring (before planting vines) or late fall (after harvest). This gives vines enough time to establish roots before summer heat or winter frost. If installing in summer, water deeply and monitor for stress—especially for delicate varieties like clematis or roses.
How do I prevent rust on my wrought iron arbor?
Wrought iron is durable, but rust can sneak in! Start with a weather-resistant coating (like spar urethane or powder coating) and reapply every 2–3 years. Avoid placing the arbor in shady, damp spots—opt for partial sun and elevate the base slightly to improve airflow. A quick wipe-down with a vinegar-water mix (1:3 ratio) keeps it fresh between treatments.
Which vines grow best on an iron arbor?
Not all vines are arbor-friendly! Top picks include:
- Clematis: Fast-growing, fragrant, and low-maintenance (needs winter mulch).
- Jasmine: Sweet-scented and drought-tolerant—perfect for trellises.
- Wisteria: Dramatic blooms but needs pruning to control growth.
- Roses (climbing varieties): Classic choice for romance and structure.
Can I DIY-assemble an iron arbor, or should I hire a pro?
Most iron arbors come with simple bolt-and-bracket instructions, but assembly depends on your comfort level. If the arbor is heavy (over 50 lbs) or requires concrete footings, team up with a friend or hire help. Pro tip: Use a level and lag bolts for stability—especially in windy areas!
What should I do if my arbor starts leaning or wobbling?
First, check the anchor points—loose bolts or shifting soil are usually the culprits. Tighten all connections and add gravel or sand around the base for drainage. For severe tilting, dig out the footings, add concrete piers, and re-level before backfilling. If the arbor is new, ensure it was installed on level ground with proper spacing between supports.
Are there affordable alternatives to wrought iron arbors?
Yes! Consider:
- Powder-coated steel: Rust-resistant and budget-friendly (look for galvanized options).
- Vinyl or resin: Lightweight and low-maintenance (great for renters).
- Wooden trellises: Rustic charm, but needs seasonal sealing.
- PVC pipes: DIY-friendly and cheap (best for lightweight vines).
Wrapping up and next steps
A garden iron arbor isn’t just a decorative piece—it’s a functional, timeless addition that elevates your outdoor space with charm and utility. Whether you’re a seasoned gardener or a beginner, this wrought iron beauty offers endless possibilities for climbing vines, cozy seating areas, or even a stunning focal point. 🌿✨
Now that you’re equipped with the materials, tips, and answers to tackle your project, it’s time to roll up your sleeves and bring your vision to life! Start by sketching your design, gathering supplies, and let your creativity grow—your garden’s new centerpiece awaits. Happy building!