Planting
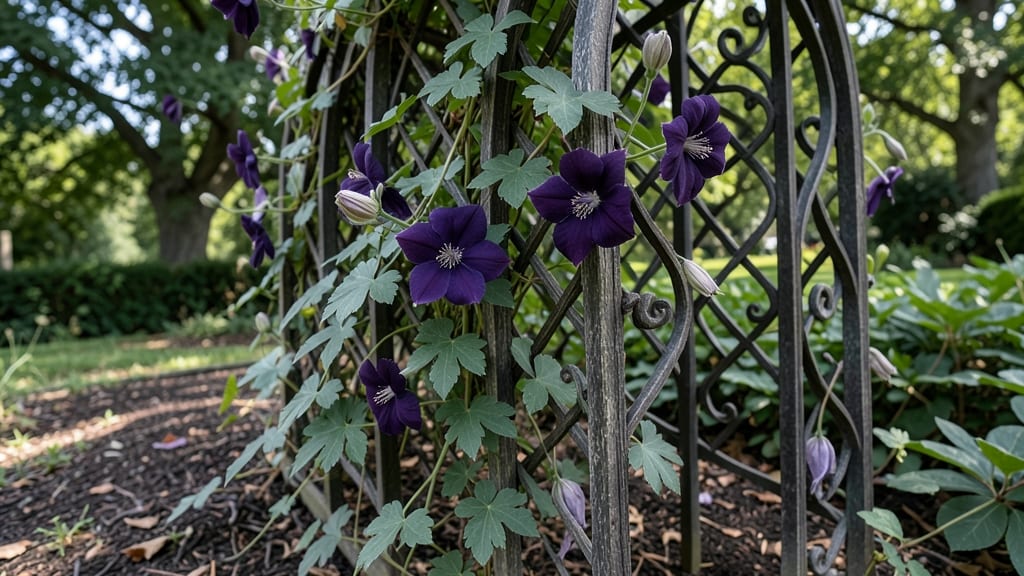
My garden plant ornaments aren't just decorations—they're living art that grows more beautiful every year. 🌿 I started with a single ornamental grass and now my yard tells stories through plants that sway, bloom, and change with the seasons.
The best part? These aren't static decorations; they're plants that thrive while adding character to your space.
Think beyond traditional garden decor—we're talking about plants like Japanese maples with their fiery fall colors, lavender bushes that perfume the air, or ornamental peppers that add a pop of color long after their harvest.
Pair them with garden art like wind chimes or mosaic stepping stones, and you've got a scene that feels alive and intentional. The key is mixing textures: feathery grasses next to bold-leafed shrubs, or delicate flowers climbing trellises.
You'll end up with a garden that feels like a curated gallery, where every element has purpose. The lavender attracts bees, the grasses sway in the breeze, and the colors shift with the seasons—purple spring blooms turning to golden autumn foliage.
It's not just pretty; it's functional and full of life. Let's turn your yard into a living masterpiece.
Works for any style—cottage gardens, modern landscapes, or rustic retreats. The only limit is your imagination. Start small with a single statement plant, then build from there. Your garden will thank you for the transformation.
📚 In This Guide
- What you need
- Instructions
- Tips and common mistakes
- Wrapping up and next steps
What you need
- ● Base Materials (Choose 1-2): Terracotta pots (various sizes, 3–10 inches in diameter)
- ● Concrete mix (5–10 lbs, for custom shapes)
- ● Resin or epoxy (1–2 quarts, for durable, weatherproof designs)
- ● Wooden stakes or planks (for rustic looks, ½–1 inch thick)
- ● Decorative Elements: Paint (acrylic or outdoor-safe, in garden-themed colors)
- ○ Glitter or metallic flakes (for a touch of sparkle, optional)
- ● Moss, dried flowers, or faux greenery (for texture)
- ● Small figurines (animals, faces, or whimsical shapes)
- ● Tools & Extras: Paintbrushes (fine-tip for details, wider for base coats)
- ● Sandpaper (120–220 grit, for smoothing edges)
- ● Measuring tape and pencil (for precision)
- ● Sealant (waterproof, like Mod Podge Outdoor)
- ● Hot glue gun or strong adhesive (for securing elements)
- ● Weather Considerations: Work on dry, mild days (avoid extreme heat or rain).
- ● Plant Compatibility: Ensure ornaments won’t harm plants (e.g., avoid sharp edges near delicate foliage).
- ○ Safety Gear (Optional but Recommended): Gloves (for handling resin or concrete)
- ● Safety goggles (if sanding or mixing chemicals)
Step-by-Step guide to creating whimsical garden plant ornaments
Bring your garden to life with living decorations that grow and evolve alongside your space.
🌱 Step 1: Select Low-Maintenance Ornamental Plants
Choose plants that thrive in your climate and require minimal care—think boxwood topiaries, dwarf conifers, or ornamental grasses. These hold their shape well and add structure to your garden. I like to pick plants with interesting textures or colors, like silver-blue foliage or variegated leaves, because they stand out as natural art pieces.
Visit a local nursery and select 4-6 plants that match your garden’s style. Look for healthy specimens with firm stems and vibrant leaves. Avoid plants with yellowing or brown spots—they won’t last as long as decorations. Skipping this step means your ornaments might wilt or look sad within weeks.
🪴 Step 2: Choose Containers and Planting Spots
Use decorative pots or planters that complement your garden’s aesthetic. Terra cotta, ceramic, or even repurposed items like vintage teapots or wooden crates work beautifully. Place each plant in its container, ensuring the pot has drainage holes to prevent root rot—this is non-negotiable for long-term health.
Position your ornaments in spots where they’ll be visible year-round. Near pathways, entryways, or garden focal points ensures they’re both functional and eye-catching. If you’re using topiaries, trim them slightly before planting to encourage bushier growth. This step sets the foundation for how your garden will look for years to come.
✂️ Step 3: Shape and Prune for Whimsy
Once planted, shape your ornaments to match your vision. Use sharp pruning shears to trim boxwood into spirals, cones, or even animals. For grasses, gently weave stems together to create flowing patterns. I like to prune in the morning when the plants are hydrated—this makes cutting cleaner and reduces stress on the plant.
Prune gradually over a few weeks to avoid shocking the plant. Watch for new growth to guide your shaping. If you’re unsure about a shape, start with simple forms like spheres or pyramids—they’re forgiving and timeless. This is where your garden ornaments truly come to life as art.
💧 Step 4: Maintain Water, Light, and Care
Water your ornaments deeply once a week, or more often if your climate is hot and dry. Check the soil—it should feel moist but not soggy. Overwatering is a common mistake that can kill your living decorations faster than anything else. Use a watering can with a narrow spout to direct water to the roots without wetting the leaves.
Place your ornaments in areas with 6+ hours of sunlight daily, unless you’re growing shade-loving varieties. Fertilize lightly every 4-6 weeks with a balanced, slow-release fertilizer to keep them lush. This step ensures your ornaments stay vibrant and healthy, ready to impress for seasons to come.
☀️ Step 5: Seasonal Adjustments for Longevity
In fall, trim back any dead or overgrown foliage to prepare for winter. Wrap tender plants in burlap or move them indoors if frost is expected. I always mark my calendar to do this before the first frost—it saves my ornaments from winter damage and ensures they bounce back in spring.
In spring, give your ornaments a fresh trim and a boost of fertilizer. This is the time to refresh their shapes and add new life to your garden. With a little care, your living decorations will thrive for years, becoming cherished parts of your outdoor space.
Tips & tricks for perfect garden plant ornaments
Transforming plants into living art takes patience and a few key tricks I've learned from years of trial and error.
Plant Selection Wisdom: In Step 1, don't just grab the first plants you see. Look for boxwood topiaries with dense foliage and dwarf conifers that hold their shape well—these are the workhorses of garden ornaments. I always check for new growth at the tips of stems, as this indicates healthier plants that will recover better from shaping. Avoid plants with yellowing leaves or soft stems, even if they're on sale—those are signs of poor health that will show up in your ornaments within weeks.
Container Strategy: The containers you choose in Step 2 make all the difference. Terra cotta pots work beautifully for Mediterranean-style gardens, while ceramic planters add a more formal touch. Pro tip: Place a layer of gravel at the bottom of each container before adding soil—this creates better drainage and prevents root rot, which is especially important for ornamental grasses that hate soggy roots. I also like to use containers with built-in saucers to catch any excess water and keep my pathways clean.
Pruning Like a Pro: When shaping in Step 3, work in stages rather than trying to perfect everything at once. Start with broad strokes to establish your basic shape, then refine over several sessions. I've found that pruning in the morning gives cleaner cuts because the plants are fully hydrated. For boxwood, I make my cuts at a slight angle to prevent water from pooling on the leaves, which can lead to fungal issues. And remember—less is often more. It's easier to trim back than to try to regrow lost foliage.
Seasonal Care Calendar: Mark your calendar for the fall prep in Step 5—this is when most plant damage occurs. I always do a final trim in late September, then wrap my tender plants in burlap and move them to a sheltered spot before the first frost. For spring, I like to fertilize right after my last frost date, which gives the plants a boost as they start their new growth cycle. This simple seasonal routine has kept my ornaments thriving for over a decade!
Pro Tips for Garden Plant Ornaments
- Transforming plants into living art takes patience and a few key tricks I've learned from years of trial and error.
- Plant Selection Wisdom: In Step 1, don't just grab the first plants you see.
- Container Strategy: The containers you choose in Step 2 make all the difference.
Frequently asked questions
Got questions about adding charm to your garden with plant ornaments? You’re not alone! Here are some of the most common queries—plus simple, practical answers to help you get started.
What are the best materials for outdoor garden plant ornaments?
Opt for weather-resistant materials like resin, ceramic, or metal (e.g., copper or wrought iron) to ensure longevity. Avoid porous materials like untreated wood or fabric, as they can degrade quickly in rain, sun, or humidity. For a rustic touch, seal natural elements like stones or driftwood with outdoor-safe sealant.
When is the best time to install garden plant ornaments?
Install ornaments before planting (early spring or fall) to avoid disturbing roots. If adding to an established garden, place them after pruning or mulching to keep the space tidy. For seasonal decor (like pumpkins or holiday figures), follow local planting schedules to align with your garden’s rhythm.
Can I make DIY garden plant ornaments instead of buying them?
Try repurposing terracotta pots, glass jars, or even old tools (like rakes or trowels) as quirky decor. Paint them with outdoor-safe paint or wrap them in moss for a natural look. Upcycling not only saves money but also adds a personal, eco-friendly touch to your garden.
How do I keep garden ornaments from attracting pests?
Pests like slugs or spiders may hide in crevices of ornaments. To deter them:
- Smooth surfaces: Choose ornaments with minimal nooks (e.g., polished stones or sleek metal).
- Regular cleaning: Wipe down ornaments with soapy water monthly to remove debris.
- Natural repellents: Place citrus peels or diatomaceous earth nearby for a chemical-free solution.
Will garden plant ornaments survive winter or heavy rain?
Most high-quality materials (resin, ceramic, or sealed wood) handle winter well, but extreme cold or ice can crack delicate pieces. Store fragile ornaments indoors (like glass figures) and elevate others on pedestals to prevent water pooling. For heavy rain, ensure ornaments have drainage holes if placed in soil.
How can I match ornaments to my garden’s style?
Start by noting your garden’s color palette, theme, and scale. For a cottage garden, opt for vintage teacups or painted stones. Modern spaces pair well with geometric metal sculptures or minimalist planters. Pro tip: Mirror your home’s decor—e.g., a farmhouse garden benefits from rustic barn signs, while a Zen garden thrives with smooth river rocks.
Wrapping up and next steps
Transforming your garden into a living work of art with plant ornaments is easier—and more rewarding—than you think! These charming additions blend beauty with functionality, offering year-round interest while requiring minimal upkeep.
Whether you’re drawn to sculptural plants, whimsical topiaries, or vibrant annuals, the key is to let your creativity grow alongside your greenery. 🌿
Ready to take the next step? Start small—pick one plant ornament that excites you, gather your supplies, and begin crafting your garden’s new focal point. Before you know it, your outdoor space will be a showstopper that delights every season!