Tools
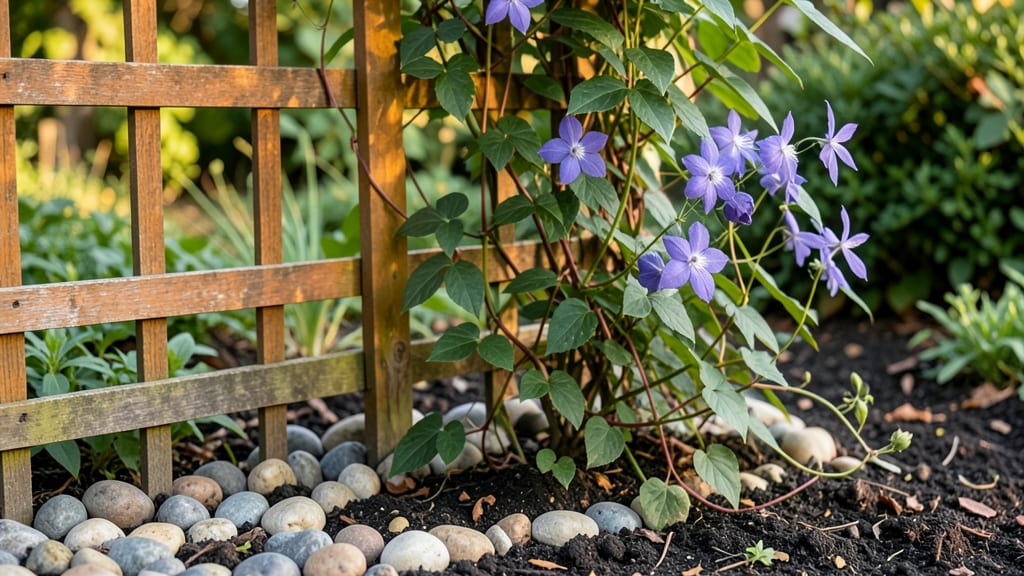
A garden vine trellis turns wasted vertical space into a lush, productive corner that transforms your yard into a living tapestry. 🌿 I’ve seen overgrown vines strangle themselves on fences, but the right trellis keeps them organized, healthy, and eye-catching—whether you’re growing grapes, beans, or roses.
The difference between a tangled mess and a structured, thriving vine is just the right support.
Your trellis should match both your plants and your style—wood for rustic charm, metal for durability, or plastic for lightweight versatility. For heavy climbers like grapes, opt for sturdy 8-foot posts with crossbars; for lighter plants like morning glories, a simple 4-foot lattice panel works perfectly.
The key is spacing: vines need room to grip and grow without crowding each other.
With the right setup, you’ll watch your vines climb into sunlit canopies by midsummer, producing more flowers, fruit, or foliage than they ever could sprawled on the ground.
Plus, trellises make harvesting easier—no more bending or squatting. Whether you’re working with a tiny balcony or a sprawling backyard, this is how to make every inch count.
Pro tip: Angle trellises toward the sun for maximum growth, and mix heights to create layers in your garden. Start small—even a single trellis can anchor your design and inspire bigger ideas. Let’s get growing upward!
📚 In This Guide
- What you need
- Instructions
- Tips and common mistakes
- Wrapping up and next steps
What you need
- ● Trellis frame: Wooden posts (4x4 or 6x6, pressure-treated) – 2-4 posts, 6-8 ft tall
- ● Horizontal slats (1x2 or 2x2 lumber) – 4-6 pieces, 4-6 ft long
- ● OR pre-made trellis panels (metal, wood, or PVC) – 1-2 panels, size to match your space
- ● Fasteners: Galvanized screws or decking screws – 1-2 lbs
- ● L-brackets or corner braces – 4-6 pieces
- ● Support base: Concrete footings or gravel – for stability
- ● OR heavy-duty stakes – 4-6 stakes, 12-18" long
- ● Measuring tape
- ● Speed square or level
- ● Drill/driver with screw bits
- ● Circular saw or handsaw
- ● Post hole digger (if using footings)
- ● Hammer (for stakes)
- ● Safety gloves & goggles
- ● Stain or paint (for weatherproofing)
- ● Lattice or chicken wire (for extra climbing support)
- ● Plant ties or soft twine (to guide vines)
- ● Decorative elements (e.g., mosaic tiles, rope accents)
- ● Post caps (for a polished look)
Step-by-Step instructions for building a sturdy garden vine trellis
Here's how to create a functional, attractive support system for your climbing plants—no specialized tools required.
🪴 Step 1: Choose and Prepare Your Materials
For a 4-foot tall trellis (serving four climbing plants), gather two 8-foot wooden posts (4x4 inches), four 6-foot wooden slats (2x4 inches), and six 3-foot wooden crossbeams (2x2 inches). I like using cedar or redwood because they resist rot naturally, but treated pine works too if you seal it first. Cut the posts to your desired height—6 feet is ideal for most vines.
Mark the posts at 12-inch intervals starting from the bottom. These marks will guide where your crossbeams attach. Pre-drill holes at each mark to prevent wood splitting when you attach the crossbeams later. Use a ½-inch drill bit for clean, secure connections.
🌱 Step 2: Assemble the Vertical Posts and Crossbeams
Place the two posts 4 feet apart on level ground, parallel to each other. This spacing ensures your trellis can support heavy vines like clematis or grapes without sagging. Use a 4-foot level to check alignment before securing. If the ground isn’t perfectly flat, adjust by adding gravel or sand under one post until both stand upright.
Attach the first crossbeam 6 inches from the bottom of each post, using 3-inch exterior wood screws. Space the screws 2 inches from the edges of the wood to maximize strength. Repeat this process at each marked interval—12, 24, 36, and 48 inches—until all crossbeams are in place. This creates a ladder-like structure that vines can grip and climb.
✂️ Step 3: Add Horizontal Slats for Vine Guidance
Install the 2x4-inch slats horizontally between the posts, spacing them 12 inches apart vertically. These slats act as guides, helping vines spread evenly and preventing them from tangling. Secure each slat with 2½-inch deck screws at both ends, ensuring they’re flush with the crossbeams for a clean look.
For a diagonal trellis (better for heavy vines like pole beans or kiwi), angle the slats at 45 degrees instead of keeping them straight. This design distributes weight more evenly and looks more dynamic. Test the stability by gently pushing the trellis—it should hold firm without wobbling.
☀️ Step 4: Secure the Trellis and Prepare for Planting
Dig 6-inch deep holes at each post’s base, burying half the post length for stability. Fill the holes with gravel (for drainage) and then soil, tamping firmly as you go. If your trellis is near a fence or wall, brace it with additional stakes for extra support in windy conditions.
Now, it’s time to train your vines. For self-clinging plants like ivy or morning glories, the crossbeams alone will work. For twining vines like cucumbers or squash, weave the tendrils through the slats as they grow. Watch for new growth—this is when you’ll gently tie stems to the trellis with soft plant ties to encourage upward growth.
💧 Step 5: Maintain and Adjust as Needed
Check the trellis every 2-3 weeks for signs of stress—sagging slats or loose screws mean it’s time to tighten connections. If vines grow too thick, prune them to prevent overcrowding, which can weaken the structure. In winter, remove annual vines and store the trellis or leave it in place for perennials like clematis or wisteria.
Here’s the thing—a well-built trellis lasts years. The key is regular maintenance: tighten screws annually, replace any rotted wood, and adjust ties as vines thicken. You’ll see the difference in healthier, more productive plants within a single growing season.
Tips & tricks for perfect garden vine trellis construction
A few strategic approaches will transform your trellis from functional to flawless—here's how to avoid common pitfalls and build with confidence.
Material Selection Matters: While cedar and redwood resist rot naturally, treated pine offers an affordable alternative—just seal it with outdoor wood finish to extend its lifespan. For extra durability, consider pressure-treated lumber if building near moisture-prudent areas. The 4x4 posts provide the necessary stability, but if you're supporting particularly heavy vines like grapes, opt for 6x6 posts instead. This upgrade prevents sagging over time and makes all the difference for long-term support.
Precision in Assembly: In Step 2, when marking your 12-inch intervals, use a tape measure and pencil to create clean, straight lines. The key is consistency—each crossbeam should align perfectly to create that professional ladder look. I've learned the hard way that uneven spacing leads to wobbling, especially when vines start growing. For extra stability, consider adding a diagonal brace between posts if your garden experiences strong winds. This simple addition prevents leaning and extends your trellis's lifespan significantly.
Slat Angle Innovation: The diagonal slat option in Step 3 isn't just decorative—it's a game-changer for heavy vines. When angled at 45 degrees, the slats distribute weight more evenly, preventing the classic "sagging middle" problem. Test stability by gently pushing the completed frame before planting. If it wobbles, add a horizontal support beam between posts at mid-height. This subtle modification transforms your trellis from basic to premium support system.
Long-Term Maintenance Strategy: The 2-3 week maintenance check in Step 5 is non-negotiable for longevity. I've seen trellises collapse after just one season when screws weren't tightened annually. Keep a small toolkit with you during garden visits—tightening screws and adjusting ties takes just minutes but prevents costly replacements. For winter storage, remove all plant ties and store them in a dry place to prevent rot. This simple habit makes reassembly in spring effortless.
Pro Tips for Garden Vine Trellis
- A few strategic approaches will transform your trellis from functional to flawless—here's how to avoid common pitfalls and build with confidence.
- Material Selection Matters: While cedar and redwood resist rot naturally, treated pine offers an affordable alternative—just seal it with outdoor wood finish to extend its lifespan.
- Precision in Assembly: In Step 2, when marking your 12-inch intervals, use a tape measure and pencil to create clean, straight lines.
Frequently asked questions
Got questions about garden vine trellises?
Here are some of the most common ones—plus straightforward answers to help you get started with confidence!
1. What’s the best material for a vine trellis?
A durable trellis depends on your needs: wood (like cedar or redwood) is classic and sturdy, metal (galvanized or wrought iron) resists rot, and plastic (PVC or resin) is lightweight and budget-friendly. For heavy climbers (e.g., grapes or wisteria), opt for metal or thick wooden beams. Lighter vines (like morning glories) thrive on simple wooden or bamboo frames.
2. When is the best time to install a vine trellis?
Install your trellis in early spring (before planting) or late fall (after harvest) for best results. If planting perennials, set it up at least 4–6 weeks before vines start growing to give roots time to establish. For annuals, install it right after sowing seeds or transplanting seedlings.
3. Can I use a trellis for non-climbing plants?
While trellises are designed for vines, they’re also great for tall herbs (like rosemary or lavender), small trees (e.g., dwarf fruit trees), or even ornamental grasses. Just ensure the structure is wide enough to support the plant’s mature size. For non-climbers, add horizontal slats or mesh to create more surface area for stability.
4. How do I keep vines from falling off my trellis?
Use soft ties (like garden twine, fabric strips, or velcro plant ties) to gently secure vines as they grow—never use wire, which can damage stems. Train vines to climb by weaving them through trellis openings (don’t just tie them at the top!). For aggressive growers (like pumpkins or cucumbers), add extra cross-bracing to prevent sagging.
5. What if my trellis isn’t strong enough for my plants?
If your trellis bends or sags, reinforce it with stakes or additional supports (like bamboo poles or metal rods). For DIY fixes, add diagonal braces between posts or anchor the base with concrete or heavy rocks. If using a freestanding trellis, bury the posts at least 12 inches deep for extra stability. For heavy loads, consider a metal cage or A-frame trellis.
Pro Tip:
Need a quick fix? Repurpose materials like old ladders, fences, or even a sturdy pergola as a trellis! Just ensure it’s tall enough for your vines’ mature height (check plant tags for guidance).
Wrapping up and next steps
Transforming your garden with a vine trellis isn’t just about saving space—it’s about creating a thriving, vertical oasis that’s both functional and beautiful. Whether you’re a seasoned gardener or just starting out, the right trellis can elevate your plants while adding charm to your outdoor space.
Now that you’re equipped with the how-tos, materials, and answers to common questions, there’s no better time to get started!
Ready to turn your vision into reality? Pick your favorite climbing plants, gather your supplies, and start building—or shop for a pre-made trellis—today! Your garden’s next masterpiece is just a few steps (and vines) away. 🌿✨