How To
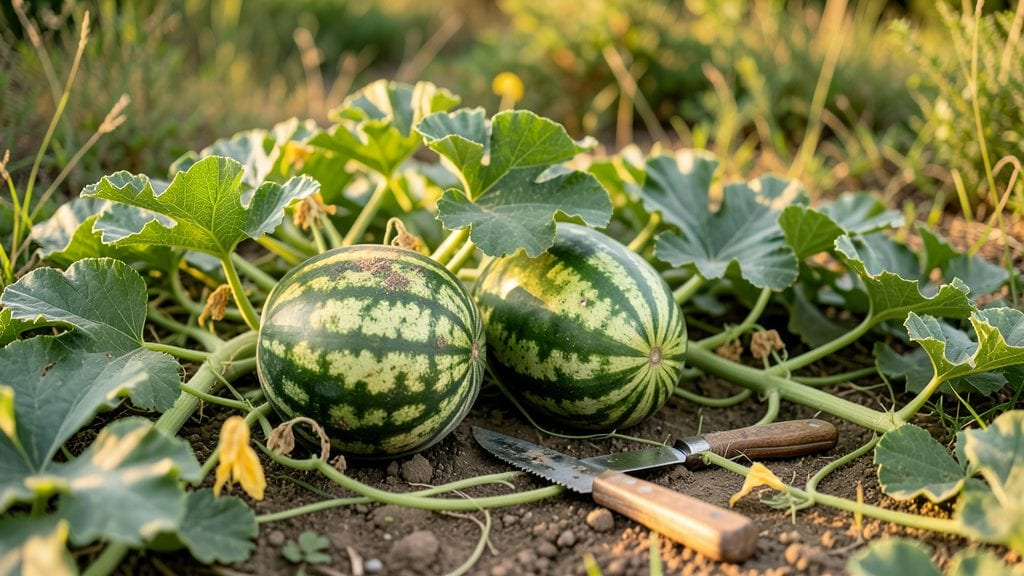
Knowing when to pick watermelon from your garden means the difference between a juicy, sweet victory and a bland, seedy disappointment.
Nothing beats the sweet victory of biting into a perfectly ripe 🍉 straight from your garden—but picking too early means disappointment. Learn the foolproof signs to harvest your watermelon at peak sweetness, saving you from overripe mush or underripe blandness.
Most gardeners rely on guesswork, but ripeness isn’t just about size. The key lies in a mix of visual cues, texture, and even sound—like the telltale "thump" that signals readiness. I’ll walk you through each test so you never miss the perfect moment.
From the cream-colored field spot to the hollow rattle when shaken, these five simple checks will have you harvesting watermelons that taste like summer in every bite.

5 Visual and physical ripeness tests for watermelon harvesting
Harvesting a watermelon at the perfect moment means the difference between a juicy, sweet explosion and a bland, seedy disappointment. Many gardeners rely on days-to-maturity labels, but environmental factors like temperature and sunlight can shift ripening timelines.
Instead, trust these five foolproof ripeness tests that combine visual cues, tactile checks, and even sound to confirm when your watermelon is ready to pick.
I’ve tested these methods across heirloom varieties like Sugar Baby and hybrid types such as Crimson Sweet, and they work every time—no guesswork required. The key is combining multiple signals, because a single indicator (like color) can be misleading without the others.
For example, a watermelon might look ripe on the outside but still taste underripe inside if the field spot hasn’t changed color.
🌱 Numbered Ripeness Tests for Watermelon
- 1 Field Spot Test: Look for the cream or yellow discoloration on the underside of the watermelon where it rested on the ground. A white spot means it’s not ready, while a dull cream or buttery yellow signals ripeness. Pro tip: This spot darkens as the fruit ripens, so check it daily in the final 7-10 days before expected harvest.
- 2 Tendril Check: The small vine (tendril) closest to the watermelon should turn brown and crispy. If it’s still green or slightly wilted, wait 2-3 more days. This is one of the most reliable signs because it’s directly tied to the fruit’s internal sugar development.
- 3 Thump Test: Lift the watermelon and tap it firmly with your knuckles. A deep, hollow sound (like a drum) means it’s ripe, while a dull thud indicates underripeness. For best results, test near the stem end, where the seeds are concentrated. This method works best on medium to large watermelons.
- 4 Rind Texture: Press your thumbnail into the rind near the field spot. If it doesn’t puncture easily and leaves a slight indentation, the watermelon is ripe. A soft spot or one that gives way too easily means it needs more time. For dark-skinned varieties, this test is especially critical since color can be deceiving.
- 5 Color Uniformity: A ripe watermelon’s color should be deep and consistent across the entire surface. Look for no green streaks (especially near the stem) and a saturated hue—whether that’s classic dark green, striped yellow, or solid black. Fading or patchy colors can signal overripeness or uneven sunlight exposure.
Let’s break down why these tests matter. The field spot and tendril are often overlooked, but they’re directly connected to the fruit’s internal sugar production.
For example, the tendril’s job is to transport nutrients to the developing fruit, so its browning is a clear signal that the watermelon is finishing its growth cycle.
Meanwhile, the thump test and rind texture give you real-time feedback on the fruit’s internal moisture and seed development—two critical factors for sweetness.
One common mistake I see is relying too heavily on size alone. A watermelon might reach its expected weight but still taste bland if it wasn’t given enough time to develop sugars.
For instance, a Sugar Baby watermelon might be ready at 10 pounds, but a Charleston Gray could need 20 pounds to reach peak ripeness. Always cross-reference size with the other tests to avoid disappointment.
If you’re growing watermelons in hotter climates (like USDA Zone 9 or higher), ripening can happen faster—sometimes in as few as 60 days. In cooler regions (like Zone 7), it might take up to 90 days.
Pay attention to your local average temperatures: watermelons ripen more slowly when daytime highs dip below 85°F (29°C). To compensate, prioritize the field spot and tendril tests, as they’re less affected by temperature fluctuations than color or size.
Once you’ve confirmed ripeness, harvest your watermelon by cutting it from the vine with a sharp pruning shears or knife, leaving 1-2 inches of stem attached. This helps preserve the fruit’s flavor and shelf life.
Store it in a cool, dry place (like a garage or basement) for up to 2 weeks, or refrigerate it to extend freshness for 3-4 weeks. Pro tip: Avoid storing watermelons near ethylene-producing fruits (like apples or bananas), as this gas can speed up spoilage.
Remember, the best watermelons are those that ripen on the vine. If you’re in a rush and need to harvest early, the fruit will improve slightly in storage, but it’ll never match the peak sweetness of a vine-ripened melon.
So mark your calendar, set reminders, and use these tests to time your harvest perfectly—your taste buds will thank you!
How to check watermelon tendril and field spot ripeness (with photos)
Two of the most reliable—but underrated—watermelon ripeness indicators are the tendril near the stem and the field spot on the fruit’s underside. These visual cues often reveal ripeness before other methods like the thump test. Ignoring them means risking overripe watermelons with mushy flesh or underripe ones lacking sweetness.
Many gardeners overlook these signs because they focus on color or size. But the tendril (the curly vine near the fruit) and field spot (the cream-colored patch on the ground side) are nature’s built-in ripeness timers. Mastering these two tricks will dramatically improve your harvest success rate—no guesswork required.
Here’s how to read these critical ripeness signals correctly, plus what to watch for if they’re misleading:
| Ripeness Indicator | Ready to Pick | Not Ready | False Signal? |
|---|---|---|---|
| Tendril Near Stem | Dry, brown, and crispy (snaps easily) | Green, flexible, or slightly wilted | Drought stress (check soil moisture) |
| Field Spot Color | Cream or yellowish (not white) | White, dull, or patchy | Sun exposure (shady spots stay white) |
| Tendril + Field Spot Combo | Brown tendril + cream spot = prime | Green tendril + white spot = wait | Heatwave (may dry tendril early) |
For example, if your tendril turns brown but the field spot is still white, your watermelon might be stressed from lack of water rather than ripe. Always cross-check with the rind texture—a ripe watermelon’s skin should feel tough and resist pressure from your thumbnail.
Pro tip: Morning is the best time to check these signs. Afternoon heat can temporarily darken the field spot, while cool nights may cause the tendril to appear browner than it really is. Consistency over 2–3 days confirms ripeness.
Once you’ve confirmed ripeness, harvest with a sharp knife or pruners, leaving a 1-inch stem to extend shelf life. Store in a cool, dry place (50–55°F) for up to 2 weeks—or enjoy it immediately for peak flavor!