Light Requirements
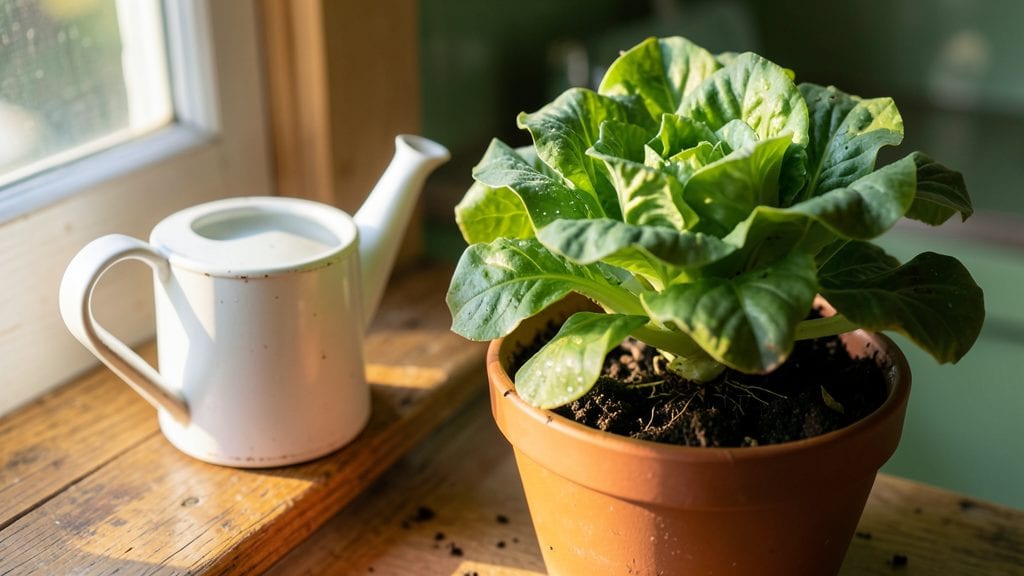
An indoor kitchen garden with thriving herbs can transform your countertop into a fragrant, functional oasis—if you maximize the light. 🌿 I’ve turned my tiny galley kitchen into a year-round herb factory by stacking windowsills, using reflective surfaces, and choosing plants that tolerate lower light, like parsley and thyme.
The key isn’t just picking the right herbs—it’s arranging them so every leaf gets its share of sun.
Start with a south-facing window (or the brightest spot you have) and group plants by their light needs. Tall herbs like basil and dill go in the back, while shade-tolerant ones like chives and mint take the front.
Add a small grow light on a timer if natural light is weak—just 4-6 hours a day keeps them happy. You’ll need shallow pots with drainage, a spray bottle for humidity, and a rotating schedule so all sides get even light.
Within weeks, you’ll have snippable basil for pesto, fresh cilantro for tacos, and mint that actually tastes good (no more bitter store-bought!). The best part? No more forgetting to water—these compact layouts mean quick checks and minimal mess.
Plus, the greenery makes cooking feel like a whole experience, not just a chore.
Works in apartments, kitchens with no windows, or even under fluorescent lights—just adjust the plant choices. The secret is flexibility: if one spot flops, move it. Your kitchen (and your meals) will thank you.
📚 In This Guide
- What you need
- Instructions
- Tips and common mistakes
- Wrapping up and next steps
What you need
- ● Containers: 3–5 window-sill-friendly pots (6–12" diameter, drainage holes included). Terra cotta or fabric pots work best.
- ○ 1 self-watering planter (optional, for low-maintenance setups).
- ● Growing Medium: 3–5 lbs of well-draining potting mix (avoid garden soil—it compacts!). Look for organic herb/vegetable blends.
- ○ 1 cup perlite or vermiculite (for aeration, optional but helpful).
- ● Herb Starters: 6–10 live herb plants (basil, parsley, thyme, mint, or cilantro—pick sun-loving varieties!). Seedlings grow faster than seeds for beginners.
- ● 1 small hand trowel (for gentle soil adjustments).
- ● 1 spray bottle (for misting leaves—herbs love humidity!).
- ● 1 measuring cup (for precise watering, ~½ cup per pot weekly).
- ○ 1 pH testing kit (optional, to keep soil between 6.0–7.0 for optimal growth).
- ● A south-facing window (or grow lights if natural light is limited—4–6 hrs/day minimum).
- ● Space for airflow (crowded pots = moldy herbs).
- ● Patience! Herbs like basil thrive in 2–3 weeks, while rosemary takes 4–6.
Step-by-Step instructions for designing sunlight-maximizing indoor herb gardens
Here’s how to arrange your kitchen garden for maximum light and airflow—no fancy tools needed.
🪴 Step 1: Choose the Right Containers and Locations
Start by selecting 4 containers (any size from 6-12 inches deep) with drainage holes—herbs hate soggy roots. Place them near your brightest window (south-facing is ideal) or under grow lights if natural light is limited. I like to use a mix of terra cotta pots for breathability and lightweight plastic containers for easy moving.
Rotate containers a quarter turn every 2-3 days so plants grow evenly toward the light. If using a windowsill, avoid drafty spots near air vents or exterior doors—herbs like basil and parsley wilt in cold drafts. Watch for leaves leaning toward the light; that’s your cue to reposition.
☀️ Step 2: Arrange Plants by Sunlight Needs
Group sun-loving herbs (basil, thyme, oregano) together near the southernmost window where they’ll get 6+ hours of direct light daily. Place moderate-light herbs (parsley, cilantro, dill) slightly farther back where they’ll still catch 4-6 hours of bright, indirect light. Shade-tolerant herbs like mint or chives can go in the dimmest corner.
Keep containers 6-12 inches apart to allow airflow—crowding invites fungal diseases. If your kitchen only has one sunny spot, prioritize high-value herbs like basil or rosemary, which grow well even in 4-5 hours of light if supplemented with a grow light for 2-3 hours daily.
💧 Step 3: Water and Maintain Consistent Moisture
Use the 4 cups of water from your supplies to keep soil evenly moist but not waterlogged. Stick your finger 1 inch into the soil—if it feels dry, water thoroughly until it drains from the bottom. Herbs like basil need water every 2-3 days, while rosemary and thyme prefer drier soil and should be watered every 5-7 days.
Mist leaves occasionally with a spray bottle to boost humidity, especially in dry winter air. You’ll notice herbs like parsley wilt slightly in the morning if they’re thirsty—water them immediately, but avoid soggy soil. Overwatering is the #1 killer of indoor herbs, so when in doubt, wait a day.
✂️ Step 4: Prune and Harvest Regularly
Pinch off the top sets of leaves when plants reach 4-6 inches tall to encourage bushier growth. For basil, harvest outer leaves first to keep the plant compact and productive. Rosemary and thyme can be trimmed back by one-third in spring to promote new growth—just avoid cutting into old wood.
Harvest in the morning when oils are most concentrated. If you see yellowing leaves, trim those first—they’re a sign of overwatering or nutrient depletion. Replace old soil every 3-4 months with fresh potting mix to keep herbs thriving, and fertilize lightly with balanced liquid fertilizer every 4-6 weeks during growing season.
🌿 Step 5: Troubleshoot Common Issues
If leaves turn yellow between veins, it’s usually overwatering—let the soil dry out more between waterings. Brown tips mean the air is too dry; group plants closer together or use a pebble tray under containers. Leggy growth signals insufficient light—move plants closer to the window or add a grow light.
Pests like aphids are rare indoors, but if you spot them, wipe leaves with a soapy water spray (1 tsp mild soap per quart of water). Rotate containers weekly to prevent uneven growth, and wipe windowsills monthly to remove dust blocking light. With these adjustments, your herbs will stay lush and flavorful all year.
Tips & tricks for perfect indoor herb gardens
Here's what nobody tells you about keeping your kitchen herbs thriving—these tricks make all the difference.
Light Strategy: In Step 2, when arranging your herbs by sunlight needs, remember that window light varies dramatically. South-facing windows provide the most consistent light, but even there, light intensity drops by 50% in winter. If your herbs start looking leggy (stretching toward light), supplement with a grow light for 2-3 hours daily—this mimics summer sunlight and prevents weak growth. I keep mine 6-12 inches above the plants for even coverage.
Container Material Matters: The containers you choose in Step 1 affect moisture control more than you might think. Terra cotta pots dry out faster, which works well for rosemary and thyme but can stress basil. For moisture-loving herbs, opt for plastic containers—they retain water better. Pro tip: Place a 1-inch layer of pebbles at the bottom of containers before adding soil to improve drainage and prevent root rot.
Watering Wisdom: Step 3's watering instructions are spot-on, but here's the secret: water in the morning so leaves have all day to dry. Wet foliage at night invites fungal diseases. I use a spray bottle to mist leaves occasionally—this boosts humidity without overwatering the soil. For the 4 cups of water mentioned, divide it evenly among containers based on size: larger pots may need slightly more.
Pruning Payoff: When you reach Step 4 and start pruning, here's what I've learned: always use clean, sharp scissors to avoid damaging stems. For basil, I harvest leaves in pairs rather than single leaves to encourage branching. And here's a game-changer: save your basil cuttings in water—they'll root in 7-10 days and give you free new plants!
Pro Tips for Indoor Kitchen Gardens
- Here's what nobody tells you about keeping your kitchen herbs thriving—these tricks make all the difference.
- Light Strategy: In Step 2, when arranging your herbs by sunlight needs, remember that window light varies dramatically.
- Container Material Matters: The containers you choose in Step 1 affect moisture control more than you might think.
Frequently asked questions
Got questions about starting your own indoor kitchen garden?
You’re not alone! Here are answers to the most common queries to help you grow with confidence.
How much sunlight do indoor herbs really need?
Most herbs thrive with 4–6 hours of bright, indirect light daily. South- or west-facing windows are ideal, but supplement with a grow light (12–16 hours/day) if natural light is limited. Leafy herbs like basil tolerate lower light, while rosemary and thyme need more.
How quickly can I expect to harvest my herbs?
Timelines vary by herb! Fast growers like cilantro and green onions are ready in 3–4 weeks, while basil and mint take 6–8 weeks. Woody herbs (e.g., rosemary, oregano) may take 3–6 months to mature. Prune regularly to encourage bushier growth and faster regrowth.
What’s the best alternative if my space has no windows?
No windows? No problem! Use a full-spectrum LED grow light (like a clip-on or floor lamp) for 12–16 hours/day. Place herbs on a counter near the light source, and rotate pots weekly for even growth. Hydroponic systems also work well for compact setups.
Why are my herbs turning yellow or drooping?
Yellow leaves often signal overwatering (check soil moisture—it should be dry 1–2 inches down) or nutrient deficiency (use a balanced liquid fertilizer every 4–6 weeks). Drooping can mean underwatering or root stress—ensure pots have drainage holes and adjust watering frequency.
Can I grow more than just herbs in an indoor kitchen garden?
Try microgreens (fast-growing, nutrient-packed), leafy greens (kale, spinach), or even small veggies like cherry tomatoes or peppers with proper lighting. Just match light needs—herbs generally require less than veggies.
Wrapping up and next steps
Creating an indoor kitchen garden is more than just a trend—it’s a rewarding way to bring freshness, flavor, and sustainability into your home! 🌱 With the right sunlight-maximizing layouts and herbs, you’ll enjoy a thriving green space year-round.
Whether you’re a seasoned gardener or just starting, every small step—like optimizing light exposure—makes a big difference.
Ready to take the next step? Start small—pick 2-3 herbs, test your setup, and watch your confidence (and plants!) grow. Happy gardening! 🌿