
Tools
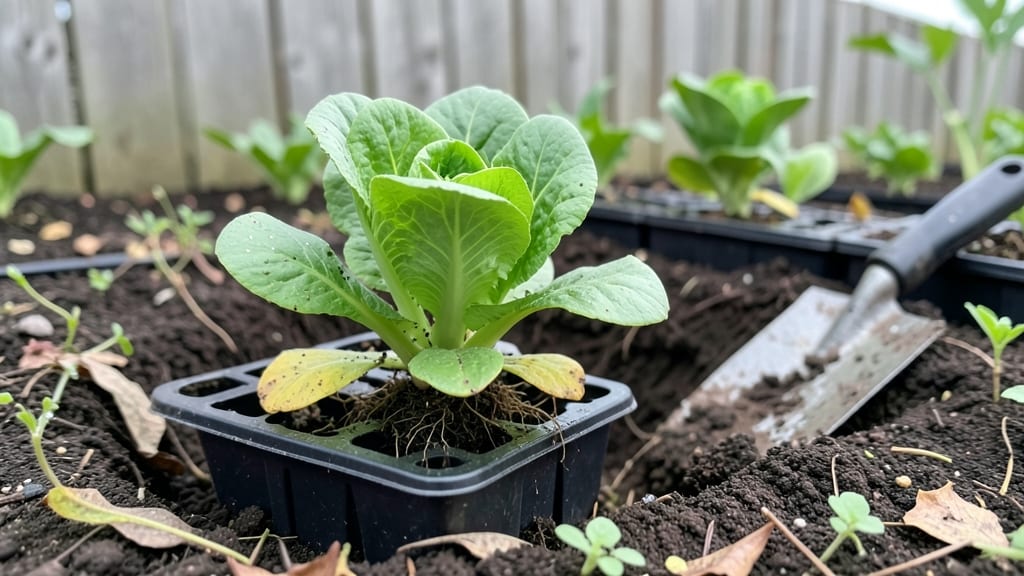
This introduction to gardening feels overwhelming—until you learn the five simple steps that turn dirt into thriving plants. 🌱 I’ve watched beginners go from nervous first-timers to confident gardeners in just one season, and the secret isn’t complicated tools. or rare plants.
It’s about matching the right soil, sunlight, and water to what your plants actually need.
You’ll need basic supplies: gloves, a trowel, seeds or starter plants, and containers or a small plot. The first year is all about easy-to-grow crops like lettuce, radishes, or marigolds—they forgive mistakes and give instant confidence.
Even a sunny windowsill or balcony can work, proving you don’t need a backyard to begin.
By the end of your first month, you’ll be harvesting crisp greens or vibrant flowers, and the smell of fresh soil will feel like a victory. The key is starting small: one container, one plant, and one lesson at a time.
Every gardener I’ve taught follows this exact path, and so will you.
Once you’ve mastered the basics, we’ll dive deeper into soil mixes, pest prevention, and seasonal planning—but for now, focus on these lush starts. You’ve got this.
📚 In This Guide
- What you need
- Instructions
- Tips and common mistakes
- Wrapping up and next steps
What you need
- ● Gloves (1 pair) – Choose breathable, durable ones (nitrile or leather work great!).
- ● Hand trowel (1-2) – A 6-8” stainless steel or ergonomic trowel for digging and transplanting.
- ● Pruners (1 pair) – Bypass pruners for clean cuts (avoid anvil pruners—they crush stems!).
- ● Garden fork (1) – A sturdy, 12-18” fork for breaking up soil or aerating.
- ● Watering can (1) or hose with adjustable nozzle – A 1-2 gallon can with a rose attachment is ideal for gentle watering.
- ● Spade or shovel (1) – For digging holes or moving soil (look for a 12-14” flat or round-point shovel).
- ● Rake (1) – A small bow rake (8-10”) for leveling soil or clearing debris.
- ● Wheelbarrow or bucket (1) – A 2-3 cubic foot wheelbarrow or 5-gallon bucket for hauling soil/amendments.
- ● Potting soil or garden soil (1-5 bags) – Start with a high-quality potting mix (not topsoil) for containers. For in-ground gardens, amend native soil with compost.
- ● Compost (1 bag or homemade) – A 40 lb bag of organic compost or your own compost pile to enrich soil.
- ● Seeds or seedlings (quantity varies) – Start with easy picks like marigolds, lettuce, basil, or sunflowers (check seed packets for spacing!).
- ○ Containers (optional) – If gardening in pots, choose ones with drainage holes (5-10” diameter for herbs/veggies).
- ● Knee pad or cushion – Protect your joints during long sessions!
- ● Garden hose timer or drip irrigation kit – For consistent watering.
- ● Mulch (straw or shredded bark) – Helps retain moisture and suppress weeds.
- ● Plant markers or labels – Save old yogurt cups or buy reusable stakes to track what’s what.
- ● Sun hat or wide-brimmed hat – Because even beginners need shade breaks!
Step-by-step instructions for your first gardening project
Let’s start simple—here’s how to plant your first garden with confidence.
🌱 Step 1: Pick Your Plants and Location
Begin with easy, fast-growing plants like lettuce, marigolds, or basil. These tolerate beginner mistakes and reward you quickly. Check your space: at least 6 hours of sunlight for most veggies, or partial shade for leafy greens. A south-facing spot gets the most light, but even a sunny windowsill works for herbs.
I always test the soil first by digging a 6-inch hole—if it’s hard or clay-like, you’ll need to amend it later. Watch for wind exposure too; delicate seedlings need shelter until they’re 3-4 inches tall. A small fence or temporary shield works great.
🪴 Step 2: Prepare the Soil
Break up the top 4-6 inches of soil with a fork or trowel to loosen compaction. Add 2-3 inches of compost (or the organic matter you’ve gathered) and mix it in. This improves drainage and feeds roots without burning plants. If your soil is sandy, add a handful of peat moss to retain moisture.
Don’t skip this step—poor soil is the #1 reason new gardens fail. You’ll know it’s ready when it crumbles easily between your fingers and smells earthy, not sour. Water the area lightly after amending to help everything settle.
☀️ Step 3: Plant with Care
Dig holes twice as wide as the root ball but only as deep as the plant’s container. Gently remove seedlings from pots and tease apart tangled roots. Place each plant in its hole, then fill with soil, pressing lightly to remove air pockets. Water immediately to help roots settle.
Space plants according to their mature size—check seed packets for guidance. Crowding stresses plants and invites disease. A good rule: 3 inches apart for herbs, 6-12 inches for veggies, and 12-18 inches for flowers. Mulch with 1-2 inches of straw or shredded leaves to keep soil moist and block weeds.
💧 Step 4: Water and Monitor
Water deeply once a week (or daily for the first week) until the top 2 inches of soil feel damp. Use a watering can with a gentle spray to avoid disturbing seedlings. Early mornings are best—watering at night can invite fungal issues. You’ll know you’re doing it right when leaves stay crisp, not wilted.
Watch for pests like aphids (tiny green bugs on stems) or slugs (silver trails at dawn). A spray of soapy water or a beer trap (yes, really!) keeps them away. If leaves yellow, it’s usually overwatering—let the soil dry slightly before watering again.
✂️ Step 5: Maintain and Enjoy
Once plants are established (after 4-6 weeks), fertilize lightly with a balanced organic fertilizer every 2-3 weeks. Pinch back leggy stems to encourage bushier growth. Harvest regularly—picking leaves or flowers encourages more production. You’ll see the difference in just a few weeks!
Celebrate small wins. Even if a plant doesn’t thrive, you’re learning. Take photos of progress, and don’t hesitate to ask for help at local nurseries—they love supporting new gardeners. Before you know it, you’ll be troubleshooting like a pro.
Tips & tricks for perfect gardening starts
Here’s what nobody tells you—these tricks will help your first garden thrive without the common pitfalls.
Location is Everything: That 6 hours of sunlight is non-negotiable for most veggies, but don’t assume your yard gets it all. Use a sunlight tracker app for a week to map your space—shade from trees or buildings can change daily. If you’re limited to partial shade, stick with leafy greens like lettuce or herbs like basil that handle less light better. I learned this the hard way when my tomato plants turned leggy from insufficient sun.
Soil Prep Secrets: The 4-6 inches of loosened soil might seem like overkill, but it’s worth it. I use a garden fork to break up compaction, then mix in 2-3 inches of compost—this isn’t optional, it’s the foundation. For sandy soil, a handful of peat moss per square foot works wonders to retain moisture. Think of it like prepping a cake pan: you wouldn’t bake without greasing it, right?
Planting Like a Pro: When digging those holes twice as wide as the root ball, don’t rush—gently tease apart tangled roots with your fingers. This encourages faster establishment. And that 1-2 inches of mulch? It’s not just for looks. It keeps soil moist, blocks weeds, and regulates temperature. I always use straw because it breaks down slower than leaves and doesn’t compact.
Watering Wisdom: The deep watering once a week rule works, but only if you’re consistent. Use your finger to check that top 2 inches of soil—it should feel damp, not soggy. Morning watering is key because it gives plants time to dry out during the day, preventing fungal issues. I set a reminder on my phone for the first week to avoid forgetting.
Pro Tips for Introduction To Gardening
- Here’s what nobody tells you—these tricks will help your first garden thrive without the common pitfalls.
- Location is Everything: That 6 hours of sunlight is non-negotiable for most veggies, but don’t assume your yard gets it all.
- Soil Prep Secrets: The 4-6 inches of loosened soil might seem like overkill, but it’s worth it.
Frequently asked questions
New to gardening? You’re not alone—here are answers to the most common questions to help you grow with confidence!
What’s the best time of year to start a garden?
For most regions, spring (after the last frost) is ideal for planting vegetables and flowers. However, cool-season crops like lettuce or spinach thrive in early spring or fall. Check your USDA Plant Hardiness Zone for local timing tips. Starting indoors 6–8 weeks before the last frost can extend your growing season!
How much does gardening really cost to start?
Budget-friendly options exist! A basic setup costs $50–$100 for seeds, soil, pots, and tools. Reuse containers (like yogurt cups or old buckets) to save money. Skip expensive tools initially—focus on a trowel, gloves, and pruners. Thrift stores and seed swaps can cut costs further. Pro tip: Start small with herbs or microgreens—they’re low-cost and rewarding!
What do I do if bugs or pests attack my plants?
Don’t panic! Most pests are harmless. Start with prevention: healthy soil, proper spacing, and regular watering. For mild infestations, try neem oil or soapy water sprays. Avoid chemicals—many harm beneficial insects. Handpick larger pests (like tomato hornworms) or introduce ladybugs for aphids. Monitor plants daily to catch issues early!
Can I garden in small spaces, like apartments or balconies?
Container gardening
is perfect for small spaces. Use window boxes, hanging pots, or vertical gardens for herbs, lettuce, or strawberries. Choose compact varieties (like ‘Patio’ tomatoes or ‘Thumbelina’ carrots). Ensure containers have drainage holes and use lightweight potting mix. Bonus: Rotate plants for even sun exposure!
How long until I see results from my garden?
Results vary by plant! Fast growers like radishes or green onions sprout in 3–4 weeks, while tomatoes or peppers take 2–3 months. Flowers like marigolds bloom in 6–8 weeks. Track progress with a gardening journal—it’s fun to compare predictions vs. reality! Patience pays off, but don’t hesitate to ask your local nursery for realistic timelines for your climate.
Wrapping up and next steps
Gardening is a rewarding journey that starts with curiosity and grows into a passion! 🌱 Whether you’re dreaming of fresh herbs, vibrant flowers, or a thriving veggie patch, the key is to start small, stay consistent, and embrace the learning process.
Remember, every expert gardener was once a beginner—so take pride in your progress, no matter how tiny.
Your next step? Pick one plant or task from this guide and dive in! Grab your tools, roll up your sleeves, and let your green thumb grow. Happy planting—your garden (and future harvests) will thank you! 🌿✨