Tools
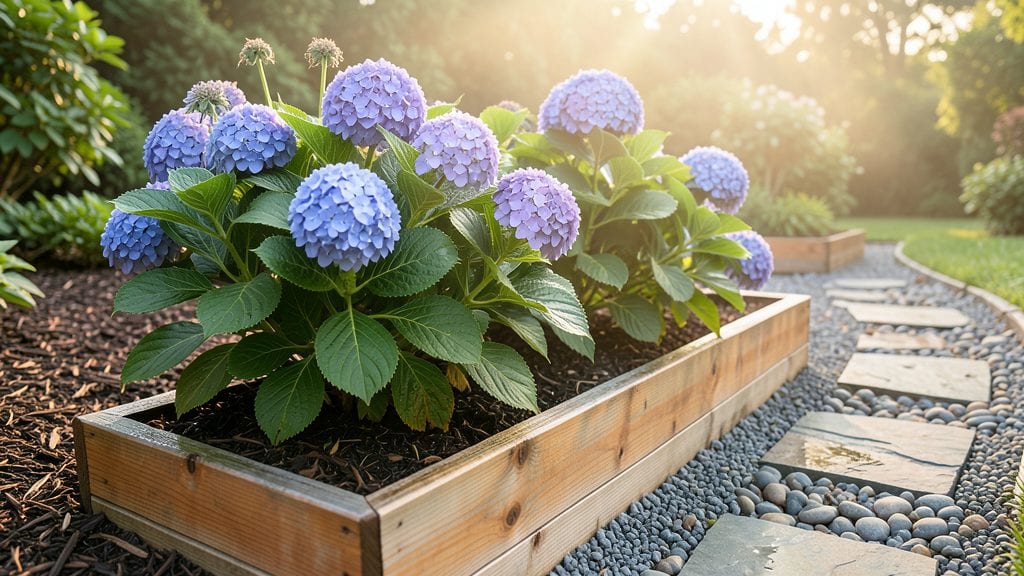
Creating island beds garden spaces transforms your yard into a lush, functional oasis that works as hard as it looks. 🌿 I stumbled upon this design after struggling with muddy paths and overgrown borders—until I built my first raised island bed, and everything changed.
The moment I stepped onto it, I knew it would solve my drainage problems while adding instant curb appeal.
The beauty of island beds is their versatility—whether you use them as herb gardens, flower borders, or even seating accents, they elevate any space. Materials like cedar, stone, or even repurposed bricks give you endless design options, and their elevated structure keeps soil healthy and weeds at bay.
Plus, they’re easier to maintain than traditional in-ground beds because you control the soil mix and drainage from day one.
Imagine stepping into your garden and being greeted by vibrant foliage that frames your home year-round. Island beds create natural privacy while keeping pathways clean and accessible, even after rain. You’ll spend less time weeding and more time enjoying the lush, structured beauty they bring to your outdoor living space.
From small urban patios to sprawling backyard retreats, island beds adapt to any layout. Whether you’re starting with a single bed or planning a full garden redesign, this approach makes gardening both practical and stunning. Let’s get your design ideas growing!
📚 In This Guide
- What you need
- Instructions
- Tips and common mistakes
- Wrapping up and next steps
What you need
- ● Soil & Amendments: High-quality garden soil (2–3 cubic yards, depending on bed size)
- ● Compost or organic matter (1–2 bags per 4’ x 4’ section)
- ● Perlite or vermiculite (1–2 bags for drainage)
- ● Plants & Greenery: Privacy plants (e.g., bamboo, boxwood, or evergreen shrubs—10–20 per bed)
- ● Climbing vines (e.g., ivy, jasmine, or clematis—5–10 plants)
- ○ Flowering plants (optional but recommended for aesthetics—5–10 per bed)
- ● Structural Supports: Wooden or metal edging (4–6 ft long, depending on bed shape)
- ● PVC pipes or trellises (for climbing plants—2–4 per bed)
- ● Shovel & spade (for digging and shaping)
- ● Wheelbarrow (for hauling soil and amendments)
- ● Garden rake (to level the soil)
- ● Measuring tape & stakes (for marking bed layout)
- ● Pruners & gloves (for plant care)
- ● Watering can or hose (with adjustable nozzle)
- ○ Optional: Mulch (2–3 bags for weed suppression)
- ● Sunlight assessment (full sun, partial shade, or full shade)
- ● Water source nearby (hose or drip irrigation)
- ● Clear space (measure your desired bed size—standard: 4’ x 4’ to 6’ x 8’)
- ● Local climate considerations (choose plants suited to your zone)
How to design and plant island beds for natural privacy
Here's my go-to approach for creating lush, low-maintenance island beds that block noise and views while adding beauty.
🌱 Step 1: Plan Your Island Bed Layout
Start by marking your desired island bed shape with garden stakes and twine. I like to use 3-4 foot wide islands for good privacy without overwhelming the space. Measure 6-8 feet from your property line or windows—they should sit far enough back to avoid shading foundations but close enough to block views effectively.
Sketch a simple design first. Curved edges look more natural and reduce sharp corners where weeds love to hide. For 4 islands, space them 8-10 feet apart so you can walk between them without trampling plants. This spacing also prevents overcrowding as plants mature.
🪴 Step 2: Prepare the Soil and Base
Dig out the marked area to a depth of 12 inches, removing any grass or weeds. I mix 3 cubic yards of topsoil with 2 bags of compost and 1 bag of slow-release fertilizer for each island bed. This gives plants the nutrients they need to establish strong roots quickly.
For drainage, add a 2-inch layer of coarse sand at the bottom of the hole before adding your soil mix. Compact the base lightly with your hands—this prevents settling later. If your soil drains poorly, consider adding 1 inch of gravel beneath the sand layer for extra protection against waterlogging.
☀️ Step 3: Choose and Plant Privacy-Focused Plants
Select a mix of evergreen shrubs (like boxwood or holly) for year-round coverage and deciduous plants (such as arborvitae or privet) for seasonal interest. I plant 3-4 shrubs per island, spacing them 3-4 feet apart so they fill in naturally. For height variation, place taller plants toward the back and shorter ones toward the front.
Dig holes twice as wide as the root ball and 1 inch deeper. Place each plant in its hole, then fill with soil while gently pressing down to remove air pockets. Water deeply to settle the soil around the roots. For 4 islands, you’ll need about 12-16 plants total, depending on the shrub sizes you choose.
💧 Step 4: Mulch and Water for Establishment
Spread 2 inches of mulch (like shredded bark or pine straw) over the soil surface, keeping it 3 inches away from plant stems to prevent rot. This mulch layer retains moisture, regulates soil temperature, and suppresses weeds—exactly what you want for low-maintenance privacy. For 4 islands, use about 1 cubic yard of mulch total.
Water immediately after planting, then every other day for the first 2 weeks to encourage root growth. After that, water once a week unless you experience a heatwave. You’ll know the plants are settled when new growth appears within 4-6 weeks. Avoid overwatering—soggy soil can suffocate roots.
✂️ Step 5: Maintain for Long-Term Privacy
Prune plants in early spring before new growth starts. Trim back any dead or overgrown branches to encourage bushier, denser growth. For evergreens, a light shaping prune in late summer keeps them looking tidy without stressing the plant. I use clean, sharp shears to make cuts just above a leaf node for the best regrowth.
Fertilize once in spring with a balanced, slow-release fertilizer to support steady growth. Watch for pests like spider mites or aphids—if you spot them, treat with neem oil or insecticidal soap. With proper care, your island beds will provide full privacy within 2-3 years and require minimal upkeep afterward.
Tips & tricks for perfect island beds garden
Creating island beds that actually deliver on privacy takes more than just planting shrubs—it's about the details that make them thrive. Here's what I've learned after designing these for years.
Design Matters: The 3-4 foot width I recommend isn't arbitrary—it's the sweet spot for privacy without creating maintenance nightmares. Narrower than 3 feet and you'll get weeds growing through, wider than 4 feet and you'll spend hours weeding. For Step 1, use a garden hose to trace your curves before staking—it's easier to adjust the shape when it's flexible.
Soil Preparation Secret: That 2-inch layer of coarse sand in Step 2 isn't just for drainage—it's also a moisture barrier that prevents your nutrient-rich soil from washing away during heavy rains. If you're working with clay soil, add an extra inch of gravel beneath the sand to create better drainage channels. Compact the base just enough so it holds shape but still feels springy—like a well-packed pillow.
Plant Placement Strategy: When arranging your 3-4 shrubs per island in Step 3, think of them like a living room arrangement—taller plants at the back, shorter ones in front. I like to stagger the heights by 6-12 inches for that natural, layered look. Pro tip: Plant evergreens on the north side of each island if you're in a hot climate—they'll get less sun stress and grow more densely.
Watering Wisdom: The "every other day for 2 weeks" rule in Step 4 is non-negotiable for root establishment, but here's the thing about watering: morning is always better than evening. Watering in the morning gives plants time to dry out before nightfall, which prevents fungal diseases. Use a rain gauge to track your watering—you're aiming for about 1 inch of water per week, whether from rain or your hose.
Pro Tips for Island Beds Garden
- Creating island beds that actually deliver on privacy takes more than just planting shrubs—it's about the details that make them thrive.
- Design Matters: The 3-4 foot width I recommend isn't arbitrary—it's the sweet spot for privacy without creating maintenance nightmares.
- Soil Preparation Secret: That 2-inch layer of coarse sand in Step 2 isn't just for drainage—it's also a moisture barrier that prevents your nutrient-rich soil from washing away during heavy rains.
Frequently asked questions
Got questions about creating an island beds garden for privacy? You’re not alone!
Here are some of the most common ones—plus quick, actionable answers to help you plan like a pro.
What’s the best time of year to plant an island bed for privacy?
For most climates, spring or early fall are ideal—when soil is workable and plants can establish roots before extreme heat or cold. In warmer zones, late winter works too. Pro tip: Check your plants’ specific needs (e.g., shrubs like boxwood or bamboo thrive in cooler temps, while tropicals need warmth).
Are island beds expensive to install?
Costs vary! A DIY project with basic materials (gravel, soil, low-maintenance plants) can run $50–$200 for a small bed. Pre-planned kits or professional installation (e.g., with hedges or trellises) may cost $500–$2,000+. Save money: Use native plants—they’re cheaper and need less water!
How do I keep pests and weeds out of my island bed?
Start with a thick layer of landscape fabric under mulch to block weeds. For pests:
- Choose resistant plants (e.g., lavender deters deer, rosemary repels mosquitoes).
- Use organic sprays (neem oil) if needed.
- Add gravel borders to discourage burrowing critters.
Can I use an island bed for both privacy AND shade?
Combine tall, dense plants (like arborvitae or bamboo) with vine-covered trellises (e.g., clematis or wisteria). For instant shade, add a sun-loving shrub (e.g., photinia) on the sunniest side. Layering tip: Place taller plants at the back and trailing vines at the front for a lush, 3D effect.
Will an island bed survive harsh winters?
Yes, if you choose cold-hardy plants (e.g., evergreens like holly or pine, or deciduous shrubs like forsythia). For extra protection:
- Mulch heavily (3–4 inches) to insulate roots.
- Avoid tropical plants unless your zone is 8+.
- Prune damaged branches in early spring.
What’s the easiest alternative if I don’t want to plant?
No green thumb? Try:
- Privacy screens: Pre-made lattice panels or bamboo rolls (install in hours!).
- Trellis + vines: Fast-growing options like morning glories or ivy.
- Living walls: Modular planters with succulents or herbs.
Wrapping up and next steps
Transforming your outdoor space with an island beds garden isn’t just about aesthetics—it’s a game-changer for privacy, functionality, and natural beauty. Whether you’re a seasoned gardener or a beginner, this living green solution offers year-round charm and practicality.
Ready to elevate your yard? Start small with a single bed or go bold with multiple islands—your green sanctuary awaits!
Next steps:
- Sketch a simple design and gather your materials.
- Reach out to local nurseries for plant recommendations.
- Share your progress with fellow gardeners for inspiration!