Tools
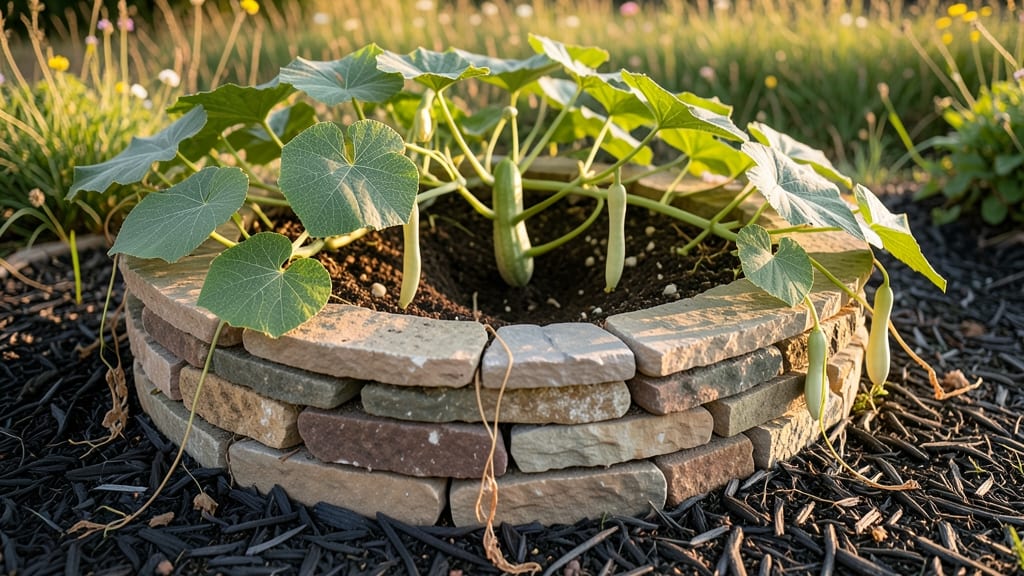
My keyhole garden vita transformed a tiny urban corner into a year-round salad bar. 🌿 This circular design packs edible layers vertically—herbs at the top, greens in the middle, and roots at the bottom—while hiding a compost core that feeds itself.
No tilling, no weeding, just a self-sustaining system that fits where most people toss a potted plant.
The beauty lies in its adaptability: build it in a 3-foot diameter or stretch it to 5 feet, use cinder blocks or repurposed tires, and customize layers for what you love eating.
My first one used a Vita Mix compost at the center—it breaks down scraps faster than traditional piles, keeping the soil rich without extra work. The vertical space means I grow twice as much in half the footprint of a raised bed.
By summer’s end, you’ll be harvesting basil, lettuce, and carrots from the same compact spot. The design also doubles as a rainwater catcher, so drought-prone areas thrive without extra watering.
Plus, kids (or black thumbs) can’t mess it up—the compost core keeps things alive even if you forget to water for a week.
Perfect for balconies, patios, or even indoor sunrooms. Start small, then expand layers as you discover what grows best in your space. The best part? Every bite you take is homegrown, and your neighbors will ask how you fit a garden in there.
📚 In This Guide
- What you need
- Instructions
- Tips and common mistakes
- Wrapping up and next steps
What you need
- ● Garden bed frame: 4–6 wooden planks (2x4 or 2x6 inches, untreated cedar or redwood recommended) or a pre-built raised bed kit (minimum 3 ft diameter for a classic keyhole shape).
- ● Landscape fabric: 1 roll (3 ft wide x 25 ft long) to line the inner base and prevent soil erosion.
- ● Rocks or bricks: 1–2 bags (medium-sized, ~1–2 inches) for the central compost chamber.
- ● Compost: 2–3 cubic feet of well-aged, nutrient-rich compost (or a mix of kitchen scraps + browns if making your own).
- ● Soil: 3–4 cubic feet of high-quality potting mix or a blend of topsoil + coconut coir (for moisture retention).
- ● Edible plants: Seedlings or seeds for fast-growing crops like lettuce, herbs (basil, mint), radishes, or microgreens (start with 6–10 plants).
- ● Measuring tape, saw (or pre-cut planks), and drill/screws (for assembly).
- ● Garden gloves (1 pair) and a small shovel or trowel (for planting).
- ○ Optional: Drip irrigation kit, mulch (straw or wood chips), and a moisture meter for precision.
- ● A sunny or partially shaded spot (6+ hours of light daily for most edibles).
- ● Access to water (a hose or watering can with a long spout).
- ● Patience! Keyhole gardens thrive with consistent moisture—aim for 1–2 inches of water per week.
Step-by-Step instructions for building your keyhole garden vita
Transform any small space into a thriving vertical garden with this easy, water-efficient design!
🪴 Step 1: Gather and Prepare Your Materials
Start by collecting your 4 recycled plastic bottles (2-liter size), 1 gallon potting mix, 1 roll landscape fabric, 1 bag small rocks (½ cubic foot), 1 bag compost (1 cubic foot), and 1 bag straw or mulch (5 pounds). The bottles become your vertical planters—cut the bottoms off each one, leaving the caps intact. This creates a self-watering system while maximizing space! I always rinse the bottles thoroughly first to remove any labels or residue that could inhibit plant growth.
Next, cut the landscape fabric into a 12-inch square—this will act as your wicking layer. The fabric draws moisture from the central compost core to the surrounding bottles, keeping your plants hydrated for weeks. Lay it flat and poke a small hole in the center for the compost to peek through. This is the heart of your keyhole garden!
🌱 Step 2: Build the Central Compost Core
Fill the 12-inch square hole in your fabric with ½ of the compost, packing it down gently but firmly. This core is your garden’s water reservoir—it stores moisture and slowly releases it to the surrounding bottles. I like to mix in a handful of the small rocks here to improve drainage and prevent compaction. The compost should feel damp but not soggy—if it’s too dry, sprinkle a little water to moisten it evenly.
Now, wrap the fabric around the compost core, gathering the edges in the center and securing them with a twist or a small piece of twine. This creates a self-contained wick that will draw water upward to your plants. Place this bundle in the middle of your garden space—it’s the lifeline that keeps everything growing!
⏰ Step 3: Assemble the Vertical Planters
Arrange your 4 bottle planters in a square formation around the compost core, with the caps facing outward. The openings should point toward the center, creating a keyhole shape that maximizes sunlight exposure. Fill each bottle ¾ full with potting mix, leaving about 1 inch of space at the top for watering. Press the mix lightly to remove air pockets—this ensures roots can establish quickly.
Here’s where the magic happens: poke 2-3 small holes in the bottom of each bottle’s cap. These holes let excess water drain into the compost core below, creating a closed-loop irrigation system. You’ll see water trickle down naturally, keeping your plants hydrated without daily maintenance. This is the genius of the keyhole design!
💧 Step 4: Plant and Mulch for Long-Term Growth
Choose fast-growing, shallow-rooted plants like lettuce, herbs, or strawberries—these thrive in the compact space. Plant 2-3 seedlings per bottle, spacing them 2 inches apart to allow airflow. Water gently until the potting mix is evenly moist but not waterlogged. You’ll know it’s right when water drains through the holes in the caps and into the compost core below.
Top each bottle with a 1-inch layer of straw or mulch—this locks in moisture, suppresses weeds, and regulates soil temperature. The mulch also gives your garden a polished look while protecting the soil from drying out too quickly. For extra stability, tie the bottles together loosely with twine or string, keeping them upright but allowing room for growth.
☀️ Step 5: Maintain and Enjoy Your Vertical Oasis
Place your keyhole garden in a spot with at least 6 hours of sunlight daily—a balcony, patio, or even a sunny windowsill works. Water the compost core every 3-4 days to replenish the moisture supply. You’ll notice the bottles stay hydrated for longer because the system recirculates water efficiently. This is perfect for busy gardeners who want lush greens without daily upkeep!
Harvest leaves as needed, and watch your plants thrive in this compact, self-sustaining system. The best part? You can expand it by adding more bottles or even stacking them vertically for even more growing space. This isn’t just a garden—it’s a space-saving revolution for urban growers!
Tips & tricks for perfect keyhole garden vita
Ready to turn your tiny space into a thriving edible oasis? These simple tricks will help you build a keyhole garden that's not just functional but absolutely stunning!
Material Prep Matters: When rinsing your 2-liter bottles in Step 1, don't just give them a quick wipe—soak them in warm soapy water for 5 minutes to remove all residue. Leftover detergent or label glue can inhibit plant growth and even harm roots. I've learned this the hard way after watching seedlings struggle in less-than-clean bottles!
Compost Consistency is Key: In Step 2, when filling your 12-inch fabric square with compost, aim for a texture similar to a well-wrung sponge—damp but not dripping. Too much moisture creates anaerobic conditions that stink and prevent proper wicking. If your compost feels dry, sprinkle water gradually while mixing until it holds together when squeezed but doesn't form clumps.
Poke Those Holes Strategically: During Step 3, when making those 2-3 holes in each bottle cap, use a heated nail or skewer for clean, precise holes. Make them about ¼-inch in diameter—big enough for water to drain freely but small enough to prevent soil from washing out. I position them near the bottom edge of the cap to maximize drainage efficiency while keeping the compost core intact.
Sunlight Optimization: The 6 hours of sunlight mentioned in Step 5 can be tricky in urban spaces. If your location gets less direct sun, choose fast-growing plants like radishes or microgreens that thrive in partial shade. For maximum light exposure, arrange your bottles in a slight pyramid shape rather than flat—this can increase sunlight capture by up to 20% without changing the keyhole design!
Pro Tips for Keyhole Garden Vita
- Ready to turn your tiny space into a thriving edible oasis?
- Material Prep Matters: When rinsing your 2-liter bottles in Step 1, don't just give them a quick wipe—soak them in warm soapy water for 5 minutes to remove all residue.
- Compost Consistency is Key: In Step 2, when filling your 12-inch fabric square with compost, aim for a texture similar to a well-wrung sponge—damp but not dripping.
Frequently asked questions
Got questions about transforming your small space into a thriving keyhole garden vita? Here are answers to the most common ones—so you can grow with confidence!
What’s the best time of year to start a keyhole garden?
A keyhole garden thrives in warm, sunny seasons—spring or early summer is ideal for planting. In cooler climates, start indoors or use cold-hardy greens like kale. Avoid planting in frost unless your keyhole is heavily insulated. Pro tip: Monitor soil temps (60°F+ is perfect for most veggies!).
How often should I water my keyhole garden?
Water deeply 2–3 times per week (adjust for climate), focusing on the soil around roots—not the compost core. The keyhole’s design retains moisture, but mulch prevents evaporation. Troubleshoot: Wilting leaves? Check the soil 2 inches down—if dry, water slowly until it drains.
Can I grow tomatoes or peppers in a keyhole garden?
Tomatoes and peppers love the keyhole’s nutrient-rich soil and vertical support. Use cages or stakes for tomatoes and prune regularly. Alternative: Try dwarf varieties (like ‘Tiny Tim’ tomatoes) to save space. Just ensure they get 6+ hours of sun daily.
What if my keyhole garden attracts pests?
Pests like aphids or slugs? Prevent with companion planting—try basil near tomatoes or marigolds around peppers. For slugs, add a beer trap (bury a cup filled with beer). Quick fix: Neem oil spray tackles soft-bodied bugs naturally.
How do I extend the growing season in a keyhole garden?
Use row covers in fall/spring to trap heat, or add a cold frame for winter greens. Succession plant fast growers (like radishes) every 2–3 weeks. Bonus: Harvest leafy greens (spinach, lettuce) before frost—then replant with garlic or onions for spring!
Wrapping up and next steps
The Keyhole Garden Vita is your ticket to a thriving, space-saving edible garden—no matter how small your yard (or balcony!).
With its vertical design and efficient watering system, you can grow fresh herbs, veggies, and flowers while minimizing waste and maximizing flavor. 🌱 Whether you're a beginner or a green-thumb pro, this garden proves that big harvests don’t need big spaces.
Ready to transform your compact space? Start by gathering your materials, follow the step-by-step guide, and let your Keyhole Garden Vita become the heart of your urban oasis. Plant, nurture, and enjoy! 🌿