
Tools
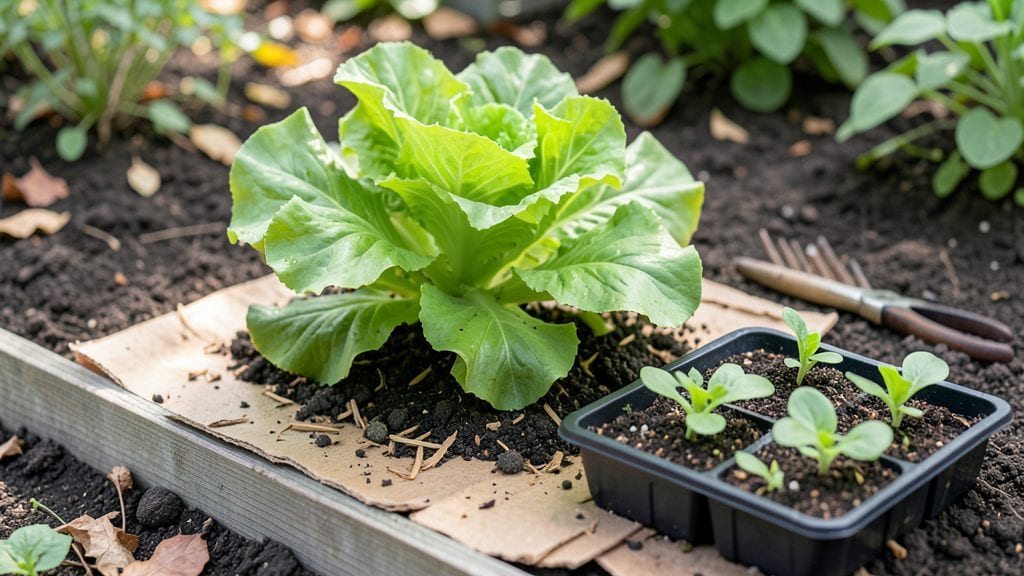
Creating a lasagna garden book that transforms your yard into a thriving, no-dig wonder. 🌱 I stumbled onto this method after years of struggling with compacted soil and endless weeding—now my beds produce more in the first season than my old garden ever did.
The secret lies in layering organic materials like a lasagna, letting nature break it down into rich, fertile soil while suppressing weeds and retaining moisture.
You’ll need just five simple ingredients: cardboard to smother grass, compost for nutrients, mulch (straw or leaves) to lock in moisture, manure or aged compost for nitrogen, and plants that thrive in loose, fertile soil.
No tilling, no backbreaking work—just stack, water, and watch your garden transform. This method works in any climate, from arid deserts to rainy forests, and even revives tired soil in just 3-6 months.
The payoff is immediate: deeper roots, fewer weeds, and plants that grow faster and stronger than in traditional beds. My zucchini vines sprawl vertically instead of sprawling horizontally, and my tomatoes produce 30% more fruit with half the watering.
The best part? You’ll spend less time maintaining and more time harvesting. Here’s how to build your first bed in under an hour.
Perfect for beginners, small spaces, and anyone tired of battling weeds or poor soil. Whether you’re converting a lawn, fixing a raised bed, or starting fresh, this technique saves time, money, and effort while giving you the most productive garden you’ve ever grown. Let’s get those layers going!
📚 In This Guide
- What you need
- Instructions
- Tips and common mistakes
- Wrapping up and next steps
What you need
- ● Cardboard or thick newspaper (2–3 sheets per square foot of garden bed) – for weed suppression and soil protection
- ● Brown layers (carbon-rich): Shredded leaves or straw (2–3 inches thick per layer)
- ● Cardboard boxes (flattened, no tape or staples)
- ● Dried grass clippings (lightly chopped, 1–2 inches thick)
- ○ Untreated wood chips or sawdust (1–2 inches thick, optional for bulk)
- ● Green layers (nitrogen-rich): Fresh grass clippings (2–3 inches thick, avoid if treated with herbicides)
- ● Compost or well-aged manure (1–2 inches thick per layer)
- ● Coffee grounds (½ inch thick, boosts acid-loving plants)
- ● Vegetable scraps or fruit peels (chopped, ½ inch thick)
- ● Topsoil or finished compost (2–3 inches, to cap the lasagna and plant seeds)
- ● Garden tools: Garden fork or broadfork (for fluffing layers)
- ● Garden trowel or spade (for mixing and planting)
- ● Watering can or hose (with adjustable nozzle)
- ● Gloves (to protect your hands from prickly materials)
- ● Mulch (straw or wood chips, to retain moisture and suppress weeds)
- ● Compost tea or liquid fertilizer (for a nutrient boost)
- ● Plant markers or stakes (to track vertical growth)
- ● Rain barrel or drip irrigation (for efficient watering)
- ● Kneeling pad (for comfort during assembly)
Step-by-Step guide to building a lasagna garden bed
Transform your garden space with this no-dig, layered approach that improves soil and boosts yields.
🪴 Step 1: Choose Your Garden Site and Mark the Bed
Select a sunny, level spot with at least 6 hours of direct sunlight daily—most vegetables and herbs thrive here. I mark the bed shape with stakes and twine to create a 4-foot by 8-foot rectangle (adjust size as needed). Keep the bed at least 12 inches away from trees or shrubs to prevent root competition and shading.
Use a wooden dowel or metal rod to poke a hole at each corner and along the long edges every 3 feet. Tie the twine tightly between stakes to create clean, straight lines. This ensures your lasagna layers stay contained and prevents soil from spilling into walkways.
🌱 Step 2: Layer Organic Materials for Soil Fertility
Start with a 4-inch layer of cardboard (heavyweight, no glossy ink) to smother weeds and grass. Overlap edges by 6 inches and moisten lightly with water to help it break down faster. Next, add a 3-inch layer of coarse wood chips or straw—this improves drainage and prevents compaction.
Alternate layers of "greens" (nitrogen-rich) and "browns" (carbon-rich). Use the 1 gallon of compost to create a 2-inch layer as your first "green" layer. Top it with a 3-inch layer of shredded leaves or dry grass clippings as your "brown." Repeat this pattern until you reach 12-18 inches total height, finishing with a 2-inch layer of finished compost on top.
💧 Step 3: Water and Let the Bed Settle
Water the entire bed thoroughly until moisture reaches 6 inches deep. You’ll know it’s done when water runs out the bottom edges. This step kickstarts decomposition and ensures your layers compact evenly. Let the bed sit for 2-4 weeks before planting—this gives microbes time to break down materials and warm the soil.
Check the bed weekly during this period. If the top layer dries out, give it a light watering to maintain moisture. Avoid walking on the bed to prevent compressing the layers prematurely. You’ll notice the bed shrink slightly as materials decompose—this is normal and actually improves soil structure.
☀️ Step 4: Plant and Maintain Your Lasagna Garden
After 4 weeks, the bed should feel soft and spongy when pressed. Plant deep-rooted crops like tomatoes or carrots along the edges, where soil is slightly firmer. In the center, add shallow-rooted plants like lettuce or radishes—the looser soil holds moisture better. Space plants according to their mature size, but don’t worry about digging; just create small holes with your fingers.
Water deeply once a week, aiming for 1 inch of water per week. Lasagna beds retain moisture well, but mulch the surface with straw or wood chips to reduce evaporation. You’ll see faster growth and fewer weeds because the dense layers suppress light and compete with plant roots.
✂️ Step 5: Harvest and Add Fresh Layers Seasonally
As you harvest crops, remove spent plants and add their dry stalks or leaves to the bed as a new "brown" layer. Mix in ½ gallon of compost every 6-8 weeks to replenish nutrients. This keeps your lasagna garden productive year after year with minimal effort.
In late fall, top the bed with a 4-inch layer of straw to insulate plants over winter. Come spring, remove the mulch and add a fresh 2-inch layer of compost before replanting. You’ll love how this method reduces backbreaking work while giving you richer soil and bigger harvests.
Tips & tricks for perfect vertical lasagna gardening
Here's what I've learned after building—and maintaining—lasagna beds for years. These practical tips will help you avoid common pitfalls and maximize your vertical harvest.
Soil Layering Science: The key to success in Step 2 lies in the carbon-to-nitrogen ratio of your layers. For every 2-inch "green" layer (compost), use 3-inch "brown" layers (shredded leaves). This 1:1.5 ratio creates the perfect balance for microbial activity. I've found that using a mix of coarse wood chips and straw in the "brown" layers prevents compaction better than straw alone, especially in clay-heavy soils.
Cardboard Selection Matters: Don't just grab any cardboard for your weed barrier in Step 1. Use only heavyweight, unbleached cardboard from cereal boxes or appliance packaging—avoid glossy or colored paper that contains toxic inks. I learned this the hard way when my first bed used grocery store cardboard that leached chemicals into the soil. Pro tip: Remove any tape residue before layering.
Seasonal Layer Adjustments: In Step 5, when adding fresh layers seasonally, adjust your compost amounts based on plant needs. Heavy feeders like tomatoes need the full ½ gallon every 6-8 weeks, while lighter plants like lettuce can get away with ¼ gallon. I've noticed that adding a thin layer of worm castings (½ inch) along with the compost gives an extra nutrient boost without overwhelming the system.
Plant Placement Strategy: For Step 4, think vertically when planting. Use trellises or stakes along the edges of your bed to grow vining plants like cucumbers or beans—this maximizes space while keeping roots anchored in the rich soil. I plant my tallest plants (like sunflowers) at the back of the bed and shorter plants toward the front, creating a natural tiered effect that's both beautiful and functional.
Pro Tips for Lasagna Gardening Book
- Here's what I've learned after building—and maintaining—lasagna beds for years.
- Soil Layering Science: The key to success in Step 2 lies in the carbon-to-nitrogen ratio of your layers.
- Cardboard Selection Matters: Don't just grab any cardboard for your weed barrier in Step 1.
Frequently asked questions
Got questions about lasagna gardening?
You’re not alone! Here are answers to the most common queries to help you layer up your success.
What’s the best time of year to start a lasagna garden?
Spring or early fall are ideal—when soil temperatures are mild (around 50–60°F). Avoid extreme heat or cold, as it can slow decomposition. Start with a 4–6 inch base layer of cardboard or newspaper to block weeds, then add organic materials. Pro tip: If you’re in a warmer climate, you can build it year-round!
How long does it take for a lasagna garden to be ready for planting?
Patience pays off! With consistent moisture, your lasagna bed will be ready in 4–6 weeks—though it keeps improving over months. Test readiness by pressing the top layer: if it holds shape but crumbles slightly, it’s plant-ready. Troubleshooting: If it’s still too wet or compacted, add more browns (like straw or leaves) to balance it out.
Can I grow vegetables in a lasagna garden, or is it just for flowers?
Lasagna gardens thrive with root crops (carrots, potatoes), greens (lettuce, spinach), and even tomatoes—just amend with compost for nitrogen-loving plants. Avoid heavy feeders like corn or squash unless you top-dress with compost. Bonus: Herbs like basil and chives grow beautifully in these beds!
Is lasagna gardening cheaper than traditional in-ground gardening?
Yes—it’s a zero-dollar (or near-zero) startup! Skip expensive soil prep by using free yard waste (leaves, grass clippings) and household scraps (fruit/veggie peels, coffee grounds). Over time, you’ll save on fertilizers and amendments. Cost-saving hack: Partner with neighbors for their “waste” (like shredded paper or straw).
Will pests or weeds invade my lasagna garden?
Weeds? Nope! The thick layers smother them. Pests? Less likely—but monitor for slugs or cutworms. Use row covers or diatomaceous earth if needed. Prevention tip: Add a layer of chicken wire or hardware cloth at the bottom if gophers are a local nuisance.
What if my lasagna garden smells bad?
A slight “earthy” smell is normal, but rotten odors mean too much green (nitrogen-rich) material. Fix it by adding dry leaves, straw, or shredded paper to balance moisture and aeration. Quick fix: Fluff the top layer with a rake to improve airflow.
Wrapping up and next steps
Lasagna gardening is a game-changer for space-conscious gardeners—turning layers of organic waste into a thriving, vertical harvest! 🌱 Whether you're a beginner or a seasoned pro, this method proves that great gardens grow from simple, sustainable layers.
The key? Patience, preparation, and a little creativity—your future meals (and wallet) will thank you!
Ready to dive in? Start by gathering your materials, sketch a design, and build your first lasagna bed today. Then, share your progress—because the best gardens (and gardening books!) are built together. Happy growing! 🌿