
Tools
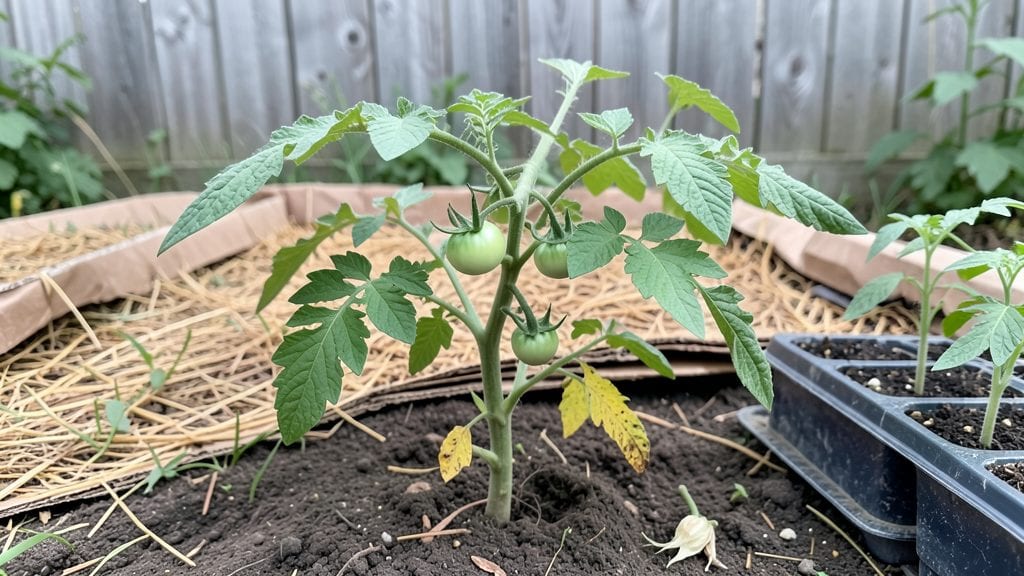
The lasagna method gardening transforms bare soil into rich, fertile beds without heavy digging or expensive amendments. I first tried it in my narrow city yard where traditional tilling was impossible—now I grow tomatoes, peppers, and herbs in beds that stay moist, weed-free, and productive for years.
The layers work like a slow-release fertilizer system, breaking down over time to create soil that rivals decades-old garden plots.
You’ll need cardboard, compost, mulch, and organic matter like grass clippings or shredded leaves. The process mimics composting but in layers: start with a weed-blocking cardboard base, then alternate between "browns" (carbon-rich materials) and "greens" (nitrogen-rich materials).
Each layer should be about 2-3 inches thick, and you’ll build the bed up to about 12 inches total before planting directly into the top layer. This method works especially well in small spaces where traditional tilling would be impractical.
What you’ll end up with is soil that improves every year, reducing the need for fertilizers and saving you time on weeding. Plants thrive because the layers retain moisture, regulate temperature, and create an ideal environment for roots to grow.
I’ve seen basil grow twice as fast and tomatoes produce 30% more fruit in lasagna beds compared to my old raised beds. The best part? You can start small—even a 4-foot-by-4-foot plot makes a difference in your harvest.
This method isn’t just for vegetables—flowers, herbs, and even small fruits like strawberries do exceptionally well in lasagna beds. It’s particularly useful for urban gardeners, renters, or anyone with poor soil, as it builds fertility from scratch.
Once you try it, you’ll wonder why you didn’t start sooner. Ready to give it a try?
📚 In This Guide
- What you need
- Instructions
- Tips and common mistakes
- Wrapping up and next steps
What you need
- ● Cardboard or newspaper (2–3 sheets per square foot) – Use plain, non-glossy, and pesticide-free.
- ● Brown layers (carbon-rich): Dry leaves (1–2 inches thick)
- ● Straw or hay (2–3 inches)
- ● Shredded newspaper or cardboard (1 inch)
- ● Wood chips or untreated wood ash (1–2 inches)
- ● Green layers (nitrogen-rich): Fresh grass clippings (1–2 inches)
- ● Compost (2–3 inches)
- ● Manure (well-aged, 1–2 inches)
- ● Coffee grounds or kitchen scraps (small amounts)
- ● Mulch (top layer): Straw, wood chips, or leaves (2–3 inches)
- ● Garden fork or sturdy shovel (for turning soil and breaking up layers).
- ● Gloves (to protect hands from prickly materials).
- ● Watering can or hose (for moistening layers).
- ● Measuring tape or ruler (to track layer thickness).
- ○ Optional but helpful: Wheelbarrow (for hauling materials).
- ● Rake (for smoothing layers).
- ● Compost thermometer (to monitor decomposition).
Step-by-Step instructions for building a lasagna garden bed
This layered approach transforms poor soil into rich planting zones without tilling.
Choose and Mark Your Garden Location
Select a flat, easily accessible spot that receives at least 6 hours of sunlight daily. Avoid areas where water pools after rain—your lasagna layers need to drain freely. I like to outline the bed with a 1-inch wide rope or spray paint to visualize the shape before digging. For a 4-foot by 8-foot bed, mark a perimeter that’s about 1 foot wider than your intended planting area to account for the thickness of the layers.
If your site has grass, use a sharp shovel or spade to cut a 4-inch deep trench along the marked perimeter. This prevents grass from creeping into your layers and competing with your plants. For compact yards, I often build beds against fences or walls to maximize space—just ensure the structure won’t rot or degrade from moisture.
Layer Organic Materials in the Correct Sequence
Start with a 4-inch layer of coarse material—this is your foundation. Use cardboard or newspaper (no glossy ink) to smother weeds and grass, then top with 2-3 inches of straw or dry leaves to absorb moisture and prevent compaction. Wet the cardboard lightly before adding the next layer so it breaks down faster.
Next, alternate between 2-3 inches of "browns" (carbon-rich materials like shredded leaves, straw, or cardboard) and 2-3 inches of "greens" (nitrogen-rich materials like grass clippings, coffee grounds, or vegetable scraps). End with a 2-inch layer of compost on top—this seals in moisture and provides immediate nutrients. I like to fluff each layer lightly with a rake to avoid creating air pockets that could lead to rot.
Water and Let the Layers Settle
After assembling the layers, water the bed thoroughly until moisture reaches 6-8 inches deep. You’ll know it’s saturated when water runs out the bottom or when the surface feels damp but not soggy. This step kickstarts decomposition, which generates heat and breaks down materials into fertile soil. For a 4-foot by 8-foot bed, expect to use about 10-15 gallons of water—don’t skimp, as dry layers won’t decompose efficiently.
Let the bed sit undisturbed for 2-4 weeks before planting. During this time, the materials will shrink as they decompose, so the bed’s height will drop by 30-50%. Check the moisture level weekly—if the top 2 inches feel dry, water again. Avoid walking on the bed, as this compacts the layers and slows decomposition. You’ll see steam rising from the bed on cool mornings—that’s a sign the breakdown process is active.
Plant and Maintain Your Lasagna Bed
When the layers have settled and the bed feels like loose, crumbly soil when pressed, it’s ready for planting. Gently loosen the top 4-6 inches with a garden fork or your hands to create planting holes. For perennials or deep-rooted plants, dig holes 12-18 inches deep to accommodate their root systems. I like to add a handful of compost or worm castings to each hole for extra nutrients.
Water newly planted areas deeply to help roots establish in the fresh soil. Mulch the surface with 2-3 inches of straw or wood chips to retain moisture and suppress weeds. Lasagna beds require less frequent watering than traditional gardens because the organic layers hold moisture well. Water deeply 2-3 times per week during dry spells, aiming for 1-1.5 inches of water per session. You’ll notice fewer weeds and healthier plants as the bed continues to enrich itself over time.
Tips & tricks for perfect lasagna method gardening
These practical insights will help you maximize the effectiveness of your layered garden bed while avoiding common pitfalls that can derail your project.
Location Strategy: In Step 1, when selecting your garden spot, prioritize areas with 6+ hours of direct sunlight—this is non-negotiable for most vegetables and herbs. I’ve found that southern exposures (facing south in the Northern Hemisphere) receive the most consistent sunlight, which is especially important if you’re growing heat-loving crops like tomatoes or peppers. For compact spaces, consider vertical lasagna beds against fences or walls, but ensure the structure won’t degrade from moisture or block sunlight during peak hours.
Layering Technique: The alternating 2-3 inch layers of browns and greens in Step 2 create the perfect balance of carbon and nitrogen for decomposition. When building your bed, think of it like a lasagna—each layer has a purpose. Cardboard or newspaper should be completely flat and overlapping to block light from weeds, while straw or dry leaves should be loosely spread to allow airflow. Pro tip: If you’re using coffee grounds as greens, limit them to 10% of your total greens layer—too much can make the soil too acidic.
Decomposition Timing: The 2-4 week settling period in Step 3 is where the magic happens, but it requires patience. I’ve seen beds ready in as little as 2 weeks in warm climates, while cooler seasons may take the full 4 weeks. During this time, resist the urge to peek or disturb the layers—this disrupts the decomposition process and slows down soil formation. If you notice steam rising from the bed in the mornings, that’s a great sign the materials are breaking down efficiently. For larger beds, consider building them in sections to start planting sooner.
Planting Preparation: When your bed is ready for planting in Step 4, take time to gently loosen the top 4-6 inches rather than digging deeply. This preserves the structure of your lasagna layers while creating ideal conditions for root growth. For deep-rooted plants like asparagus or fruit trees, you can create individual planting pockets by digging down to 12-18 inches—just be careful not to mix the layers too much. I’ve found that adding a handful of worm castings to each planting hole gives seedlings an extra boost without overwhelming the soil.
Pro Tips for Lasagna Method Gardening
- These practical insights will help you maximize the effectiveness of your layered garden bed while avoiding common pitfalls that can derail your project.
- Location Strategy: In Step 1, when selecting your garden spot, prioritize areas with 6+ hours of direct sunlight—this is non-negotiable for most vegetables and herbs.
- Layering Technique: The alternating 2-3 inch layers of browns and greens in Step 2 create the perfect balance of carbon and nitrogen for decomposition.
Frequently asked questions
Got questions about the lasagna method?
Here are answers to the most common ones—so you can dive into layered gardening with confidence!
What’s the best time of year to start lasagna gardening?
The ideal time is early spring or fall when the soil is workable but not frozen. Spring lets you plant right away, while fall gives layers time to decompose over winter. Avoid summer in hot climates—it can dry out materials too fast!
How long does it take for a lasagna garden bed to be ready for planting?
Most beds are ready in 3–6 months, depending on your climate and materials. Test readiness by pressing your finger into the soil—if it crumbles easily and smells earthy (not sour or rotten), it’s plant-ready! Patience pays off!
Is lasagna gardening cheaper than traditional in-ground gardens?
Yes! It’s cost-effective because you repurpose free/cheap materials like grass clippings, leaves, and cardboard. Avoid pricey soil amendments by using kitchen scraps (fruit/veggie peels) and yard waste. Win-win for your wallet and the planet!
Will lasagna gardening attract pests like rodents or insects?
Not if you balance layers correctly. Use carbon-rich materials (newspaper, straw) to deter pests and avoid fresh meat/veggie scraps. A 2–3 inch layer of mulch on top also deters burrowing critters. Pro tip: Add diatomaceous earth if needed!
Can I use lasagna gardening in containers or raised beds?
It’s perfect for containers or raised beds—just scale the layers to fit your space. Use smaller chunks of cardboard, compost, and soil. Great for balconies, patios, or small yards! Just ensure proper drainage.
How do I protect my lasagna garden in winter?
Cover beds with 4–6 inches of straw or leaves to insulate and prevent compaction. Avoid heavy mulch that can smother soil. Spring will thank you with nutrient-rich, fluffy soil!
What if my lasagna garden smells bad?
A sour or rotten smell means too many "greens" (nitrogen-rich) layers. Fix it by adding carbon sources (shredded leaves, straw) and turning the bed gently. Balance is key! Air it out if needed.
Wrapping up and next steps
The lasagna method gardening transforms even the smallest spaces into thriving gardens with minimal effort—and zero backbreaking work! By layering organic materials like cardboard, compost, and mulch, you create rich, fertile soil that retains moisture and nurtures plants without digging.
Whether you’re a beginner or a seasoned gardener, this no-till approach is your ticket to lush, low-maintenance beds.
Ready to dive in? Start small—pick a sunny spot, gather your supplies, and begin layering. Watch your garden bloom with less sweat and more success! 🌱✨