Flowers
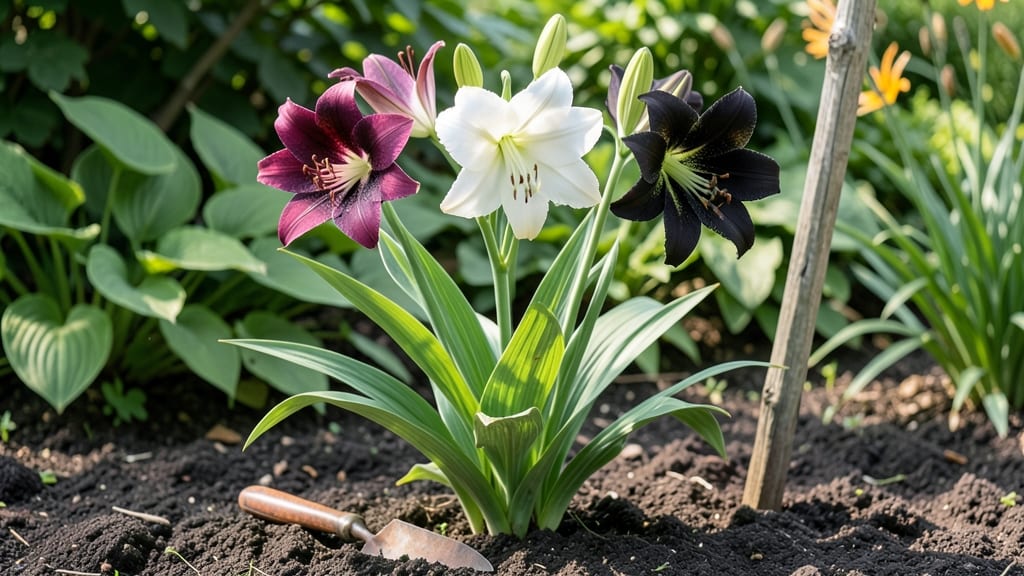
The best lily garden flowers create a fragrant, sun-drenched border that comes back more stunning every year. ✨ I learned this the hard way after planting a chaotic mix of annuals that fizzled by August—until I swapped them for perennial lilies that now bloom from June through September.
The secret isn’t just picking the right varieties, but arranging them so each wave of color overlaps like a living quilt.
Start with Asiatic lilies for early summer’s bold reds and oranges, then layer in Oriental lilies for their intoxicating fragrance in late summer. Martagon lilies add height and texture, while daylilies (technically not true lilies) fill gaps with neighborhood-stopping blooms.
The key is spacing: give each plant 18-24 inches of room so they don’t crowd each other out, and plant in full sun for the best performance.
By midsummer, you’ll have a garden that smells like a secret garden—rich, sweet, and impossible to resist. The foliage stays lush even after blooms fade, and with proper mulching, these perennials need almost no care beyond dividing clumps every 3-4 years.
The payoff? A border that thrives year after year with almost no effort.
Works for cottage gardens, modern borders, or even container arrangements on patios. The best part? Every year, the blooms get bigger and the fragrance stronger. Here’s how to design yours without the trial-and-error of my first attempt.
📚 In This Guide
- What you need
- Instructions
- Tips and common mistakes
- Wrapping up and next steps
What you need
- ● Lily bulbs: Choose 10–25 bulbs (depending on garden size) of fragrant varieties like Lilium regale, Lilium candidum, or Lilium auratum.
- ● Well-draining soil: 5–10 bags of garden soil mixed with 20–30% perlite or sand (for bulbs).
- ● Compost: 2–3 cubic feet to enrich the soil.
- ● Organic fertilizer: 5–10 lbs of balanced 10-10-10 or bulb-specific fertilizer.
- ● Mulch: 1–2 bags of pine bark or straw mulch (3–4 inches thick).
- ● Watering can or hose: With a gentle spray nozzle for hydration.
- ● Garden gloves: A pair for protection while handling soil/bulbs.
- ● Pruners: Sharp, sterilized pruners for trimming.
- ● Garden trowel or spade: For digging holes (6–8 inches deep).
- ● Measuring tape: To space bulbs 6–12 inches apart.
- ● Sunlight assessment: A 6+ hours of direct sunlight daily spot.
- ○ Drip irrigation (optional but recommended): For consistent moisture.
- ● Companion plants: Ferns, hostas, or daylilies for texture.
- ● Stakes or rings: To support tall varieties like Lilium martagon.
- ● Slow-release fertilizer tablets: For extra nourishment.
- ● Decorative rocks or borders: To define your lily garden.
Step-by-Step instructions for designing a fragrant lily perennial border
Here's how to create a stunning, low-maintenance lily garden that blooms reliably for years.
🌱 Step 1: Select and Prepare Planting Locations
Lilies thrive in full sun (6+ hours daily) with well-draining soil—this is non-negotiable. Test your soil drainage by digging a 12-inch hole, filling it with water, and timing how long it takes to drain. If it holds water beyond 2 hours, amend with 3 inches of coarse sand or gravel mixed into the top 12 inches of soil.
Choose a location with 4-6 feet of width for your border—this gives mature lilies room to spread their foliage without crowding. Mark the area with stakes and string to visualize your design. I like to plant in curved lines rather than straight edges; it creates a more natural, flowing look that's easier to maintain.
🪴 Step 2: Plant Lily Bulbs at the Right Depth and Spacing
Plant lily bulbs (like Asiatic, Oriental, or Trumpet lilies) 4-6 inches deep, with the neck (top of the bulb) pointing upward. Space them 6-12 inches apart, depending on the variety—check the bulb packaging for specifics. Overcrowding leads to weak stems and fewer blooms, while proper spacing ensures airflow and reduces disease risk.
Dig holes twice as wide as the bulb to avoid root damage. Gently loosen the roots before placing the bulb in—don’t force it. Fill the hole with soil, pressing lightly to eliminate air pockets. Water deeply immediately after planting to settle the soil and encourage root growth. Mulch with 2 inches of shredded bark to retain moisture and suppress weeds.
☀️ Step 3: Provide Support and Mulch for Healthy Growth
Install bamboo stakes or spiral supports (6-12 inches tall) at planting time for taller varieties like Trumpet lilies. Drive them 3-4 inches into the soil beside each bulb—this prevents root damage later. As stems grow, gently tie them to the stakes with soft plant ties (never wire, which can cut into the stems).
Replenish mulch annually in early spring to maintain 2 inches of coverage. This keeps soil temperatures stable, conserves moisture, and discourages weeds. Avoid organic mulches like wood chips near the stems—lilies prefer drier conditions at the base to prevent rot. Water deeply once a week during the first growing season, ensuring the soil is moist but not soggy.
✂️ Step 4: Prune and Divide for Long-Term Beauty
After blooms fade, cut back stems to 2 inches above the ground with clean, sharp shears. This redirects energy to the bulb for next year’s growth. Leave the foliage intact until it yellows naturally—this process stores nutrients in the bulb. I mark spent stems with a popsicle stick to avoid accidentally cutting them later.
Every 3-4 years, divide congested clumps in early spring before new growth appears. Dig up bulbs, separate offsets with a sterilized knife, and replant immediately. Discard any bulbs that show signs of rot or pests. This rejuvenates the border and prevents overcrowding, which can lead to fewer blooms and weaker stems.
💧 Step 5: Maintain Soil Health and Pest Control
Feed lilies in early spring with a balanced, slow-release fertilizer (10-10-10) applied at ½ the recommended rate. Over-fertilizing encourages leafy growth at the expense of blooms. Water deeply but infrequently—lilies are drought-tolerant once established. Let the soil dry completely between waterings to prevent bulb rot.
Watch for lily beetles (bright red with black spots) and aphids—handpick beetles and spray infested areas with neem oil for organic control. I also interplant lilies with garlic and chives, which naturally repel pests. Deadhead spent blooms promptly to encourage more flowers and reduce seed production, which drains the bulb’s energy.
Tips & tricks for perfect lily garden flowers
Creating a lily border that thrives for years requires more than just planting bulbs—it's about understanding the subtle details that make all the difference.
The Soil Drainage Test: That 2-hour drainage test in Step 1 is absolutely critical. If your soil holds water longer than 2 hours, you're risking bulb rot that can kill your lilies before they even bloom. I've seen beautiful gardens ruined by soggy soil—don't let that happen to yours. For heavy clay soils, consider creating raised beds where you can control the drainage completely. The extra effort pays off with healthy, blooming lilies every season!
Bulb Spacing Secrets: In Step 2, those 6-12 inches of spacing might seem generous, but trust me—it's worth it. I've learned the hard way that crowded lilies produce weak stems and fewer blooms. For a more dramatic look, try planting taller varieties like Trumpet lilies at the back of your border and shorter Asiatics in front. This creates beautiful height variation while maintaining proper airflow between plants.
Support System Strategy: When installing those bamboo stakes in Step 3, think ahead about how your lilies will grow. I recommend placing stakes slightly off-center from the bulb (about 2 inches away) so they don't interfere with root development. For very tall varieties, consider using two stakes per plant—one on each side—for extra support. And remember, those 3-4 inches of depth when driving stakes in is crucial to prevent them from toppling in wind or rain.
Dividing Made Easy: That 3-4 year division schedule in Step 4 might seem like a long wait, but it's actually perfect timing. When you do divide, look for healthy offsets with their own small bulbs—these are your future plants! I like to soak the clump in warm water for 10 minutes before dividing to make the roots more pliable. This makes the process much easier and reduces damage to both mother bulbs and offsets.
Pro Tips for Lily Garden Flowers
- Creating a lily border that thrives for years requires more than just planting bulbs—it's about understanding the sub...
- The Soil Drainage Test: That 2-hour drainage test in Step 1 is absolutely critical. If your soil holds water longer t...
- Bulb Spacing Secrets: In Step 2, those 6-12 inches of spacing might seem generous, but trust me—it's worth it. I've l...
Frequently asked questions
Got questions about creating your dream lily garden? You’re not alone! Here are answers to the most common queries—from planting tips to troubleshooting—so you can grow a fragrant, year-after-year border with confidence.
When is the best time to plant lilies in my garden?
Plant lily bulbs in early spring (just as shoots emerge) or fall (6-8 weeks before the first frost). Spring planting gives them time to establish roots before summer heat, while fall planting lets them settle before winter dormancy. Avoid planting in extreme heat or freezing temps—aim for soil temps between 50–60°F (10–15°C).
How much sunlight do lilies need, and what if my yard doesn’t get enough?
Most lilies thrive in full sun (6+ hours/day), but varieties like Lilium asiaticum or Lilium martagon tolerate partial shade (4–6 hours). If your space is shady, opt for daylilies (Hemerocallis)
or hostas as companions—they pair beautifully with lilies and handle lower light. Just ensure lilies get at least 4 hours of morning sun for optimal blooms.
Why aren’t my lilies blooming, even though the leaves look healthy?
No blooms? Check these fixes:
- Age: Lilies often skip blooming for 1–2 years while establishing roots.
- Overcrowding: Divide bulbs every 3–4 years if they’re packed too tightly.
- Nutrients: Feed with balanced fertilizer (10-10-10) in early spring.
- Stress: Avoid transplanting or heavy pruning during bloom time.
Do lilies need special care during winter or in rainy climates?
Lilies are hardy perennials, but mulch bulbs with 2–3 inches of straw or leaves in winter to protect roots. In rainy areas, ensure well-draining soil (amend with compost or sand) to prevent bulb rot. Stake tall varieties (like Lilium candidum) before heavy rains to avoid flopping. Most lilies tolerate light frost, but avoid planting in soggy, waterlogged soil.
Can I grow lilies in containers, or are they only for garden beds?
Lilies thrive in containers (use pots at least 12 inches deep with drainage holes). Choose dwarf varieties like Lilium ‘Stargazer’ or Lilium ‘Black Beauty’ for small spaces. Mix in compost-rich potting soil and repot every 2–3 years. Place containers in full sun** and water when the top inch of soil dries. Bonus: Move pots indoors before frost if winter temps dip below 20°F (-7°C).
Wrapping up and next steps
Creating a stunning lily garden filled with fragrant, perennial blooms is a rewarding project that brings beauty and tranquility to your outdoor space.
Whether you’re drawn to the elegance of Asian lilies, the hardiness of daylilies, or the delicate charm of true lilies, these flowers promise year-after-year returns with minimal fuss. With the right soil, sunlight, and care, you’ll enjoy a vibrant border that thrives season after season.
Ready to dive in? Start small—plant a few varieties, experiment with colors, and let your garden evolve into a fragrant paradise. Your future self (and pollinators!) will thank you. 🌸💚