Pests and Diseases
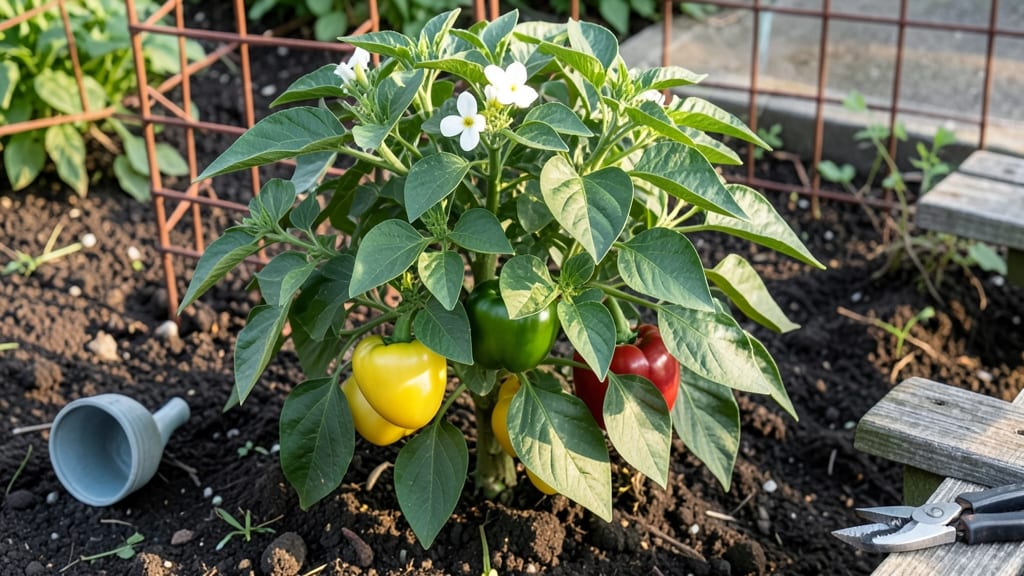
Here are pepper gardening tips to make your plants flourish—skip the store-bought seeds and start with disease-resistant heirlooms like ‘Carolina Wonder’ instead. 🌿 or ‘Jalapeño M’ deliver reliable heat and flavor year after year.
The secret isn’t just the seeds; it’s how you prep the soil, space them, and keep them happy once they’re planted.
You’ll need well-draining soil mixed with compost, containers at least 5 gallons deep (or full sun in the ground), and a spot that gets 6-8 hours of sunlight daily. Watering is where most gardeners trip up—peppers hate soggy roots but also can’t handle drought.
I’ve perfected a routine of deep watering twice a week (more in summer heat), always at the base to avoid wetting leaves. A mulch layer keeps moisture steady and deters weeds, cutting down on maintenance.
By mid-summer, you’ll be harvesting peppers that are bold in flavor and free of cracks or spots—no more tossing half your crop.
The key is consistent care: pinch off early flowers if your plants look stressed, and watch for pests like aphids (spray with soapy water if you spot them). With these tips, you’ll go from struggling with peppers to enjoying a bounty that lasts from July through frost.
This works whether you’re growing in pots on a balcony or rows in the ground. The same principles apply, just scaled to your space. Let’s turn those seeds into a harvest you’ll brag about!
📚 In This Guide
- What you need
- Instructions
- Tips and common mistakes
- Wrapping up and next steps
What you need
- ● Pepper Seeds or Seedlings: Choose disease-resistant varieties like ‘Aristotle,’ ‘Carmen,’ or ‘Jupiter.’ (Start with 5–10 seeds or 3–5 seedlings for a small garden.)
- ● Growing Medium: Well-draining potting mix (avoid garden soil—peppers hate soggy roots!). Look for a blend labeled for vegetables or peppers. (5–10 gallons per container or 1 cubic yard for in-ground planting.)
- ● Perlite or vermiculite (1 part per 4 parts soil) to improve aeration.
- ● Containers (if applicable): 5-gallon pots or larger (minimum 12–18 inches deep and wide for mature plants). Ensure they have drainage holes!
- ● Fertilizer: Balanced organic fertilizer (10-10-10 or 5-5-5) or compost (mix 1 cup per 5 gallons of soil).
- ● Calcium supplement (like crushed eggshells or lime) to prevent blossom-end rot.
- ● Hand trowel (for transplanting seedlings).
- ● Gloves (to protect from thorns and soil-borne diseases).
- ● Watering can or hose with a gentle spray nozzle (peppers hate wet leaves!).
- ● Pruning shears (for trimming dead leaves or shaping plants).
- ○ Row covers or shade cloth (optional, for early-season frost protection or pest deterrence).
- ● Spray bottle with neem oil or copper fungicide (preventative care for disease-resistant varieties).
- ● Sunlight: Full sun (6–8+ hours daily).
- ● Temperature: Warm soil (70–85°F) and air (above 55°F). Use a seedling heat mat if starting indoors early.
- ● pH Level: Slightly acidic to neutral soil (6.0–7.0). Test with a soil pH kit if needed.
- ● Water: Consistent moisture (1–1.5 inches per week). Avoid overhead watering to prevent fungal diseases.
How to grow disease-resistant peppers year-round
Here's the method I've perfected for growing peppers that stay healthy, productive, and delicious through all seasons.
🌱 Step 1: Start Seeds Indoors at the Right Time
Begin sowing seeds indoors 8-10 weeks before your last frost date. Use small seedling trays with the sterile seed-starting mix you've prepared, planting each pepper seed ¼ inch deep. I always label my trays with the variety and date—pepper seeds take 10-14 days to germinate, and I want to track them properly.
Keep the soil consistently moist (not soggy) by covering the trays with plastic wrap until germination. Place them in a warm spot—pepper seeds need soil temperatures of 75-85°F to sprout. A seedling heat mat helps if your home runs cooler. Once sprouts appear, remove the plastic and move them to a sunny window or under grow lights for 14-16 hours daily.
☀️ Step 2: Transplant Seedlings When Strong and Ready
Wait until seedlings have 4-5 true leaves and are 3-4 inches tall before transplanting. This ensures they're strong enough to handle the shock of moving. Harden them off by placing them outside in a sheltered spot for 1-2 hours daily over 7-10 days, gradually increasing their time outdoors.
Choose a location with full sun (6-8 hours daily) and well-draining soil. If growing in containers, use pots at least 12 inches deep with drainage holes. Fill with a mix of potting soil and compost to give peppers the nutrients they crave. Space plants 18-24 inches apart to allow airflow and prevent disease.
💧 Step 3: Water and Fertilize for Maximum Health
Water peppers at the base of the plant, avoiding the leaves to prevent fungal diseases like powdery mildew. Keep the soil consistently moist but not waterlogged—peppers hate soggy roots. I water mine when the top inch of soil feels dry, usually 1-2 times per week, depending on the weather.
Fertilize every 2-3 weeks with a balanced, water-soluble fertilizer (like 10-10-10) to encourage strong growth and fruiting. Stop fertilizing 4-6 weeks before harvest to allow flavors to develop fully. Mulch around the base with straw or shredded leaves to retain moisture and suppress weeds.
✂️ Step 4: Prune and Support for Bigger Harvests
Prune peppers to encourage bushier growth and better air circulation. Remove any suckers (side shoots) that form in the leaf axils, as these can divert energy from fruit production. I also pinch off the first few flowers if you want larger peppers later—this redirects the plant's energy into growing stronger stems and leaves.
Use cages or stakes to support taller varieties like bell peppers. This prevents the plants from toppling over and makes harvesting easier. Remove any damaged or diseased leaves immediately to keep the plant healthy. Peppers are sensitive to cold, so if temperatures drop below 50°F, bring potted plants indoors or cover them with frost cloth.
🌿 Step 5: Harvest and Extend the Season
Harvest peppers when they reach their mature size and color. For bell peppers, this is when they're fully colored and firm. For hot peppers, harvest when they're plump and vibrant. Use pruning shears to cut stems cleanly—this encourages more fruit to grow in their place.
To extend the season, bring potted peppers indoors before the first frost. Place them in a sunny spot and continue watering and fertilizing as needed. With proper care, you can keep peppers producing well into fall and even winter. Store harvested peppers in a cool, dark place to enjoy their flavors year-round.
Tips & tricks for perfect year-round pepper growth
Here's what I've learned after years of growing peppers that thrive through every season—these tricks make all the difference.
Soil Temperature Secret: That 75-85°F soil temperature range in Step 1 is non-negotiable for germination. If your home runs cooler, invest in a seedling heat mat—it's a game-changer. I've seen germination rates drop by 50% when seeds sit in temperatures below 70°F. Place your trays on top of the fridge if needed to maintain that warm environment consistently.
Harden Off Gradually: The 1-2 hours daily hardening process in Step 2 might seem tedious, but rushing it causes transplant shock. Start with just 30 minutes on day one, then add 30 minutes each day until you reach the full 1-2 hours. Watch your seedlings closely—if they wilt dramatically, they're not ready for that extra time outside yet.
Fertilizer Timing: Stopping fertilization 4-6 weeks before harvest might seem counterintuitive, but it's crucial. This final period lets the plant focus on flavor development rather than leafy growth. I switch to a low-nitrogen fertilizer (like 5-10-10) during this time to encourage sweetness in the peppers without promoting new foliage.
Cold Protection: When temperatures drop below 50°F, don't just bring potted peppers indoors—acclimate them first. Move them to a sheltered spot outside for 2-3 hours daily over 3-4 days before bringing inside completely. This prevents shock from sudden temperature changes and helps maintain their productivity through winter.
Pro Tips for Pepper Gardening Tips
- Here's what I've learned after years of growing peppers that thrive through every season—these tricks make all the difference.
- Soil Temperature Secret: That 75-85°F soil temperature range in Step 1 is non-negotiable for germination.
- Harden Off Gradually: The 1-2 hours daily hardening process in Step 2 might seem tedious, but rushing it causes transplant shock.
Frequently asked questions
Got questions about growing peppers like a pro? Here are answers to the most common ones—from timing to troubleshooting—so you can keep your garden thriving all year!
When is the best time to plant peppers?
Peppers love warmth! Start seeds indoors 8–10 weeks before your last frost date (or buy transplants). Move them outside after soil temps hit 60°F+—they’re frost-sensitive! For year-round growing, use row covers or grow in containers to extend seasons.
How do I prevent pepper diseases like blight?
Disease-resistant varieties (like ‘Aristotle’ or ‘Carolina Wonder’) are your best bet! Also:
- Space plants for airflow (18–24" apart).
- Water at the base (avoid wetting leaves).
- Rotate crops yearly to break disease cycles.
- Use copper fungicide if spots appear.
What’s the fastest way to get rid of pepper pests (aphids, hornworms)?
Try these non-toxic fixes first:
- Spray pests off with water (aphids).
- Handpick hornworms (they’re sneaky—check leaves daily!).
- Introduce ladybugs or parasitic wasps (natural predators).
- Dust plants with diatomaceous earth (food-grade only!).
How long does it take for pepper plants to produce fruit?
Patience pays off! From transplant to harvest:
- 60–90 days for sweet peppers (like bell peppers).
- 70–120 days for hot peppers (jalapeños, cayennes).
- Pro tip: Warmth speeds things up—use black plastic mulch to boost soil temps!
Can I grow peppers in containers? What’s the best setup?
Use pots at least 12–18" deep with drainage holes. Choose compact varieties like ‘Shishito’ or ‘Mini Bell.’ Mix in compost for nutrients, and place containers in full sun (6+ hours/day). Fertilize every 2–3 weeks with a balanced formula (like 10-10-10).
Why are my pepper plants dropping flowers or fruit?
Common culprits:
- Temperature stress: Peppers need 70–85°F to set fruit. Too hot/cold = flower drop.
- Watering issues: Uneven moisture (or overwatering) causes stress.
- Nutrient deficiency: Lack of phosphorus (bloom booster) or calcium (blossom end rot).
- Fix: Adjust care, hand-pollinate (gently shake plants), or add Epsom salt (for magnesium).
Wrapping up and next steps
Growing your own disease-resistant peppers is a rewarding journey that brings fresh, flavorful harvests straight to your kitchen! 🌱 From selecting the right varieties to mastering pest control and soil care, these tips ensure your garden thrives year-round.
Whether you're a beginner or a seasoned gardener, every step you take brings you closer to a bountiful, healthy crop.
Now that you're armed with the knowledge, roll up your sleeves and get planting! Start small if you're new, experiment with different varieties, and don’t forget to share your successes (and lessons learned) with fellow gardening enthusiasts. Happy growing—your taste buds will thank you! 🌶️✨