Advice
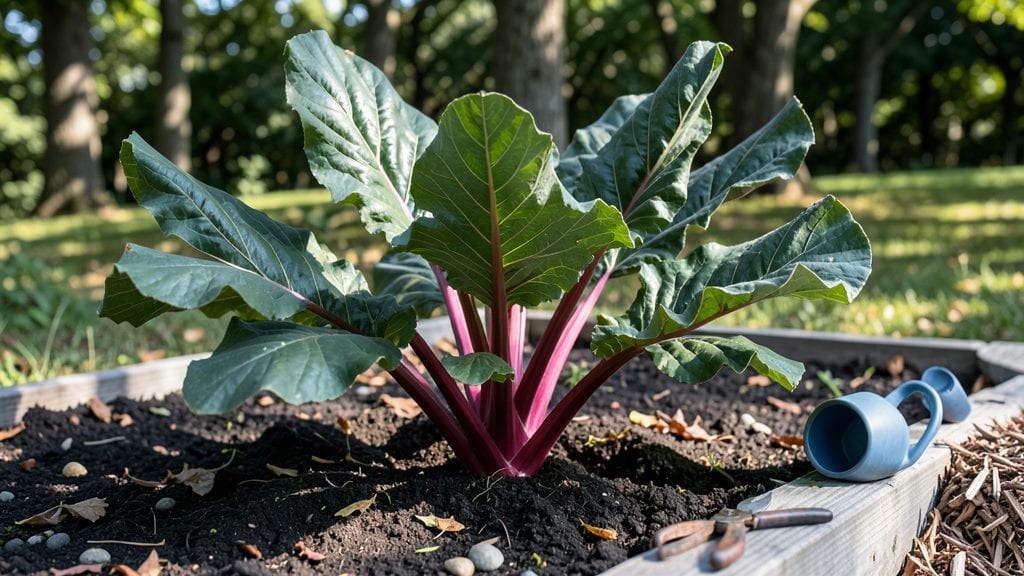
Here are rhubarb gardening tips that’ll turn grocery store scraps into lush, long-lasting plants with just a little patience and the right conditions—no fancy tools or greenhouses needed. 🌱 The key is getting the soil, sunlight, and watering rhythm just right, and I’ll show you exactly how to do it without the guesswork.
Rhubarb thrives in cool climates and actually suffers in summer heat, which means most of the heavy lifting happens in spring and fall.
You’ll need a spot with at least 6 hours of sun, well-draining soil rich in compost, and a watering schedule that keeps the roots moist but never soggy.
Once established, these plants reward you with bold red stalks for decades, making them one of the most low-maintenance perennials around.
📚 In This Guide
- What you need
- Instructions
- Tips and common mistakes
- Wrapping up and next steps
What you need
- ● Rhubarb Crowns: 1–3 healthy, disease-free crowns (choose varieties like 'Victoria' or 'Strawberry' for beginners).
- ● Well-Draining Soil: Rich in organic matter (compost or aged manure). Aim for a pH of 5.5–6.5.
- ● Sunlight: A full-sun spot (6+ hours of direct sunlight daily).
- ● Watering Can or Hose: For consistent moisture (rhubarb loves 1–1.5 inches of water per week).
- ● Mulch: Straw, wood chips, or compost to retain moisture and suppress weeds.
- ● Garden Gloves: To protect your hands while handling soil and plants.
- ● Pruners or Sharp Shears: For harvesting stalks cleanly (sterilize with rubbing alcohol between cuts).
- ● Fertilizer: Balanced 10-10-10 or organic options like compost tea (apply early spring).
- ● Soil Test Kit: To check nutrient levels and pH before planting.
- ● Drip Irrigation System: For automated, even watering.
- ● Row Cover or Netting: To protect young plants from pests like slugs or birds.
- ● Garden Journal: To track planting dates, harvests, and growth notes.
- ● Compost Bin: For recycling kitchen scraps into nutrient-rich mulch.
Step-by-step rhubarb plant care for a year-round harvest
Here's my battle-tested approach to growing rhubarb that thrives through seasons and delivers tender stalks for years.
🌱 Step 1: Plant Crowns in Well-Drained Soil
Choose a sunny spot with 6+ hours of direct sun daily—rhubarb needs full sun to produce thick, flavorful stalks. The crowns you planted should go 2 inches deep in the soil, with the buds facing upward. I space mine 3 feet apart in all directions to give roots plenty of room to spread.
Work in a 2-inch layer of compost before planting to improve drainage and fertility. Rhubarb hates soggy roots, so if your soil drains poorly, mix in sand or build a raised bed. The first year focuses on root establishment, so resist harvesting—let the plant grow strong for next year's bounty.
💧 Step 2: Water Deeply and Mulch Heavily
Water rhubarb 1-2 inches per week during the growing season, aiming for the soil rather than leaves to prevent disease. I use a soaker hose to deliver moisture slowly at the base. The soil should feel moist 6 inches down—if it's dry, water again.
Apply a 3-inch layer of organic mulch around plants (but not touching the crown) to retain moisture and suppress weeds. I use straw because it breaks down slowly and keeps the soil cool. In winter, add an extra 4-6 inches of mulch to protect the crowns from freezing temperatures.
☀️ Step 3: Fertilize and Prune for Long-Term Health
Feed rhubarb in early spring with a balanced 10-10-10 fertilizer applied 6 inches away from the crown. I use about ½ cup per plant to avoid over-fertilizing, which can lead to leafy growth at the expense of stalks. Water thoroughly after applying to prevent root burn.
Remove any flower stalks that appear—they sap energy from the plant. Cut them off at the base immediately. In late fall, trim old leaves down to 2 inches above the ground to keep the crown healthy. This cleanup prevents disease and makes next year's harvest even better.
⏰ Step 4: Harvest Strategically for Maximum Yield
Wait until the third year to harvest—this gives the plant time to establish a strong root system. Pull stalks gently when they're 8-10 inches tall and at least ½ inch thick. Leave the leaves attached to feed the plant as it grows new stalks.
Never harvest more than ⅓ of the stalks at a time, and avoid cutting into the center of the plant. I start harvesting in late spring and continue until early summer. After that, let the plant rest—it needs energy to survive winter and produce next year's crop.
✂️ Step 5: Protect and Prepare for Winter
In late fall, cut back old leaves to 2 inches above the ground and add 4-6 inches of mulch around the crown. This insulation helps the plant survive winter temperatures down to -25°F. I also cover the crown with a thick layer of straw or leaves for extra protection.
Rhubarb is surprisingly hardy, but young plants (first 2 years) benefit from a burlap wrap around the crown if your winters are harsh. In early spring, remove the mulch and check for signs of rot or pests. Healthy rhubarb will send up new leaves by late winter, signaling it's ready for another growing season.
Tips & tricks for perfect rhubarb plant care
These battle-tested strategies will help you grow rhubarb that thrives year after year with minimal effort.
Soil Preparation Secret: Before planting, test your soil's drainage by digging a hole and filling it with water. If it doesn't drain within 2 hours, amend with sand or build a raised bed. I've found that rhubarb planted in containers with a mix of garden soil and perlite thrives even in apartments—just ensure the pot has drainage holes. The 2-inch compost layer mentioned in Step 1 should be well-aged compost, not fresh manure, to avoid burning the roots.
Watering Wisdom: The 1-2 inches per week guideline works best in most climates, but adjust for your local conditions. In hot summers, I water every 2-3 days to keep that 6-inch soil moisture level consistent. A simple way to check is to stick your finger in the soil—if it feels dry at 6 inches, it's time to water. Morning watering prevents fungal diseases by allowing leaves to dry during the day.
Fertilizer Timing: That ½ cup of 10-10-10 fertilizer in Step 3 should be applied right after you see new growth in early spring, not before. I also recommend adding a handful of bone meal to the planting hole when you first install crowns—this provides slow-release phosphorus for strong root development. Avoid fertilizing after mid-summer as it encourages new growth that won't harden off before winter.
Winter Protection Upgrade: While the instructions mention 4-6 inches of mulch for winter, I've found that adding a layer of bubble wrap over the mulch in extremely cold climates (below -25°F) provides extra insulation. Just make sure to remove it in early spring before new growth appears. For container-grown rhubarb, move pots to a sheltered location or wrap them in thick burlap and move to a garage or cold frame.
Pro Tips for Rhubarb Gardening Tips
- These battle-tested strategies will help you grow rhubarb that thrives year after year with minimal effort.
- Soil Preparation Secret: Before planting, test your soil's drainage by digging a hole and filling it with water.
- Watering Wisdom: The 1-2 inches per week guideline works best in most climates, but adjust for your local conditions.
Frequently asked questions
Got questions about growing rhubarb? You’re not alone!
Here are answers to the most common queries—from timing to troubleshooting—to help you cultivate a thriving rhubarb patch with confidence.
When is the best time to plant rhubarb?
Plant rhubarb crowns in early spring or fall when soil temperatures are cool (50–60°F). Avoid summer planting—heat stress can stunt growth. Choose a spot with 6+ hours of sunlight and well-draining soil. Pro tip: Mulch after planting to retain moisture and protect roots.
How long does it take for rhubarb to produce stalks?
Be patient! Rhubarb is a perennial that takes 2–3 years to mature. The first year focuses on root establishment, while the second yields small harvests. By year three, you’ll enjoy full-size stalks (12–18 inches). Don’t harvest heavily in early years—it can weaken the plant.
Why is my rhubarb turning yellow or mushy?
Yellow or mushy stalks often signal overwatering, root rot, or fungal issues. Check for:
- Soggy soil → Reduce watering; improve drainage.
- Crown rot → Remove affected plants; sterilize tools.
- Pests (like slugs) → Use organic slug bait or copper barriers.
Prevent it: Space plants 3 feet apart for airflow and avoid wet foliage.
Can I grow rhubarb in containers?
Yes! Rhubarb thrives in large containers (18+ inches deep) with drainage holes. Use a well-draining potting mix and repot every 3–4 years to refresh soil. Limit to 1–2 plants per container—crowding stresses roots. Container tip: Place in full sun and water consistently (containers dry faster).
What’s the best way to overwinter rhubarb?
Rhubarb is hardy to USDA Zone 3, but young plants or harsh winters need help. In Zone 4+:
- Apply 4–6 inches of mulch (straw or leaves) around the crown.
- Avoid cutting stalks until late spring (after last frost).
- In extreme cold (<0°F), cover with burlap if your region gets heavy snow.
Spring check: Remove mulch early to prevent rot.
Wrapping up and next steps
Growing rhubarb is a rewarding journey that combines patience, care, and a dash of creativity! 🌱 With the right soil, sunlight, and timing, you’ll soon enjoy bountiful harvests of tart, vibrant stalks perfect for pies, compotes, or savory dishes.
Remember, consistent mulching, proper spacing, and winter protection are your secret weapons for year-round success.
Ready to dive in? Start by prepping your garden bed this fall—your future harvest will thank you! 🌟 Check out our step-by-step planting guide to get growing today.