
Tools
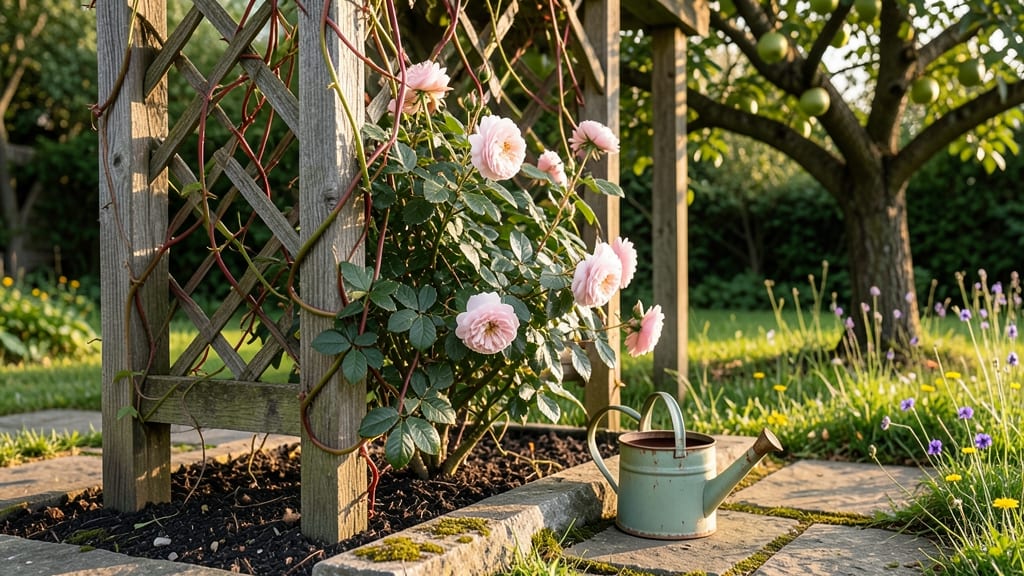
Creating a secret garden privacy screen that blooms all year transforms your backyard into a hidden sanctuary. ✨ I stumbled upon this design after years of struggling with noisy neighbors and unflattering views—until I discovered the perfect mix of evergreen shrubs, flowering climbers, and ornamental grasses that thrive together.
The beauty of this setup is that it grows denser every season without constant pruning. Start with 6-8-foot evergreens like boxwood or holly for structure, then weave in clematis or roses for seasonal color. The result? A living wall that blocks noise, filters sunlight, and stays lush even in winter.
By late spring, you’ll have fragrant blooms climbing the screen, while the deep green foliage creates a cozy, enclosed feeling. The best part? It requires no more than 30 minutes of maintenance per month—just occasional trimming and watering during dry spells.
Works for small urban yards or sprawling backyards alike. Here’s how to build yours without breaking the bank or your back.
📚 In This Guide
- What you need
- Instructions
- Tips and common mistakes
- Wrapping up and next steps
What you need
- ● Plants: 5–10 Bamboo (Fargesia or Phyllostachys) – 4–6 ft tall, clumping varieties (avoid running bamboo!)
- ● 3–5 Hydrangeas (Oakleaf or Panicle) – Dwarf varieties (3–4 ft mature height)
- ● 2–3 Boxwood (Buxus) – Compact shrubs (3–4 ft tall)
- ● 1–2 Camellias (Sasanqua) – Evergreen, winter-blooming (3–5 ft tall)
- ● 1 Dwarf Japanese Maple (Acer palmatum) – For year-round color (3–5 ft tall)
- ● Soil & Amendments: 50 lbs Well-draining potting mix (or garden soil + perlite for DIY blend)
- ● 10 lbs Organic compost (for nutrient boost)
- ● 1 lb Slow-release fertilizer (12–14 month)
- ● Hardware: 1–2 Garden trellis or lattice panels (6–8 ft tall, 4 ft wide)
- ● Stakes & twine (for temporary support if needed)
- ● Mulch (3–4 inches of shredded bark or wood chips)
- ● Garden trowel or spade
- ● Pruning shears (sterilized)
- ● Measuring tape
- ● Wheelbarrow (for soil transport)
- ● Gloves (gardening or work gloves)
- ● Watering can or hose with spray nozzle
- ● Drip irrigation system (for hands-off watering)
- ● Decorative stones or pebbles (for borders)
- ● Solar-powered garden lights (for evening ambiance)
- ● Fertilizer spikes (for extra nutrients)
- ● Plant markers (to track varieties)
Step-by-Step instructions for designing a year-round privacy screen
Here's how to create a thriving, evergreen privacy barrier that stays lush and blooming through every season.
🌱 Step 1: Plan Your Layout and Select Plant Placement
Start by sketching your space, marking where the 8-foot-tall privacy screen will run. I like to use a mix of evergreen shrubs for year-round coverage and seasonal bloomers for color. Place taller plants like Arborvitae along the back row, with mid-height Hydrangeas and Camellias in front. This creates natural layers that block views while letting light filter through.
Measure your space carefully—most privacy screens need 6-8 feet of width per plant to mature fully. If your area is narrow, opt for compact varieties like Dwarf Fothergilla or Boxwood to avoid overcrowding. Remember, plants will spread as they grow, so leave extra room for future expansion.
🪴 Step 2: Prepare the Soil for Optimal Growth
Dig a trench 12 inches wide and 18 inches deep along your planned layout. Amend the native soil with 3 cubic yards of compost and 10 pounds of balanced 10-10-10 fertilizer to ensure nutrient-rich conditions. I always mix in a handful of mycorrhizal fungi to help roots establish stronger connections with the soil.
For clay-heavy soil, blend in 2 cubic feet of perlite to improve drainage—waterlogged roots are the fastest way to kill a privacy screen. Test the soil pH and adjust if needed; most evergreens thrive in slightly acidic soil (pH 5.5-6.5). If your soil is too alkaline, add sulfur to lower the pH gradually.
☀️ Step 3: Plant Your Evergreen Foundation
Begin by planting Arborvitae or Leyland Cypress at 6-foot intervals—these will form the backbone of your screen. Dig holes twice as wide as the root ball and place each plant so the top of the root ball sits 1 inch above ground level. This prevents rot when water pools around the stem.
Backfill with native soil mixed with 1 gallon of compost per plant, tamping gently to remove air pockets. Water deeply until the soil is evenly moist to a depth of 12 inches. Mulch the base with 3 inches of shredded bark, keeping it 6 inches away from the trunk to prevent moisture buildup.
🌿 Step 4: Add Seasonal Bloomers for Color and Texture
Fill gaps between evergreens with Hydrangeas, Camellias, or Azaleas, spacing them 3-4 feet apart for mature growth. These plants provide spring, summer, and fall blooms while keeping the screen vibrant. Plant them at the same depth as their nursery pots, ensuring the root flare is visible above the soil line.
For year-round interest, include evergreen ferns or Boxwood in shaded areas. These fill gaps where blooming plants may go dormant in winter. Water newly planted shrubs twice weekly for the first month, then taper to once weekly once established. Avoid overhead watering—use a soaker hose to keep foliage dry and prevent fungal diseases.
✂️ Step 5: Prune and Maintain for Long-Term Health
Prune Arborvitae and Cypress in early spring before new growth appears. Trim back overgrown branches to maintain a clean, tapered shape, but never cut into old wood—this weakens the plant. For flowering shrubs, prune right after blooming to encourage next year’s flowers. Remove any dead, diseased, or crossing branches immediately.
Fertilize in early spring and mid-summer with a slow-release, organic fertilizer to support steady growth. Monitor for pests like spider mites or aphids—a strong spray of neem oil usually resolves infestations before they spread. With consistent care, your privacy screen will mature into a dense, lush barrier within 2-3 years.
Tips & tricks for perfect year-round privacy screens
Creating a thriving privacy screen takes thoughtful planning—here's how to ensure your design thrives year after year with minimal effort.
Layering Strategy: In Step 1, when planning your layout, remember that the 8-foot height of your screen should be achieved through staggered layers. Place taller evergreens like Arborvitae at the back, then add mid-height Camellias, and finally fill the front with lower-growing Hydrangeas. This creates visual depth while ensuring no gaps appear as plants mature. I've found that spacing these layers 3-4 feet apart prevents overcrowding while maintaining that lush, natural look.
Soil Preparation Secret: The 12-inch wide, 18-inch deep trench in Step 2 is your foundation—don't skip the mycorrhizal fungi! These beneficial fungi form symbiotic relationships with plant roots, helping them absorb nutrients more efficiently. For clay-heavy soils, I recommend adding 2 cubic feet of perlite per 10 feet of trench length—this dramatically improves drainage while maintaining moisture retention. Pro tip: Test your soil pH before planting; evergreens thrive in slightly acidic conditions (pH 5.5-6.5), and adjusting with sulfur now saves headaches later.
Planting Precision: When planting your Arborvitae foundation in Step 3, pay special attention to that 1-inch elevation above ground level. This small detail prevents water from pooling around the stem, which is the #1 cause of root rot in young plants. I always use a level to ensure consistent elevation across all plants—trust me, it makes a noticeable difference in long-term health. For the 1 gallon of compost per plant, consider using worm castings instead of regular compost; they provide gentle, balanced nutrients that won't burn tender new roots.
Watering Wisdom: The twice-weekly watering schedule in Step 4 works for most climates, but adjust based on rainfall. I've learned the hard way that overhead watering leads to fungal issues—always use that soaker hose! For the first month, check soil moisture daily; young plants need consistent moisture to establish roots. After establishment, you can reduce to weekly watering, but always water deeply to encourage deep root growth. A good rule of thumb: Water until you see moisture 12 inches deep—that's when you know your plants are getting the hydration they need.
Pro Tips for Secret Garden P
- Creating a thriving privacy screen takes thoughtful planning—here's how to ensure your design thrives year after year with minimal effort.
- Layering Strategy: In Step 1, when planning your layout, remember that the 8-foot height of your screen should be achieved through staggered layers.
- Soil Preparation Secret: The 12-inch wide, 18-inch deep trench in Step 2 is your foundation—don't skip the mycorrhizal fungi!
Frequently asked questions
Got questions about creating your own Secret Garden P privacy screen? Here are some of the most common ones—and their answers!
How long does it take for a Secret Garden P screen to grow dense enough for privacy?
A well-maintained Secret Garden P screen typically reaches full privacy (6–8 feet tall) in 2–3 years, depending on sunlight and soil quality. Fast-growing varieties like Bamboo or Hydrangeas may show results in 1–2 years. Patience pays off—once established, these plants thrive with minimal effort!
Will a Secret Garden P screen survive harsh winters or hot summers?
The Secret Garden P design prioritizes hardy, climate-adaptive plants like Boxwoods, Privet, or Evergreens, which tolerate -20°F to 100°F+ with proper care. Mulch in winter and water deeply in summer to boost resilience. Pro tip: Choose native species for your region for extra toughness!
Is this more cost-effective than a wooden fence or lattice?
Yes! While initial costs (~$50–$150 per plant) may seem higher, Secret Garden P screens save long-term by eliminating:
- Fence installation labor (~$20–$50/ft)
- Paint/stain maintenance every 2–5 years
- No structural repairs (unlike wood)
Can I mix different plants in my Secret Garden P screen for variety?
Yes! The modular design encourages layered planting for texture and color. Pair fast climbers (e.g., Clematis) with shrubs (e.g., Abelia) and ground cover (e.g., Creeping Jenny) for a lush, dynamic look. Just ensure similar sunlight/water needs to avoid stressing plants.
What’s the best way to keep pests (like deer or rabbits) from eating my screen?
Use these low-effort deterrents:
- Natural repellents: Sprinkle garlic powder or hot pepper spray around the base.
- Physical barriers: Install chicken wire (temporarily) or deer fencing (8 ft tall).
- Plant smart: Avoid hostas or roses—opt for Boxwoods or Holly, which pests dislike.
What do I do if my plants start looking leggy or sparse?
Leggy growth usually means too much shade or overcrowding. Try these fixes:
- Trim 1/3 of the top growth to encourage bushiness.
- Add balanced fertilizer (10-10-10) in spring.
- Thin out overlapping branches for better airflow.
- Move sun-loving plants to sunnier spots if needed.
Wrapping up and next steps
Creating your own Secret Garden P is a rewarding way to enjoy year-round privacy while adding beauty to your space with minimal effort. Whether you’re a gardening novice or a seasoned pro, this lush, low-maintenance solution brings nature’s charm to your doorstep—without the fuss. 🌿
Ready to transform your outdoor area? Start by sketching your design, gathering your materials, and planting with confidence. Your private oasis awaits—just a few steps away!