Lawn
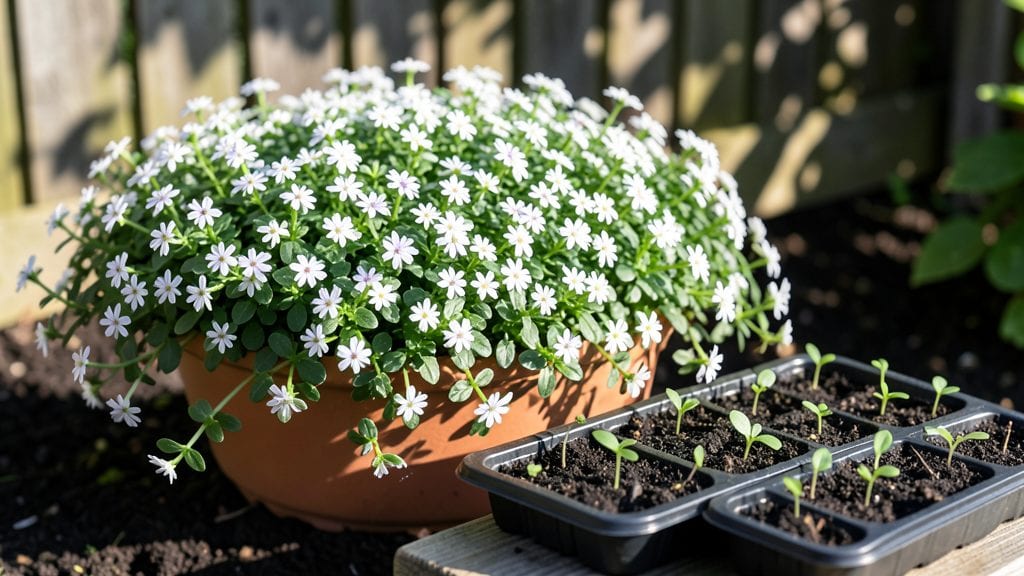
My seed sheet garden transformed a boring patch of lawn into a layered, year-round harvest system that actually works. 🌱 The secret lies in those thin, plant-infused sheets that dissolve into the soil—no more struggling with tiny seeds or waiting for perfect planting conditions.
You’ll need biodegradable seed sheets (available online or at garden centers), a small shovel, and a watering can. The process takes less than 30 minutes to set up, and you can grow everything from lettuce to flowers.
Unlike traditional planting, these sheets protect seeds from birds, keep moisture locked in, and even help with spacing.
Within 10-14 days, you’ll see sprouts pushing through the soil, and by 4-6 weeks, you’ll have edible greens or blooming flowers. The best part? You can layer multiple sheets in the same spot—plant one in early spring, another in late summer, and enjoy fresh harvests without replanting.
Perfect for small spaces, balconies, or even your front yard. No more waiting for the "right" time to plant—just lay, water, and watch it grow. Here’s how to get started without overcomplicating it.
📚 In This Guide
- What you need
- Instructions
- Tips and common mistakes
- Wrapping up and next steps
What you need
- ● Seed sheets (biodegradable planting sheets) – 1–2 sheets per plant type (e.g., lettuce, herbs, or microgreens). Choose sheets with embedded seeds for convenience.
- ● Organic potting mix or seed-starting soil – 1–2 gallons, lightweight and sterile (avoid garden soil—it’s too dense!).
- ● Watering can or spray bottle – With a fine mist setting to avoid disturbing seeds.
- ○ Clear plastic dome or humidity tray – Optional but helpful for maintaining moisture while seeds germinate.
- ● Grow lights or sunny windowsill – 6–8 hours of light daily (grow lights are ideal for indoor setups).
- ● Small pots, trays, or fabric grow bags – 4–6 inches deep, with drainage holes.
- ● Twine or biodegradable twine – For securing seed sheets to pots if needed.
- ● Plant labels or markers – To track varieties (especially useful for layered planting!).
- ● Scissors or pruners – For trimming seed sheets to fit pots.
- ○ Compost or worm castings – Optional boost for nutrient-rich soil.
- ● A space with consistent temperature (65–75°F)—seed sheets thrive indoors or in a greenhouse.
- ● Patience! Germination can take 5–14 days depending on the plant.
- ● Dedication to layered planting: Plan your harvest schedule so faster-growing greens (like radishes) don’t outcompete slower ones (like carrots).
Step-by-Step instructions for creating your own seed sheet garden
Transform a single sheet of newspaper into a thriving, layered garden that keeps giving all season!
🌱 Step 1: Prepare Your Newspaper Base
Start with a full-size newspaper—the larger the sheet, the more plants you can fit. Lay it flat on a clean, dry surface and unfold it completely. I like to use a sheet that’s been printed on both sides, as the ink won’t leach into the soil and can actually help retain moisture. If your newspaper is damp or crinkled, smooth it out with your hands to create an even surface.
Fold the edges inward slightly to create a raised border—this prevents soil from spilling off when you water. Think of it like making a tiny tray. The goal is to create a contained space where roots can grow downward while the top layer stays loose for planting. This simple fold keeps everything neat and makes watering easier later.
💧 Step 2: Layer Moisture-Retentive Materials
Place a thin layer of coffee grounds over the newspaper—about ¼ inch thick. Coffee grounds are a gardener’s secret weapon because they improve soil structure, add nutrients, and help retain moisture. Sprinkle them evenly, avoiding clumps. Next, add a light layer of compost, about ½ inch deep, spreading it evenly over the coffee grounds.
Press down gently but lightly—you want the layers to stay in place but still feel loose enough for roots to penetrate. The coffee grounds and compost will work together to create a nutrient-rich environment for your seeds. This combo also helps prevent the newspaper from breaking down too quickly, giving your plants a stable growing medium.
☀️ Step 3: Plant Your Seeds in Strategic Layers
Start with fast-growing seeds like radishes or lettuce—these will sprout quickly and give you an early harvest. Scatter them lightly over the compost layer, pressing them in just enough so they make contact with the soil but don’t get buried too deep. For slower-growing plants like carrots or beets, create small indentations with your finger and place the seeds about ¼ inch deep.
Once the fast growers are in, add a second layer of compost—about ½ inch thick—to cover the seeds. This keeps them moist and protected while they germinate. Label the sheet with a toothpick and a bit of marker so you remember what’s planted where. This layered approach mimics natural soil stratification, giving each plant the perfect conditions to thrive.
🌿 Step 4: Water Gently and Position for Growth
Water the sheet gently with a spray bottle until the top layer is moist but not soggy. You’ll know it’s right when the moisture reaches the bottom of the newspaper without pooling. Place your seed sheet in a location with indirect sunlight—like a windowsill or under a shade cloth—for the first few days. Too much direct sun can dry out the newspaper too quickly, while too little light slows germination.
Check the moisture daily and water lightly as needed. Once you see the first sprouts—usually within 3-7 days—move the sheet to a spot with 4-6 hours of sunlight daily. Watch for signs of stress like wilting or yellowing leaves; these mean it’s time to adjust watering or light exposure. The beauty of this method is how adaptable it is—you can even hang it vertically in a sunny spot!
⏰ Step 5: Harvest and Rotate for Continuous Growth
When your first batch of fast growers—like radishes or microgreens—is ready to harvest, simply snip them at the base with scissors. This opens up space for new seeds! Add another layer of compost and replant with slower-growing varieties like kale or Swiss chard. The newspaper will continue to break down, enriching the soil as you go.
This layered approach means you can keep harvesting for 6-8 weeks without replanting. Just keep an eye on moisture levels and add a bit more compost as needed to maintain fertility. The best part? You’re not just growing plants—you’re creating a self-sustaining ecosystem in a single sheet of newspaper!
Tips & tricks for perfect seed sheet gardens
Here's what nobody tells you about making your seed sheet garden thrive like a pro!
Newspaper Selection: Don't just grab any newspaper! Look for sheets printed on both sides—the ink won't leach into your soil and actually helps retain moisture. I've found that glossy magazine pages work even better than regular newsprint because they resist breaking down faster. For extra durability, you can even use brown paper bags as a lining inside your newspaper tray!
Layering Like a Pro: In Step 2, when adding your coffee grounds and compost, think about texture! Mix in a handful of shredded leaves or dried grass clippings for extra aeration—this mimics natural forest floor layers where plants thrive. Press each layer just enough so it stays put, but leave it loose enough that roots can easily penetrate. The goal is to create a sponge-like medium that holds moisture without becoming waterlogged.
Sunlight Strategy: The 4-6 hours of daily sunlight mentioned in Step 4 is your sweet spot! For maximum growth, position your seed sheet near a south-facing window or under grow lights if natural light is limited. I've had amazing results by rotating the sheet 180 degrees daily—this ensures even growth and prevents plants from leaning toward the light. Watch for signs of stress like yellowing leaves, which means it's time to adjust either watering or light exposure.
Harvesting Hack: When harvesting your fast growers in Step 5, use clean scissors and cut just above the soil line. This prevents disturbing the roots of your slower-growing companions below. I've found that harvesting in the morning gives you the freshest greens, and it also opens up space for new seeds without disrupting the established ecosystem. The key is to work gently—you're not just harvesting, you're maintaining a delicate balance!
Pro Tips for Seed Sheet Garden
- Here's what nobody tells you about making your seed sheet garden thrive like a pro!
- Newspaper Selection: Don't just grab any newspaper!
- Layering Like a Pro: In Step 2, when adding your coffee grounds and compost, think about texture!
Frequently asked questions
Got questions about seed sheets and layered planting? You’re not alone! Here are answers to the most common queries to help you grow with confidence.
What exactly is a seed sheet garden?
A seed sheet garden is a layered planting method where you sow seeds directly onto a biodegradable sheet (like a seed tape or paper sheet). The sheet holds seeds in place while they germinate, then decomposes into the soil—no transplanting needed! It’s perfect for small spaces, vertical gardens, or even hanging planters.
How long does it take for seeds to sprout on a seed sheet?
Germination time varies by plant, but most seed sheets show sprouts in 7–14 days. Check the seed packet for specifics—cool-season crops (like lettuce) may sprout faster than warm-season ones (like tomatoes). Keep the sheet moist but not soggy, and place it in indirect light until leaves appear.
Do I need to water a seed sheet differently than regular seeds?
Yes! Seed sheets require gentle hydration—mist them lightly with a spray bottle 2–3 times daily until sprouts emerge. Once roots anchor into the soil, reduce watering to normal levels. Avoid overwatering, which can cause mold or rot before seeds even sprout.
Can I use seed sheets for all types of plants?
Seed sheets work best for small seeds and fast-growing plants, like herbs (basil, parsley), leafy greens (spinach, arugula), and flowers (nasturtiums, marigolds). Heavy or large seeds (like beans or corn) may not stay in place—opt for seed tapes or traditional sowing for those.
What if my seed sheet dries out or molds before sprouting?
Don’t worry—this is fixable! If dry, re-mist the sheet and place it in a sealed plastic bag with a damp paper towel to trap humidity. For mold (fuzzy spots), remove affected areas, rinse with a 1:10 hydrogen peroxide-water mix, and let dry in indirect light before reseeding.
Can I reuse seed sheets in future plantings?
No, seed sheets are designed to biodegrade after one use. However, you can repurpose the leftover sheet material as mulch or compost once plants are established. For sustainability, choose sheets made from recycled or plant-based fibers like jute or hemp.
Wrapping up and next steps
A seed sheet garden isn’t just a clever way to grow—it’s a revolution in space-saving, year-round harvests! 🌱 By stacking seeds in layers, you unlock fresh produce without sacrificing your lawn or garden space.
Whether you’re a beginner or a seasoned green thumb, this method makes gardening accessible, efficient, and rewarding.
Ready to dive in? Start small with a single sheet or experiment with your favorite veggies—then watch your mini ecosystem thrive. Happy planting, and may your harvests be as abundant as your creativity! 🌿✨