Landscaping
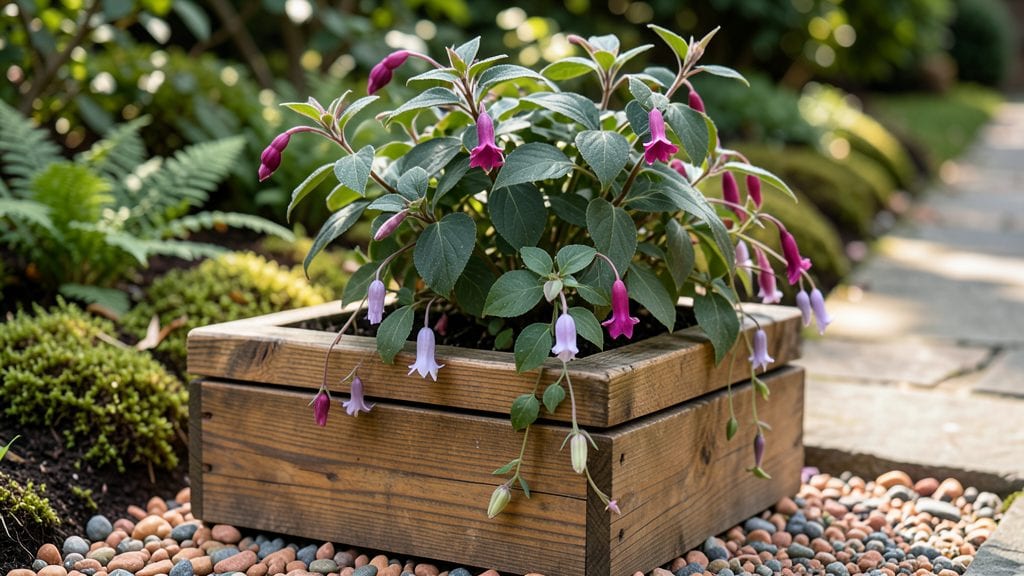
Creating a tiered garden design turns flat spaces into vibrant, layered landscapes that feel alive with movement. 🌿 I used to think my small patio was too limited until I stacked three simple wooden crates—now it’s a thriving vertical garden bursting with color and texture.
The key isn’t just stacking plants; it’s about playing with heights, textures, and sunlight to make every inch work harder.
This approach works for any space, from urban balconies to sprawling backyards. You’ll need sturdy materials (wood, metal, or even repurposed containers), a drill for assembly, and plants that thrive at different levels—sun-loving blooms on top, shade-tolerant foliage below.
The best part? Tiered designs save space, reduce weeds, and give you dramatic visual impact without deep pockets.
Imagine wisteria cascading over the top tier while trailing thyme spills from the sides, all framed by dwarf conifers at the base. The colors shift as you move through the space, creating depth that flat gardens can’t match.
You’ll spend less time weeding and more time enjoying how your garden moves—literally—with the wind and seasons.
Whether you’re starting with a single shelf or a full vertical wall, the principles stay the same: sturdy construction, smart plant pairing, and a little creativity. Let’s turn your flat space into a layered masterpiece that feels like a secret garden.
📚 In This Guide
- What you need
- Instructions
- Tips and common mistakes
- Wrapping up and next steps
What you need
- ● Raised garden beds or planters: 3–5 wooden, metal, or composite tiers (varying heights, e.g., 12"–36" tall). Pro tip: 💡 Choose cedar or redwood for natural rot resistance!
- ● Quality soil: 2–3 cubic yards of well-draining potting mix (or garden soil mixed with compost). 🌱 Tip: Test soil pH for plant-specific needs!
- ● Drainage materials: Gravel or landscape fabric (1–2 yards) to prevent waterlogging.
- ● Plants: Mix of perennials, annuals, and shrubs (e.g., ferns, succulents, petunias). 🎯 Quantity: 12–20 plants total, spaced per tier height.
- ● Mulch: 1–2 bags of organic mulch (cedar or bark) to retain moisture.
- ● Tape measure, level, and pencil for precise tier placement.
- ● Shovel, garden gloves, and pruning shears.
- ● Wheelbarrow (for hauling soil/mulch).
- ○ Optional: Stakes or landscape edging for clean lines.
- ● Sunlight analysis: Note your garden’s light exposure (full sun, partial shade, etc.).
- ● Location prep: Clear debris and level the ground where tiers will sit.
- ● Water source nearby (hose or drip irrigation).
Step-by-Step guide to creating a stunning tiered garden
Here's how to build a layered garden that adds depth, texture, and visual drama to any space.
🪴 Step 1: Plan Your Foundation and Select Containers
Start with a sturdy foundation—whether that's a pre-made tiered planter, stacked pots, or repurposed materials like wood crates and metal trays. I like to use three levels for balance: a bottom tier for taller plants, a middle tier for mid-height foliage, and a top tier for trailing or cascading varieties. Choose containers with drainage holes to prevent root rot, and place them on a stable surface or sturdy stand.
Measure your space first—containers should be 12-18 inches deep for most plants, with each tier 6-12 inches apart vertically. If using stacked pots, secure them with bungee cords or brackets to prevent shifting in wind or rain. This ensures stability while still allowing easy access for maintenance.
☀️ Step 2: Choose Plants That Thrive in Layers
Select plants based on their mature height and growth habits. For the bottom tier, opt for 3-4 foot tall plants like ornamental grasses, boxwoods, or dwarf conifers. The middle tier works well with 1-3 foot shrubs like hydrangeas, abelia, or dwarf lilacs. Finally, the top tier should feature trailing or cascading plants like ferns, ivy, or petunias.
Color coordination matters—pick plants with complementary hues or contrasting textures. I like to mix bold foliage (like purple-leafed plants) with bright flowers (like geraniums or impatiens) to create visual interest. Group plants with similar water needs together to simplify care.
💧 Step 3: Prepare and Plant Your Layers
Fill each tier with well-draining potting mix (never garden soil—it compacts in containers). Moisten the mix until it’s damp but not soggy, then loosen the roots of your plants before placing them in their designated tiers. For the bottom tier, plant taller specimens first, then fill in with mid-height plants in the middle tier, and finally add trailing plants to the top tier. Space them 6-12 inches apart depending on their mature size.
Press the soil gently around each plant to secure it without compacting the roots. Water deeply right after planting to settle the soil and encourage root growth. Avoid overwatering initially—let the soil dry slightly between waterings to prevent rot, especially in stacked containers where drainage can be tricky.
🌿 Step 4: Arrange for Visual Balance and Growth
Step back and assess your design. The tallest plants should anchor the bottom tier, while the top tier should spill over slightly for a natural, cascading effect. If one side looks bare, add a trailing plant or a small shrub to balance the visual weight. I like to rotate the tiers every few weeks to ensure even sunlight exposure—plants will lean toward the light if left in one spot too long.
Mulch the top layer of each tier with 2-3 inches of shredded bark or pebbles to retain moisture and suppress weeds. This also adds a polished finish while protecting roots from temperature fluctuations. Check the soil moisture weekly—containers dry out faster than in-ground plantings, so adjust watering based on weather conditions.
✂️ Step 5: Maintain and Refresh Your Tiered Garden
Prune regularly to encourage bushier growth and remove spent blooms to prolong flowering. For trailing plants, gently guide them over the edges of the top tier and trim back any leggy stems. Fertilize every 4-6 weeks during the growing season with a balanced, slow-release fertilizer to keep plants thriving. I also like to add a handful of compost or worm castings to the topsoil annually for extra nutrients.
In late fall, clean out dead foliage and refresh the potting mix if plants look tired. Over time, roots may outgrow containers, so be ready to repot or divide plants as needed. With proper care, a tiered garden can last for years, evolving with each season while keeping your outdoor space vibrant and inviting.
Tips & tricks for perfect tiered garden design
Here's what I've learned from years of designing tiered gardens that truly stand out.
Container Stability is Key: In Step 1, when selecting containers, don't overlook the importance of weight distribution. Place the heaviest tier at the bottom and secure stacked containers with bungee cords or brackets. I've seen too many tiered gardens topple in windy conditions because of this oversight. For outdoor spaces, consider adding sandbags to the bottom tier for extra stability. This simple step prevents accidents and keeps your design looking intentional.
Plant Height Hierarchy Matters: When arranging plants in Step 2, remember that the bottom tier should always be the tallest (3-4 feet) to anchor your design. I often make the mistake of placing shorter plants at the bottom, which creates visual imbalance. Think of it like building a pyramid—each tier should gradually decrease in height while increasing in visual interest as you move upward.
Drainage is Non-Negotiable: In Step 3, when preparing your containers, never use garden soil—it compacts and suffocates roots. Instead, fill each tier with well-draining potting mix and always check for drainage holes. I learned this the hard way after losing several plants to root rot. For extra insurance, add a layer of gravel at the bottom of each container before adding soil. This creates a reservoir for excess water while preventing soggy roots.
Seasonal Rotation Strategy: In Step 4, when arranging your design, plan for seasonal changes. I rotate my tiers every few weeks to ensure even sunlight exposure and prevent plants from leaning toward the light. For winter, you might swap out summer annuals with cold-hardy evergreens or winter pansies. This keeps your tiered garden looking fresh year-round while adapting to changing conditions.
Pro Tips for Tiered Garden Design
- Here's what I've learned from years of designing tiered gardens that truly stand out.
- Container Stability is Key: In Step 1, when selecting containers, don't overlook the importance of weight distribution.
- Plant Height Hierarchy Matters: When arranging plants in Step 2, remember that the bottom tier should always be the tallest (3-4 feet) to anchor your design.
Frequently asked questions
Got questions about bringing tiered garden design to life?
Here are answers to the most common ones—so you can create stunning, functional layers with confidence!
What’s the best time of year to start a tiered garden?
The ideal time depends on your climate! In mild zones, spring or early fall works best—soil is workable, and plants establish roots before extreme weather. In hot climates, opt for fall to avoid summer heat stress. Pro tip: Start with hardy perennials first, then add annuals later for color!
Are tiered gardens expensive to build?
Not necessarily! Costs vary based on materials: DIY-friendly options (like repurposed wood or concrete blocks) can start under $50, while custom stone or metal tiers may run $200+. Budget hack: Thrift secondhand planters or use natural rocks/wood for free! Prioritize structural integrity over aesthetics early on.
How do I prevent soil erosion in elevated tiers?
Erosion is a common headache, but easy to fix! Use landscape fabric under tiers to block weeds, and line edges with burlap or coir to hold soil. For extra stability, plant ground covers (like creeping thyme) at the base. Watering tip: Drip irrigation keeps soil moist without washing it away!
Can I mix different plant heights in one tier?
Layering heights
is key to tiered design. Place tall plants (like ornamental grasses) at the back, medium shrubs in the middle, and spillers (petunias, lobelia) at the edges. This creates depth and hides the tier’s structure. Design rule: Aim for a 3:1 ratio—3 parts base plants to 1 part focal tall plant.
What’s the easiest way to keep pests out of tiered gardens?
Pests love elevated gardens, but prevention is simple! Neem oil or diatomaceous earth deter bugs naturally. Physical barriers (like copper tape on edges) stop slugs, and companion planting (marigolds + herbs) confuses pests. Inspect regularly: Remove chewed leaves or eggs immediately to avoid infestations!
Can tiered gardens work on balconies or small patios?
Yes! Vertical tiered planters (wall-mounted or stacked) maximize tiny spaces. Use lightweight materials (fabric grow bags, plastic crates) and dwarf varieties of plants. Space-saving tip: Rotate tiers seasonally—swap heavy winter plants for lightweight summer blooms!
Wrapping up and next steps
A tiered garden design transforms flat spaces into vibrant, multi-layered oases that dazzle the senses. By blending height, texture, and color, you create a dynamic outdoor retreat that’s both functional and breathtaking.
Whether you’re a seasoned gardener or just starting, this approach makes every inch of your yard feel intentional and alive.
Ready to bring your vision to life? Start small—sketch a simple layout, gather a few key materials, and let your creativity grow! 🌱 With each tier, you’re not just planting plants; you’re crafting a masterpiece. Happy designing!