
Vegetables
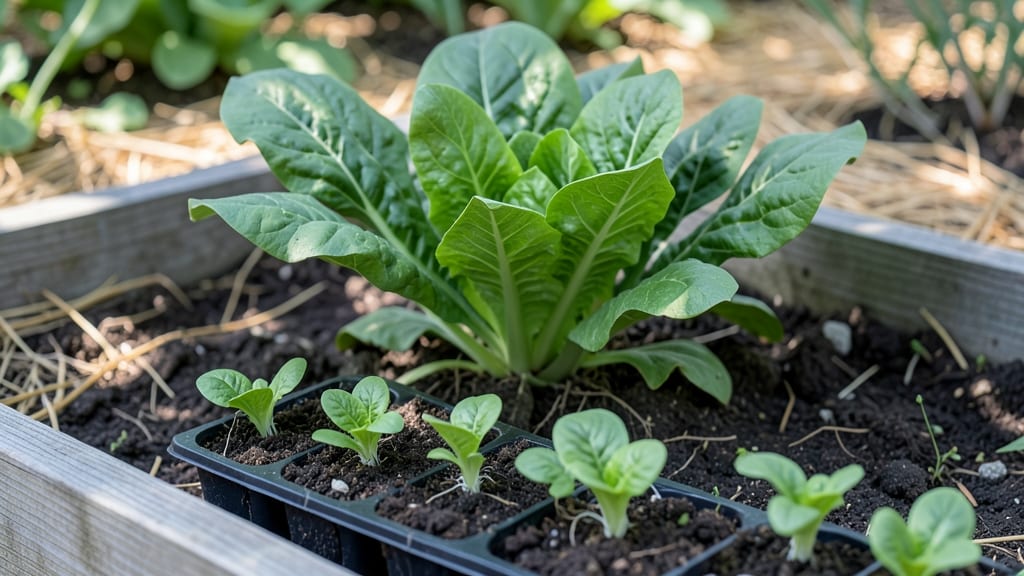
Transforming your yard with YouTube-style raised gardens starts with a simple truth: you don’t need a sprawling backyard to grow a bountiful harvest. 🌱 I built my first raised bed after watching a single YouTube tutorial—it changed how I garden forever.
The difference? Cleaner soil, fewer weeds, and plants that thrive without bending over.
These beds let you customize everything from materials (cedar resists rot, metal lasts decades) to layout (tiered designs maximize space). My 4x8-foot cedar bed produces enough tomatoes and peppers to feed my family, and the soil stays rich year after year.
No more fighting compacted clay or pulling weeds from your knees.
You’ll end up with a garden that looks as good as it performs—neat rows of herbs, climbing vines, or even a vertical wall of greens. The best part?
You can start small (2x4 feet) or go big (8x12 feet), and the results show up in just a few weeks. Let’s get your design sketched out!
Pro tip: Add a trellis for vertical space or use lightweight fabric for portable beds. The possibilities are endless, and the YouTube community has already solved most of your problems. Here’s how to pick the perfect design for your yard.
📚 In This Guide
- What you need
- Instructions
- Tips and common mistakes
- Wrapping up and next steps
What you need
- ● Raised Garden Bed Kit (or pre-cut lumber): 4x untreated cedar, redwood, or composite boards (8–12 ft long, 6–12 inches wide, 1–2 inches thick)
- ● OR a pre-assembled raised bed (check dimensions—aim for 4’x8’ for easy access)
- ● Hardware: 2.5-inch galvanized or stainless steel deck screws (12–16 per bed)
- ○ 2-inch corner braces (4 per bed, optional but recommended for stability)
- ● Landscape Fabric (10–20 sq ft, to suppress weeds)
- ● Garden Soil Mix: High-quality topsoil (2–3 cubic feet per sq ft of bed depth)
- ● OR a blend of compost, peat moss, and perlite (for better drainage)
- ● Gravel or Sand (5–10 lbs, for drainage layer at the bottom)
- ● Measuring Tape & Level (for precision)
- ● Drill/Driver (with screw attachment)
- ● Work Gloves & Safety Glasses (because safety first!)
- ● Drip Irrigation Kit (for hassle-free watering)
- ● Timber Stakes or Anchors (to secure beds in windy areas)
- ● Paint or Stain (to customize your bed’s look)
- ● Knee Pads or Stool (for comfy planting sessions)
- ● Plant Labels & Markers (to track your veggie lineup)
Step-by-Step instructions for building YouTube-style raised garden beds
Here's how to create the same stylish, functional raised beds that go viral—simple enough for beginners but packed with pro techniques.
🪴 Step 1: Design and Measure Your Layout
Start by sketching your design on paper. YouTube gardeners love 4-foot wide beds because they're perfect for reaching the center without stepping inside. Measure your yard and mark the corners with stakes and string for a straight, professional look. I always add a 2-foot walkway around each bed for easy access and airflow.
Check your yard's slope—if it's uneven, level the ground first by removing high spots and adding soil to low areas. A flat base prevents water pooling and keeps your beds stable. For 4 raised beds, you'll need about 16 feet of string total (4 feet per bed). Use a tape measure to ensure all corners are square before cutting lumber.
📏 Step 2: Cut and Assemble the Frames
Cut 2×6 lumber to your desired lengths—most YouTube beds are 4 feet wide × 8 feet long, but adjust based on your space. Use a miter saw for clean 45-degree corners, or a circular saw with a guide for straight cuts. I label each piece with its location (e.g., "Corner A") before assembly to avoid mistakes.
Assemble the frames with 3-inch deck screws—pre-drill holes to prevent splitting the wood. Start with the corners, then add the sides, creating a rectangle. Use a speed square to ensure all angles are perfect. For extra stability, add 2×4 supports every 2 feet along the inside of the frame. This prevents sagging over time, especially when filled with soil.
🌱 Step 3: Add Layered Filling for Drainage and Soil
Line the bottom with cardboard to block weeds and grass from invading. Cut it to fit snugly inside the frame, overlapping seams by 2 inches. Next, add a 3-inch layer of gravel for drainage—this prevents waterlogging and keeps roots healthy. Use a level to ensure the gravel is even before moving to the next layer.
Top with a 12-inch layer of garden soil, mixing in 3 inches of compost for nutrients. I like to blend topsoil, compost, and a handful of slow-release fertilizer for a rich growing medium. Avoid filling to the very top—leave 1 inch of space for settling. Water the soil lightly after filling to help it compact naturally.
☀️ Step 4: Position and Secure the Beds
Place the assembled frames in your marked layout, adjusting for level ground. Use landscape fabric under the beds if your yard has aggressive weeds or grass. Secure the beds to the ground with stakes and zip ties at each corner to prevent shifting in wind or when gardening. For extra stability, add corner braces if your beds are taller than 12 inches.
Step back and check the alignment—beds should look symmetrical and inviting, just like the ones you see on YouTube. Add edging stones around the perimeter if desired, but skip this if you prefer a clean, modern look. Now your beds are ready for plants, mulch, or even a decorative border for that viral-worthy finish.
Tips & tricks for perfect YouTube-style raised gardens
Creating beds that look as good as they perform starts with these key tricks—trust me, these will make all the difference between a functional garden and one that goes viral.
Design Tip: In Step 1, when sketching your layout, I recommend drawing your beds on graph paper first. This helps visualize proportions and ensures you won't run out of space for those essential 2-foot walkways. Pro gardeners often use the "4-foot rule" for width—this creates perfect reach for both sides without stepping inside, just like the YouTube pros demonstrate.
Cutting Precision: For Step 2, if you don't have a miter saw, use painter's tape along the edge of your circular saw as a guide for those 45-degree corners. I've labeled my lumber pieces before cutting—this saves time when assembling and prevents mixing up sides. Also, cut your 2×6 lumber about 1/4-inch longer than needed; you can trim any excess after assembly for a cleaner look.
Layering Strategy: When adding your 3-inch gravel layer in Step 3, use a level to check for evenness before moving to soil. I like to spread the gravel in thin layers, compacting each one with a board before adding the next. This prevents settling later and keeps your drainage perfect. For the 12-inch soil layer, mix in your compost and fertilizer as you go—this ensures even distribution throughout the entire bed.
Stability Secret: In Step 4, don't skip the 2×4 supports if your beds will be taller than 12 inches—they're what keeps those YouTube-worthy beds from sagging over time. For extra security, especially in windy areas, add corner braces at each intersection. I've seen many beds collapse because owners skipped this step, and you definitely don't want that viral video moment to be about your garden falling apart!
Pro Tips for Youtube Raised Gardens
- Creating beds that look as good as they perform starts with these key tricks—trust me, these will make all the difference between a functional garden and one that goes viral.
- Design Tip: In Step 1, when sketching your layout, I recommend drawing your beds on graph paper first.
- Cutting Precision: For Step 2, if you don't have a miter saw, use painter's tape along the edge of your circular saw as a guide for those 45-degree corners.
Frequently asked questions
Got questions about transforming your space with YouTube raised gardens? You’re not alone! Here are some of the most common queries—and their answers—to help you grow with confidence.
What’s the best material for building a raised garden bed?
Untreated wood (like cedar or redwood) is a classic choice for durability and natural resistance to rot. For longevity, consider composite lumber or galvanized metal. Avoid pressure-treated wood with arsenic (if pre-2004) or chemically treated options—opt for food-safe materials instead!
How long does it take to build a raised garden bed?
Most DIY raised beds take 1–4 hours, depending on size and complexity. A simple 4’x8’ bed with basic materials? About 1.5–2 hours for two people. Pro tip: Pre-cut materials and have tools ready to save time!
Are raised gardens more expensive than in-ground planting?
Upfront costs are higher—$50–$500+ depending on size and materials—but they pay off. Raised beds improve soil quality, reduce weeds, and extend growing seasons. Over time, they cut costs on amendments (like compost) and water. Think of it as an investment in low-maintenance yields!
Can I grow vegetables in a raised bed year-round?
Not quite! Most veggies thrive in spring/fall, but raised beds warm up faster in spring and stay cooler in summer—giving you a longer growing window. In cold climates, use row covers or cold-hardy crops (like kale or spinach) to stretch the season. Plan ahead with succession planting!
How do I keep pests out of my raised garden?
Elevated beds deter some pests (like slugs), but others (aphids, rabbits) may still visit. Use physical barriers (chicken wire for burrowing animals), companion planting (marigolds repel nematodes), and organic sprays (neem oil). Healthy soil = stronger plants that resist pests naturally!
Wrapping up and next steps
Raised gardens are a game-changer for space-conscious gardeners, blending practicality, aesthetics, and productivity—all while keeping weeds and pests at bay! 🌱 Whether you’re a beginner or a seasoned green thumb, these elevated beds offer a low-maintenance, high-reward way to grow fresh veggies without the hassle.
With the right design and a little creativity, you’ll transform even the smallest yard into a thriving harvest hub.
Ready to dig in? Start by sketching your dream garden layout, then gather your materials and follow the steps outlined above. Your future meals—and your neighbors’ envy—are just a few shovels away! 🚀