
Tools
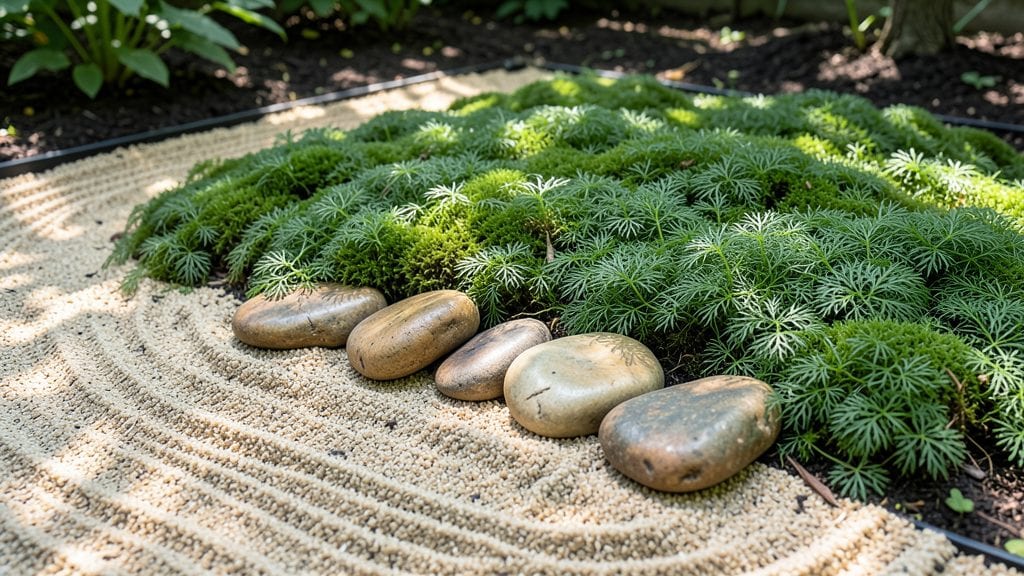
A backyard zen garden brings quiet focus to your outdoor space with just a few intentional elements. ✨ The key isn't complexity—it's the deliberate placement of smooth stones, patches of velvety moss, and carefully raked sand that creates a sense of calm.
I designed mine in my small urban yard after realizing how much peace a few hours of raking patterns brought me.
Start with a flat area, preferably near a window or seating spot where you can enjoy the space. You'll need smooth river rocks (about 2-3 inches in diameter), sharp-edged gravel for paths, and a simple bamboo rake for creating sand patterns.
The plants stay minimal: just moss for texture and maybe one or two dwarf conifers for structure. My first zen garden used only 50 square feet and transformed that corner into my favorite outdoor retreat.
What you'll end up with is a space that feels like a breath of fresh air—literally. The combination of cool stones, soft moss, and the rhythmic act of raking sand creates a meditative atmosphere.
Even on busy days, stepping into this space feels like stepping into a different world. The maintenance is simple: occasional raking, moss care, and keeping paths clear—no high-maintenance plants or overgrown vines.
This design works equally well in small urban backyards or larger suburban spaces. The beauty is in the simplicity, so you can scale it to fit your available area. Once you experience the tranquility, you'll wonder how you ever lived without it.
📚 In This Guide
- What you need
- Instructions
- Tips and common mistakes
- Wrapping up and next steps
What you need
- ● Natural Stone: Flat river rocks (20–50 lbs, ~100–200 pieces) or slate tiles (12"x12" or 18"x18", 10–20 pieces)
- ● Sand: Coarse play sand (50 lbs bag) for raking patterns
- ● Moss: Sheet moss (1–2 square feet per section) or moss plugs (10–15 plugs)
- ● Gravel: Decorative pebbles (3/8"–1/2" size, 50 lbs bag) for borders
- ● Tools: Rake (bamboo or metal, 12"–18" width)
- ● Garden shovel & trowel
- ● Wheelbarrow or large container for mixing sand
- ● Level (24" or 48") for flat surfaces
- ● Measuring tape (25 ft)
- ● Water Feature: Small bamboo fountain or shallow stone dish (for water element)
- ● Lighting: Solar-powered path lights or lanterns (for evening ambiance)
- ● Wooden Elements: Thin bamboo stakes (for moss borders) or a wooden bench
- ● Plants: Low-growing shrubs (e.g., junipers, azaleas) or ornamental grasses
- ● Decor: Wind chimes, stone lanterns, or a simple wooden gate
Step-by-Step instructions for creating your zen garden backyard
Transform your space into a peaceful retreat with these simple, intentional steps.
🪴 Step 1: Design Your Zen Garden Layout
Start by sketching a simple design on paper, keeping it minimal and balanced. A classic zen garden often features a 10x10-foot rectangular area with smooth, raked sand and a few key elements. I like to place a central flat stone or two as focal points—think of them as anchors for your space. This layout ensures harmony without clutter, and you can adjust proportions to fit your yard.
Use a measuring tape to mark boundaries with stakes and string. Step back often to check proportions—your garden should feel open and inviting, not cramped. If your space is irregular, embrace asymmetry; zen gardens thrive on natural imperfection. I always leave at least 2 feet of clearance around the edges for walking and maintenance.
💧 Step 2: Prepare the Soil and Base Layer
Remove any grass or weeds from your marked area, then loosen the soil with a garden fork to a depth of 4-6 inches. This helps drainage and prevents moss from struggling later. Spread a 2-inch layer of coarse sand evenly across the area—this creates a stable base for your stones and moss. I like to use sharp, clean sand because it resists compaction over time.
Rake the sand smooth with a leveling rake, working in small sections to catch any uneven spots. Press down lightly with a board or tamper to compact the sand slightly—this prevents future settling. If your yard has heavy clay soil, add a 1-inch layer of gravel beneath the sand for extra drainage. This step is critical; skip it, and your stones will sink or your moss will suffocate.
☀️ Step 3: Place Stones and Create Raked Patterns
Arrange your flat stones intentionally—some placed horizontally, others vertically—to create visual interest. I often group 3-5 stones together in odd-number clusters for balance. Leave 1-2 inches of space between stones to allow moss to grow naturally. Use a level to ensure stones sit flat; uneven stones disrupt the zen flow.
Once stones are set, use a bamboo rake to create smooth, flowing patterns in the sand. Start with broad, sweeping motions to establish a sense of movement, then refine into tighter, more deliberate lines. The patterns should feel organic, like waves or ripples. I like to rake daily for the first week to let the sand settle into the design before moss takes hold.
🌿 Step 4: Introduce Moss and Ground Cover
Sprinkle moss spores or small moss clumps evenly across the sand, focusing on areas between stones and along rake patterns. Press them lightly into the sand so they make contact—this encourages rooting. Avoid overcrowding; moss needs space to spread naturally. Water the area lightly but thoroughly with a spray nozzle to help spores adhere and begin growing.
If moss isn’t thriving after 4-6 weeks, add a thin layer of topsoil mixed with compost to improve moisture retention. I’ve found that sheet moss (like Hypnum or Thuidium) works best in shaded areas, while mat-forming moss (like Leucobryum) handles partial sun. Keep the area moist but not soggy—moss thrives in humidity but rots in standing water.
✂️ Step 5: Maintain and Refine Over Time
Once your moss establishes (usually 3-6 months), maintain it by raking lightly every 2-3 weeks to keep patterns crisp. Use a soft-bristle brush to gently remove debris from stones and moss. I also trim any overgrown moss with sharp scissors to maintain clean edges. This upkeep is minimal but keeps your garden looking intentional.
Add small accent plants like dwarf bamboo or ornamental grasses sparingly—just 1-2 per garden—to introduce subtle texture without breaking the zen aesthetic. If your moss fades in sunny spots, consider adding shade cloth during peak afternoon heat. The key is to let the garden evolve naturally; zen isn’t about perfection, but presence.
Tips & tricks for perfect zen garden backyard
Creating a serene zen garden takes patience and attention to detail—here are my go-to tips to ensure your space feels balanced and intentional from the start.
The Layout Secret: When sketching your design in Step 1, use graph paper to map out your 10x10-foot area. This helps visualize proportions without needing to adjust later. I always draw my garden twice—once with stones and once without—to see how the negative space (the sand areas) will look. This step prevents overcrowding and keeps the zen aesthetic clean and airy.
Base Layer Pro Tip: For Step 2, don't skip the gravel layer if you have clay soil—it's worth the extra effort. I've seen stones sink into clay over time, ruining the level look. If you're short on gravel, mix coarse sand with perlite (about 1 part perlite to 3 parts sand) for better drainage. The goal is to create a stable foundation that won't shift after your stones are placed.
Stone Placement Technique: In Step 3, arrange your stones first without touching them—this lets you see the overall composition. I like to use a string line to create a subtle grid (about 2 feet apart) to help space stones evenly. Leave those 1-2 inches between stones for moss growth, but don't be afraid to vary the spacing slightly for natural flow. The key is to create a sense of movement through the arrangement.
Moss Growth Hack: After introducing moss in Step 4, cover your garden with a light layer of frost cloth during the first 4-6 weeks—especially if you're in a hot climate. This keeps moisture levels consistent while the moss establishes. I've found that misting twice daily (morning and evening) gives better results than deep watering. Think of it like nurturing a baby plant—gentle care leads to stronger growth.
Pro Tips for Zen Garden Backyard
- Creating a serene zen garden takes patience and attention to detail—here are my go-to tips to ensure your space feels balanced and intentional from the start.
- The Layout Secret: When sketching your design in Step 1, use graph paper to map out your 10x10-foot area.
- Base Layer Pro Tip: For Step 2, don't skip the gravel layer if you have clay soil—it's worth the extra effort.
Frequently asked questions
Got questions about creating your own zen garden backyard?
You’re not alone! Here are some of the most common queries—plus straightforward answers to help you design a serene, low-maintenance space with natural stone and moss.
What’s the best time of year to start a zen garden?
The ideal time is early spring or fall when temperatures are mild. This gives plants (like moss) time to establish roots before extreme heat or cold. Avoid summer—intense sun can dry out soil and stress delicate materials. If you’re in a cooler climate, late winter works too!
How much does a zen garden cost to build?
Costs vary widely based on size and materials. A small DIY project (10x10 ft) with gravel, sand, and basic stones might run $100–$300. Upgrading to premium natural stone, moss kits, or professional installation can push costs to $500–$2,000+. Prioritize quality stones and tools for long-term harmony.
Can I skip moss in my zen garden?
Moss adds texture and tranquility, but it’s optional. Swap it for fine gravel, smooth river rocks, or even low-maintenance ground cover like creeping thyme. Focus on the raised beds, raked patterns, and stone paths—they’re the heart of zen design. Just ensure your space still feels balanced and intentional.
How do I keep my zen garden looking neat in heavy rain?
Zen gardens are built to handle rain, but proper drainage is key. Use a slight slope (1–2 inches per 10 ft) and layer coarse gravel beneath sand to prevent puddles. Avoid compacted soil—it traps moisture. After storms, gently rake the sand to restore patterns and let excess water drain away naturally.
What tools do I really need for maintenance?
Start with a bamboo rake, small hand shovel, and leaf blower (for quick cleanups). A soft-bristle brush helps refresh moss, and a watering can with a fine rose keeps gravel moist without erosion. Skip heavy equipment—zen gardens thrive on delicate touch, not brute force!
Wrapping up and next steps
Creating your own zen garden backyard is more than just a DIY project—it’s a journey toward tranquility and mindfulness. By blending natural stone, lush moss, and minimalist design, you’ve crafted a serene escape that invites peace into your daily life. 🌿
Now that you’re inspired and equipped with the right tools, take the next step—start small! Whether it’s a corner of your yard or a full-scale retreat, every rake stroke and stone placement brings you closer to harmony. Your zen garden awaits—happy creating! ✨