
Watering
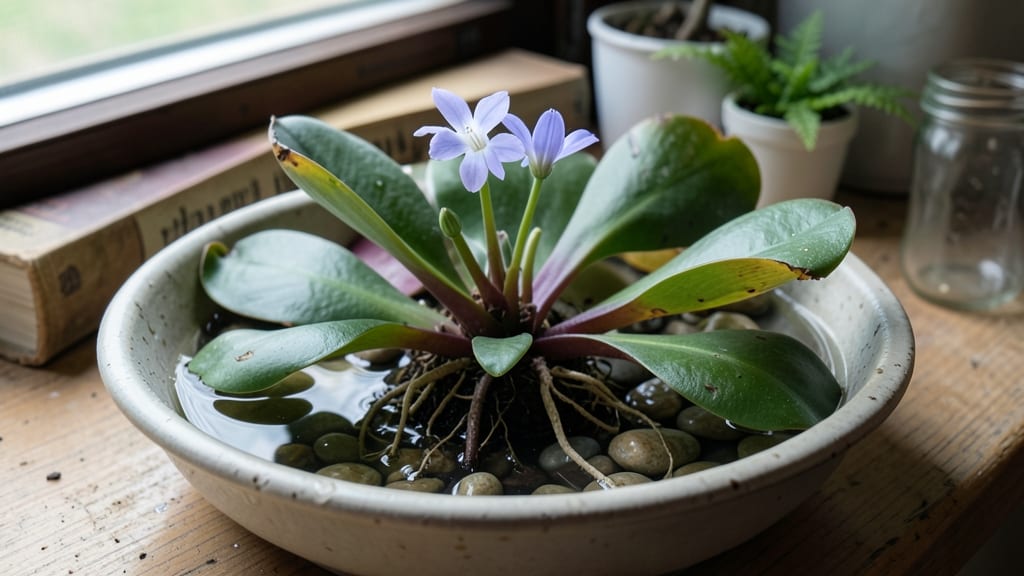
A bowl water garden turns your patio into a miniature ecosystem where herbs and veggies thrive without the fuss of traditional gardening. 🌿 I started mine after watching my basil wilt from inconsistent watering—now it grows lush and fragrant right in my kitchen sink.
The secret lies in selecting the right plants, like watercress or dwarf varieties of lettuce, that love shallow water and partial sun.
You only need a few supplies: a wide, shallow bowl (at least 6 inches deep), small pebbles for drainage, and a few hardy aquatic plants. Set it up in a spot with morning sunlight and watch roots spread within weeks.
The best part? It stays self-sustaining with minimal care—just top off the water every few days and trim leaves as needed.
Imagine snipping fresh herbs for cooking or harvesting baby greens straight from your tabletop. The setup doubles as decor, with delicate foliage swaying gently in the breeze. Plus, it attracts beneficial insects like dragonflies, turning your bowl into a tiny wildlife haven.
Works for balconies, windowsills, or patios—no yard required. Here’s how to get started without overcomplicating it.
📚 In This Guide
- What you need
- Instructions
- Tips and common mistakes
- Wrapping up and next steps
What you need
- ● Large, wide bowl or container (at least 6–12 inches deep, with a diameter of 10+ inches to accommodate plants). Tip: Glass or ceramic bowls work best for visibility.
- ● Water (filtered or dechlorinated—chlorine can harm plants). Aim for 2–3 gallons for a medium-sized bowl.
- ● Small pebbles or gravel (1–2 cups, ¼–½ inch in size) for the base layer to prevent root rot.
- ● Organic potting soil (2–3 cups, lightweight and well-draining). Pro tip: Mix in a handful of perlite for extra aeration!
- ● Herbs or veggies (choose aquatic-friendly varieties like basil, mint, watercress, or lettuce). Use 3–5 small plants or cuttings.
- ● Scissors or pruning shears (for trimming plants to fit the bowl).
- ○ Optional but helpful: Water conditioner (like Seachem Prime) to remove chlorine.
- ● Liquid fertilizer (diluted fish emulsion or seaweed extract, 1 tsp per gallon).
- ● Decorative stones or driftwood for a natural look.
- ● A sunny spot (4–6 hours of indirect light daily).
- ● Patience! Some plants (like watercress) grow faster than others.
- ● Weekly maintenance (top off water, trim plants, and refresh soil as needed).
Step-by-Step instructions for creating a bowl water garden
This self-sustaining setup brings life to your kitchen or windowsill—no green thumb required.
🪴 Step 1: Select and Prepare Your Bowl
Choose a shallow, wide bowl—at least 8 inches in diameter—with smooth edges to prevent roots from snagging. I like ceramic or glass because they don’t absorb moisture, which keeps the water level stable. Clean it thoroughly with warm, soapy water and rinse well to remove any residue that could harm plants.
Place a layer of small pebbles or gravel at the bottom—about 1 inch deep. This creates drainage and prevents roots from sitting in water. Use the 2 cups of pebbles you’ve set aside for this purpose. Rinse them first to remove any dust, then spread them evenly across the bowl’s base.
🌱 Step 2: Layer Soil and Plant Your Seeds or Starts
Add a 2-inch layer of potting mix on top of the pebbles, pressing it down lightly to create a firm base. The mix should be moist but not soggy—squeeze a handful to check. If it crumbles easily, it’s ready; if it sticks together, add a little more water and mix it in.
Plant your herbs or veggies—like basil, mint, or lettuce—by making small holes about ½ inch deep. For seeds, place 2-3 in each hole and cover lightly. If using seedlings, gently tease apart the roots before placing them in the soil. Space them 2-3 inches apart to allow room for growth. Water lightly immediately after planting to settle the soil around the roots.
💧 Step 3: Set Up the Water Reservoir
Place the bowl in a slightly larger tray or dish—this will catch any excess water and keep your space tidy. Fill a small watering can or pitcher with lukewarm water (never cold) and pour it into the tray until the water level reaches just below the pebbles. The goal is to keep the roots moist but never submerged.
Watch the water level closely for the first few days. You’ll notice the soil stays damp without direct watering—this is how the system works. If the water evaporates too quickly, add a little more to the tray. Over time, the plants will regulate the moisture themselves, pulling up exactly what they need.
☀️ Step 4: Position for Light and Maintain Balance
Place your bowl garden in a spot with bright, indirect light—like a windowsill facing east or west. Avoid direct midday sun, which can overheat the water and stress the plants. If your space is low-light, supplement with a small grow light for 6-8 hours daily.
Once a week, check the pebbles for mineral buildup—white crust can form if the water evaporates too much. Gently rinse the pebbles with clean water if this happens. Trim any yellow or wilted leaves promptly to keep the plants healthy. With this setup, you’ll harvest fresh herbs or baby greens in just 3-4 weeks.
Tips & tricks for perfect bowl water gardens
This clever setup is all about balance—water, soil, and light working together. Here's how to keep everything thriving without overcomplicating things.
Drainage is Everything: That 1-inch layer of pebbles in Step 1 isn't just decoration—it's the secret to preventing root rot. I've seen people skip this step, and within days, their plants wilted because roots were sitting in water. Rinse those pebbles well first, though—dust can clog the drainage and create a breeding ground for mold.
Soil Moisture Matters: When you add your 2-inch layer of potting mix in Step 2, squeeze a handful to check moisture. It should crumble easily but not be bone dry. Too soggy? Mix in a bit more potting mix. Too dry? Add a few drops of water and recheck. The goal is that "just right" texture—like a damp sponge. This prevents both overwatering and underwatering from the start.
Light Positioning: That bright, indirect light in Step 4 is crucial. I learned this the hard way when my first attempt got scorched by direct afternoon sun. East-facing windows are ideal—they give gentle morning light without the harsh midday heat. For low-light spaces, those 6-8 hours under a grow light make all the difference in keeping plants happy and growing steadily.
Plant Selection Strategy: Not all plants thrive equally in this system. I recommend starting with fast-growing, shallow-rooted plants like basil, mint, or lettuce—they'll give you results in those 3-4 weeks mentioned in Step 4. Avoid deep-rooted plants like carrots or potatoes—they'll outgrow the space quickly. For seeds, stick to the 2-3 per hole recommendation; overcrowding leads to competition for nutrients and stunted growth.
Pro Tips for Bowl Water Garden
- This clever setup is all about balance—water, soil, and light working together.
- Drainage is Everything: That 1-inch layer of pebbles in Step 1 isn't just decoration—it's the secret to preventing root rot.
- Soil Moisture Matters: When you add your 2-inch layer of potting mix in Step 2, squeeze a handful to check moisture.
Frequently asked questions
Got questions about creating your own bowl water garden? You’re not alone!
Here are some of the most common concerns—and their simple, practical solutions—to help you grow a thriving, self-sustaining oasis with confidence.
What herbs or veggies work best in a bowl water garden?
A bowl water garden thrives with root-friendly, low-maintenance plants like basil, mint, watercress, lettuce, or leafy greens. Avoid heavy rooters (e.g., carrots) or plants needing deep soil. Stick to shallow-rooted, fast-growing varieties for the best results!
How often should I change the water in my bowl garden?
Change the water every 3–5 days to prevent algae and bacteria buildup. If you notice cloudiness or a foul smell, refresh it sooner. Use room-temperature water to avoid shocking the roots.
Can I reuse water from my bowl garden for other plants?
Yes! After draining and rinsing the bowl, you can reuse the water for other potted plants—just avoid using it on edible crops grown directly in soil. The nutrients from the garden water can act as a light fertilizer!
What should I do if my plants look wilted or unhealthy?
Wilted leaves often mean root rot or nutrient deficiency. Check for yellowing leaves (overwatering) or brown tips (underwatering). Trim damaged foliage, refresh the water, and add a pinch of aquarium salt (1 tsp per gallon) to boost health.
Do I need special lighting for a bowl water garden?
Most herbs and greens grow well in bright, indirect sunlight (4–6 hours daily). If natural light is limited, use a grow light 6–12 inches above the bowl for 8–12 hours. Avoid direct sun to prevent overheating.
Wrapping up and next steps
A bowl water garden isn’t just a trend—it’s a game-changer for urban gardeners! With minimal space and effort, you’ve unlocked a self-sustaining oasis for fresh herbs and veggies, right on your countertop. 🌱 The key? Consistency in care and a little creativity—your green thumb will thank you!
Ready to harvest the rewards? Start small with a single bowl, then expand as you gain confidence. Next, try adding edible flowers or experiment with companion planting to maximize flavor and growth. Your kitchen—and taste buds—will never be the same!