Container Gardens
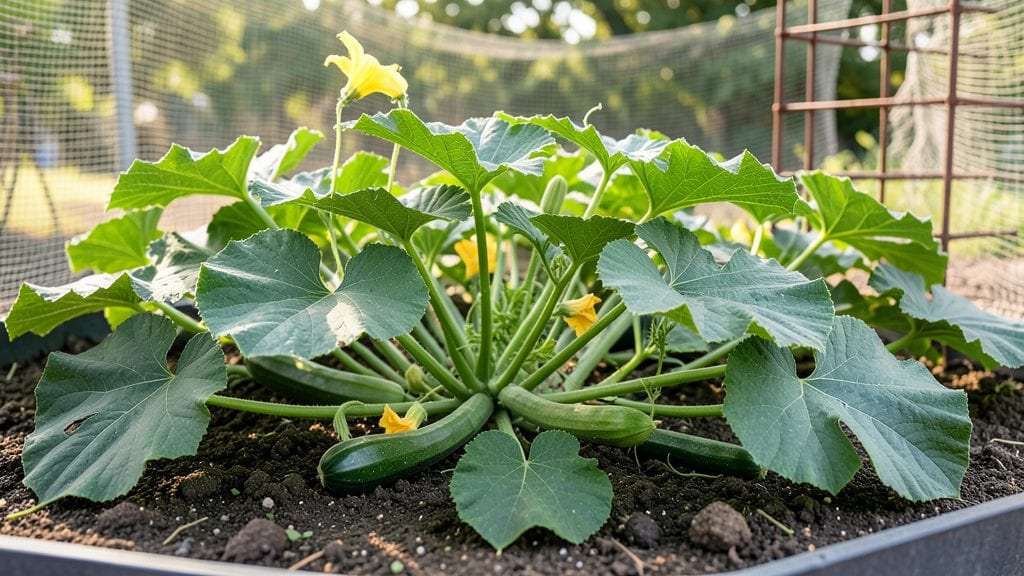
A thriving container garden squash turned my cramped patio into a mini harvest zone—just three zucchinis from a 5-gallon bucket proved bush varieties love small pots. 🌱 The key is choosing compact types like 'Eight Ball' or 'Patio Star' that stay small without sprawling.
You’ll need containers at least 5 gallons for each plant, with drainage holes to prevent root rot. Fill them with well-draining potting mix rich in compost, and place them where they’ll get 6-8 hours of sun daily.
Water consistently—containers dry out fast—and fertilize weekly with a balanced formula once vines start running.
By mid-summer, you’ll be harvesting bright green zucchinis or miniature pumpkins straight from your balcony. The vines stay contained, pests are easier to spot, and you avoid the squash vine borer’s favorite in-ground hiding spots. Just watch for overcrowding and yellowing leaves—signs you need to thin or upgrade container size.
This method works for apartments, rooftops, or urban backyards. Start with one plant to test your setup, then expand next season when you see how much space those vines really need. The first bite of homegrown squash makes the effort worth every inch of patio real estate.
📚 In This Guide
- What you need
- Instructions
- Tips and common mistakes
- Wrapping up and next steps
What you need
- ● Container: At least 5-gallon bucket (minimum 12" deep, 18"+ diameter) or larger (15+ gallons for bush varieties like Sugar Pie). Use durable, food-safe materials like: Plastic (with drainage holes)
- ● Fabric grow bags
- ● Ceramic or glazed ceramic (heavy, so add weights)
- ● Potting Mix: 100% organic, well-draining mix (avoid garden soil). Look for container-specific blends with perlite or vermiculite. 5-10 lbs per container (adjust for size).
- ● Drainage: 2-4 layers of landscape fabric or coffee filters (to prevent soil from washing out).
- ● Squash Seeds: Choose compact varieties like: Sugar Pie (bush, 8" diameter, 1-2 fruits)
- ● Eight Ball (bush, 8" diameter, 1-2 fruits)
- ● Patio Star (bush, 10" diameter, 2-3 fruits)
- ● Fertilizer: Balanced, slow-release fertilizer (10-10-10 or 5-5-5) or compost (mix 1 tbsp per gallon of soil).
- ● Watering Can or Hose: With a gentle spray nozzle (squash hates soggy roots!).
- ○ Support (Optional but Helpful): Trellis or Cage: For vining varieties (e.g., Bush Delicata), use a 5-ft tall trellis or tomato cage.
- ● Stakes or Twine: To secure vines (if not using a cage).
- ● Mulch: Straw or shredded leaves (1-2 inches) to retain moisture and suppress weeds.
- ● Companion Plants: Nasturtiums or marigolds (potted nearby to deter pests).
- ● Self-Watering System: Drip irrigation kit or wicking bed for consistent moisture.
- ● Pruning Shears: For trimming excess vines or yellowing leaves.
- ● Garden Gloves: To protect hands from prickly stems (some varieties have thorns!).
Step-by-step instructions for growing container squash
Here's my foolproof method for growing bush varieties in limited space—no sprawling vines required.
🪴 Step 1: Select the Right Containers and Drainage
Choose containers that are at least 18 inches wide and deep—squash roots spread aggressively and need room to establish. I prefer fabric grow bags because they allow roots to breathe and prevent waterlogging. If using traditional pots, ensure they have 4-6 drainage holes to prevent root rot.
Line the bottom with 2 inches of gravel or broken pottery shards to improve drainage further. This layer prevents soil from clogging the holes while still allowing excess water to escape. For four plants, you'll need containers that can hold at least 3 gallons of soil each—squash is heavy and needs stability.
🌱 Step 2: Prepare Soil and Plant Seedlings
Fill your containers with a mix of 50% potting soil and 50% compost to provide nutrients without compacting the roots. Squash thrives in well-draining, fertile soil, so avoid garden soil—it compacts too easily in containers. Moisten the mix until it feels like a damp sponge.
Plant 1-2 seeds per container, burying them 1 inch deep. If you're using seedlings, transplant them when they have 3-4 true leaves, spacing them 12 inches apart in larger containers. Water gently after planting to settle the soil around the roots. Here's the thing—squash seedlings are delicate, so handle them by the leaves, not the stems.
☀️ Step 3: Provide Full Sun and Consistent Water
Squash needs 6-8 hours of direct sunlight daily. Place your containers in the sunniest spot available—south or west-facing windowsills or patios work best. If you're growing indoors, supplement with a grow light positioned 6 inches above the plants for 12-14 hours daily.
Water deeply 2-3 times per week, ensuring the top 2 inches of soil stay moist but not soggy. Squash plants are heavy drinkers, so check soil moisture daily during hot weather. You'll know it's time to water when the soil feels dry to the touch 1 inch below the surface. Overwatering is the fastest way to invite pests and diseases.
✂️ Step 4: Prune and Support Vines
Even bush varieties benefit from light pruning to encourage bushier growth. Once your plants reach 12 inches tall, pinch off the tips of the main stems to promote branching. This creates more sites for fruit production. Remove any yellow or diseased leaves immediately—they spread problems fast.
For larger varieties, add a small trellis or cage to support the weight of developing fruits. I use lightweight wire cages that fit inside the container. This keeps squash off the ground, reduces rot risk, and makes harvesting easier. Watch for vines touching the ground—they'll root and steal energy from your harvest.
🍰 Step 5: Harvest at Peak Ripeness
Harvest squash when the fruit reaches full size and color—usually 45-60 days after planting. Use a sharp knife or pruners to cut the stem, leaving 1 inch of stem attached to the fruit. This prevents rot and extends shelf life. I check my containers every 2-3 days during peak season to avoid overripe squash.
Don't let squash linger on the vine past maturity—it signals the plant to stop producing. Store harvested squash in a cool, dry place with good airflow. With proper care, your container garden can yield 4-6 pounds of squash per plant—plenty for fresh eating, roasting, or preserving.
Tips & tricks for perfect container garden squash
Here's what nobody tells you about maximizing your container squash harvest without the usual headaches.
Container Selection: Fabric grow bags are my go-to because they prevent root circling and allow roots to breathe, but traditional pots work too—just add those 4-6 drainage holes and that 2-inch gravel layer at the bottom. I've seen people skip this drainage step and end up with root rot within weeks. Trust me on this: that gravel layer is worth the extra 5 minutes of setup.
Soil Mix Matters: The 50-50 potting soil to compost ratio is non-negotiable for container squash. I've tried using straight garden soil and watched my plants struggle with compacted roots. Pro tip: Add a handful of perlite to that mix if you're worried about drainage—it creates those tiny air pockets roots love. And for heaven's sake, don't skip the moistening step before planting!
Sunlight Strategy: Those 6-8 hours of direct sunlight are critical, but here's the thing about container growing: your plants can overheat in full sun during summer afternoons. I move my containers to partial shade between 12-4 PM when temperatures exceed 90°F. For indoor growers, that 6-inch grow light distance is perfect—just don't let it get any closer or you'll burn those delicate leaves.
Harvest Timing: The 45-60 day window is just a guideline—your squash will tell you when it's ready. Look for that full color and firm texture, and don't wait until they get too big or the plant will stop producing. I harvest mine every 2-3 days during peak season, and I've found that using a sharp knife leaves cleaner cuts than pruners. The key is that 1-inch stem attachment—it makes all the difference for storage life.
Pro Tips for Container Garden Squash
- Here's what nobody tells you about maximizing your container squash harvest without the usual headaches.
- I've seen people skip this drainage step and end up with root rot within weeks.
- Soil Mix Matters: The 50-50 potting soil to compost ratio is non-negotiable for container squash.
Frequently asked questions
Got questions about growing squash in containers?
You’re not alone! Here are answers to the most common queries to help you grow like a pro—no guesswork required.
What are the best squash varieties for containers?
Opt for compact, bush-type varieties like Eight Ball (zucchini), Bush Delicata, or Patio Star (acorn). Vining types (e.g., spaghetti squash) need larger pots (15+ gallons) or trellises. Avoid sprawling varieties like butternut unless you’re willing to prune aggressively!
When is the best time to plant container squash?
Start seeds indoors 4–6 weeks before your last frost date, or sow directly into containers after soil temps hit 60°F+. For warm climates, plant in spring; in cooler zones, wait until late spring to avoid frost damage. Squash loves warmth—rush the season, and you’ll get bitter fruit!
How often should I water container-grown squash?
Water deeply 1–2 times per week, ensuring soil stays consistently moist (not soggy). Containers dry out fast—check the top inch daily in hot weather. Mulch with straw to retain moisture and prevent weeds. Pro tip: Yellowing leaves? You’re either over- or under-watering!
Why are my squash leaves turning yellow or spotted?
Yellowing leaves often signal powdery mildew (common in humid climates) or aphids. Improve airflow by spacing plants, spray leaves with neem oil, or use row covers. Spots? It could be bacterial wilt—remove infected plants immediately to stop spread. Prevention: Rotate crops yearly and avoid overhead watering.
Can I grow squash in a 5-gallon bucket?
Only tiny varieties like Tromboncino (mini zucchini) thrive in 5-gallon pots, but expect small harvests. For most squash, aim for at least 10–15 gallons per plant. Add compost and a slow-release fertilizer to compensate for limited root space. Alternative: Try bush beans or peppers in smaller pots!
Wrapping up and next steps
Growing squash in containers is a rewarding way to enjoy fresh, homegrown produce—even in small spaces! 🌱 Whether you’re a beginner or a seasoned gardener, space-saving varieties like bush types or compact vining squash make it easy to harvest vibrant, flavorful veggies without sacrificing your patio or balcony.
With the right containers, soil, and care, you’ll soon be reaping a bountiful harvest.
Ready to dive in? Start by selecting your favorite variety and grab your containers—your future squash feast awaits! 🍆✨