
Tools
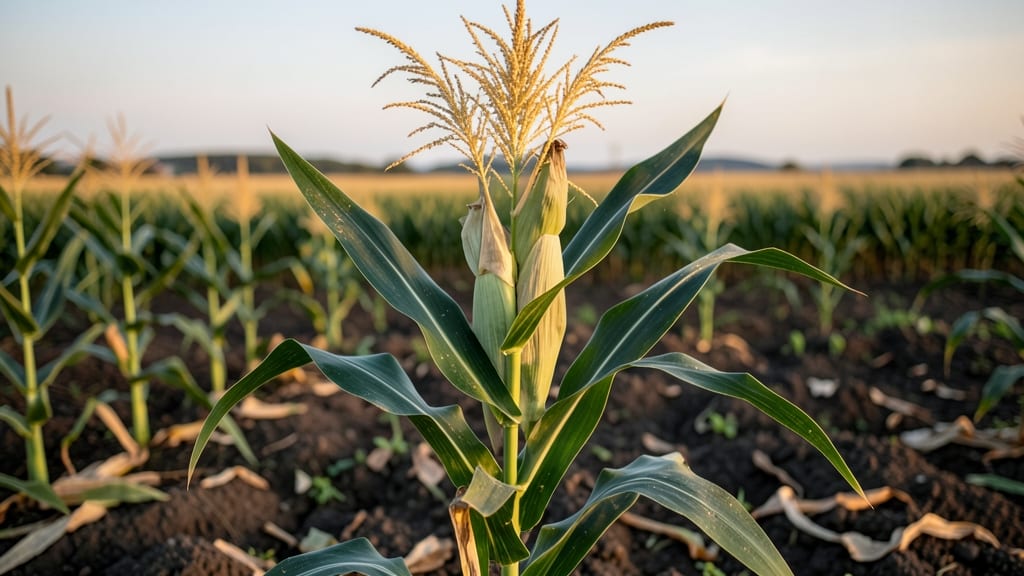
A thriving corn vegetable garden isn’t just possible—it’s a game-changer for small spaces, and vertical stacking lets you grow 3-4 times more corn in the same footprint. 🌽 I learned the hard way that traditional rows waste precious real estate.
The secret is pairing tall varieties with shorter ones and using trellises or cages to save space.
You'll need just three supplies: a 5-foot trellis, organic compost, and fast-growing varieties like 'Golden Bantam' (compact) or 'Peaches & Cream' (sweet and sturdy). Start seeds indoors 6-8 weeks before last frost, then transplant when seedlings hit 6 inches tall.
The key is rich, well-drained soil—corn hates soggy roots, but it loves nitrogen, so mix in aged manure before planting.
By midsummer, you'll watch stalks climb the trellis while shorter varieties fill the gaps below. Water deeply twice a week (more in heatwaves) and watch for silk emergence—that's your cue to side-dress with more compost.
The payoff? Fresh, buttery ears harvested straight from your vertical garden, with zero wasted space. Even my skeptical neighbor's jaw dropped when he saw the yield.
This method works for containers, raised beds, or backyard corners—just adjust trellis size to fit. The only downside? Squirrels might try to steal your harvest, so cover young plants with row fabric until they outgrow temptation. Ready to turn your small plot into a corn cornucopia?
📚 In This Guide
- What you need
- Instructions
- Tips and common mistakes
- Wrapping up and next steps
What you need
- ● Corn Seeds: Dwarf or bush varieties (e.g., ‘Golden Bantam,’ ‘Peaches and Cream,’ or ‘Temptation’) – 50–100 seeds (depending on space).
- ● Choose open-pollinated varieties for best results in vertical setups.
- ● Growing Containers or Raised Beds: 5-gallon buckets or fabric grow bags (1–2 per plant, with drainage holes).
- ● Raised bed (at least 12" deep) or vertical planter (e.g., tower garden) for stacking.
- ● Potting Mix: High-quality, well-draining mix (e.g., Miracle-Gro Organic Choice or 50% compost + 50% coconut coir).
- ● 1–2 cubic feet per container (or fill raised beds to 6–12" depth).
- ● Support Structures: Trellis or sturdy stakes (3–4 ft tall) for climbing varieties (if not using dwarf types).
- ● Bamboo stakes or spiral ties to secure plants as they grow.
- ● Fertilizer: Balanced organic fertilizer (10-10-10) or compost tea for planting.
- ● Slow-release granules (e.g., Osmoote) for mid-season feeding.
- ● Watering Supplies: Drip irrigation kit or watering can with a long spout (corn needs 1–2 inches of water weekly).
- ● Mulch (straw or shredded leaves) to retain moisture.
- ● Soil Test Kit – Check pH (ideal: 6.0–7.0) and nutrient levels.
- ● Row Cover or Shade Cloth – Protects young plants from pests and harsh sun.
- ● Plant Markers – Label varieties to avoid mix-ups in small spaces.
- ● Pruning Shears – For trimming lower leaves to improve airflow.
- ● Corn Pollination Aid – A small brush to hand-pollinate if growing in isolated containers.
Step-by-Step vertical stacking for corn in small gardens
Here's how to grow four healthy corn plants in tight spaces using proven vertical techniques.
🪴 Step 1: Prepare Your Vertical Support Structures
Corn needs sturdy support to grow vertically without bending. For four plants, I use two 4-foot tall bamboo stakes and two 6-foot tall wooden trellises (available at garden centers). Drive the bamboo stakes 6 inches deep into the soil, spacing them 18 inches apart—this creates a stable base for your corn. The trellises should be placed 3 feet apart in the remaining two spots, angled slightly outward to catch wind.
Real talk: Bamboo stakes are cheaper but may need replacing if they rot after a season. Wooden trellises last longer but cost more upfront. I like to soak the wooden ones in water for 24 hours before planting to prevent them from drawing moisture from the soil when the corn is young.
🌱 Step 2: Plant Corn Seeds at the Right Depth and Spacing
Use 4 corn seeds (like 'Golden Bantam' or 'Sweet Baby') and plant them 1 inch deep near each support structure. Space the seeds 12 inches apart in a square pattern—this ensures each plant has room to grow upward without crowding. I like to plant two seeds near each stake or trellis, then thin to the strongest seedling after germination.
Here's the thing—corn roots are sensitive, so don’t disturb them when thinning. Wait until the seedlings are 4 inches tall before snipping the weaker one at the base with clean scissors. Water the soil deeply after planting to encourage strong root development.
☀️ Step 3: Train Vines Upward and Monitor Growth
Once corn reaches 6 inches tall, gently tie the main stem to the support structure with soft plant ties (available at garden stores). I loop the tie around the stalk and the stake or trellis, leaving room for the plant to thicken. Avoid tying too tightly—you want to guide, not strangle.
Corn thrives in full sun (6+ hours daily) and warm soil (65-85°F). If your area gets cooler, use black plastic mulch to warm the soil. Watch for tassels (the pollen-producing stalks) appearing at the top—this means the plant is ready for pollination, which happens best on warm, still days. A light breeze helps pollen transfer between plants.
💧 Step 4: Water Deeply and Fertilize for Maximum Yield
Corn needs 1-2 inches of water per week, delivered at the soil level—not the leaves—to prevent fungal diseases. I water early in the morning so the foliage dries quickly. When the plants are 1 foot tall, side-dress with 1 cup of 10-10-10 fertilizer per plant, working it into the top 2 inches of soil. This gives them a nutrient boost for ear development.
You’ll know you’re doing it right when the lower leaves turn a deeper green and the stalks thicken noticeably. If the soil feels dry 2 inches below the surface, it’s time to water again. Overwatering here leads to weak stalks that snap under the weight of the ears.
✂️ Step 5: Harvest at Peak Ripeness for Sweetest Corn
Corn is ready to harvest when the silks turn brown and the kernels are plump and milky when pierced with a fingernail. Use a sharp knife to cut the stalk 6 inches below the ear—this prevents damage to the plant and allows for regrowth if you’re growing multiple seasons. I harvest in the early morning when sugars are highest.
Here’s a pro tip: If you’re growing four plants, you’ll likely get 2-4 ears per stalk. Store harvested ears in the fridge for 3-5 days or blanch and freeze them for long-term use. The vertical method lets you grow more in less space, but don’t overcrowd—each plant still needs 18 inches of root zone to thrive.
Tips & tricks for perfect vertical corn growth
A few strategic moves can transform your small garden into a corn-producing powerhouse—here's what I've learned from years of vertical growing.
Support Structure Wisdom: When prepping your bamboo stakes and wooden trellises in Step 1, I recommend treating them with a food-safe preservative before soaking (like a diluted vinegar solution) to extend their lifespan. The 24-hour water soak is crucial—it prevents the wooden trellises from competing with young plants for moisture during germination. For extra stability, bury the trellises at a 10-degree angle rather than straight up; this creates a natural windbreak that helps prevent stalk breakage as ears develop.
Planting Precision: The 1-inch planting depth in Step 2 might seem shallow, but corn seeds need that proximity to moisture for quick germination. I've found that pre-soaking seeds overnight in warm water (not boiling) gives you a 2-day jump on sprouting. When spacing your 4 seeds in that square pattern, imagine a diamond shape—this creates better airflow between plants and reduces fungal risks. And here's the thing about thinning: I wait until seedlings hit 4 inches because at that stage, the root systems are established enough to handle the stress of being separated.
Growth Monitoring: In Step 3, when you're tying up those 6-inch plants, use old t-shirts cut into strips instead of store-bought plant ties—they're just as effective and biodegradable. The warm soil range of 65-85°F is your sweet spot, but if your area dips below 65°F at night, cover plants with lightweight row covers until temperatures stabilize. For pollination, I've had success gently shaking the plants in the morning when tassels appear—this mimics natural wind pollination and increases yield.
Harvest Timing: That 6-inch harvest cut in Step 5 might seem arbitrary, but it preserves the plant's ability to regrow if you're planning a second harvest. I mark my calendar for harvest day by watching the tassels—when they've been brown for 24 hours, that's my cue. For storage, I blanch ears for 4 minutes before freezing, which preserves sweetness for up to 12 months. The key is speed: from cutting to blanching should take less than 30 minutes to maintain peak flavor.
Pro Tips for Corn Vegetable Garden
- A few strategic moves can transform your small garden into a corn-producing powerhouse—here's what I've learned from years of vertical growing.
- The 24-hour water soak is crucial—it prevents the wooden trellises from competing with young plants for moisture during germination.
- Planting Precision: The 1-inch planting depth in Step 2 might seem shallow, but corn seeds need that proximity to moisture for quick germination.
Frequently asked questions
Got questions about growing corn in a small space? You’re not alone—corn gardens can be tricky, especially when stacking vertically! Here are some of the most common questions (and answers) to help you plan like a pro.
How deep should the soil be for corn in a vertical garden?
Corn roots need at least 12–18 inches of loose, nutrient-rich soil to thrive. In vertical planters, use deep containers (like grow bags or stacked pots) and mix in compost to mimic natural depth. If your setup is shallow, opt for shorter varieties like 'Bodacious' or 'Golden Bantam', which tolerate compact roots better.
When is the best time to plant corn for vertical stacking?
Wait until after the last frost when soil temps hit 60°F+. For small spaces, stagger plantings every 2 weeks to extend harvests. Corn loves warmth—if nights dip below 50°F, use row covers or plant in late spring. Pro tip: Warm the soil faster by covering it with black plastic a week before planting!
Can I grow corn with other vegetables in a vertical garden?
Corn is a heavy feeder, so pair it with light companions like beans (they fix nitrogen), lettuce, or radishes. Avoid planting near tomatoes or cabbage—they compete for nutrients or attract pests. In vertical setups, use separate pockets or tiers for each plant to prevent overcrowding.
Why is my corn wilting or developing holes in vertical planters?
Wilting often means underwatering (corn needs 1–2 inches per week) or poor drainage. Holes? Likely corn earworms or squash bugs. Try these fixes:
- Use row covers early to block pests.
- Mulch with straw to retain moisture.
- Handpick eggs (white specks on leaves) daily.
What’s the easiest corn variety for beginners in small spaces?
Start with bush corn varieties—they grow 3–5 feet tall (vs. 7+ feet for field corn) and produce multiple ears per stalk. Top picks:
Variety
Days to Harvest
Height
'Golden Bantam'
60–70 days
4–5 ft
'Ambrosia'
70–80 days
5–6 ft
'Tuxedo' (sweet & colorful)
75–85 days
5 ft
Wrapping up and next steps
Growing corn in a vertical vegetable garden isn’t just clever—it’s a game-changer for small spaces! 🌱 By stacking plants, you’ve unlocked more harvests with less ground, saved space, and even improved airflow for healthier crops.
Whether you’re a beginner or a seasoned gardener, this method proves that big yields don’t need big plots.
Ready to put your green thumb to work? Start small—try a single vertical planter or trellis this season, then expand as you gain confidence. Share your progress, experiment with varieties, and watch your corn garden thrive like never before! 🌽✨