
Tools
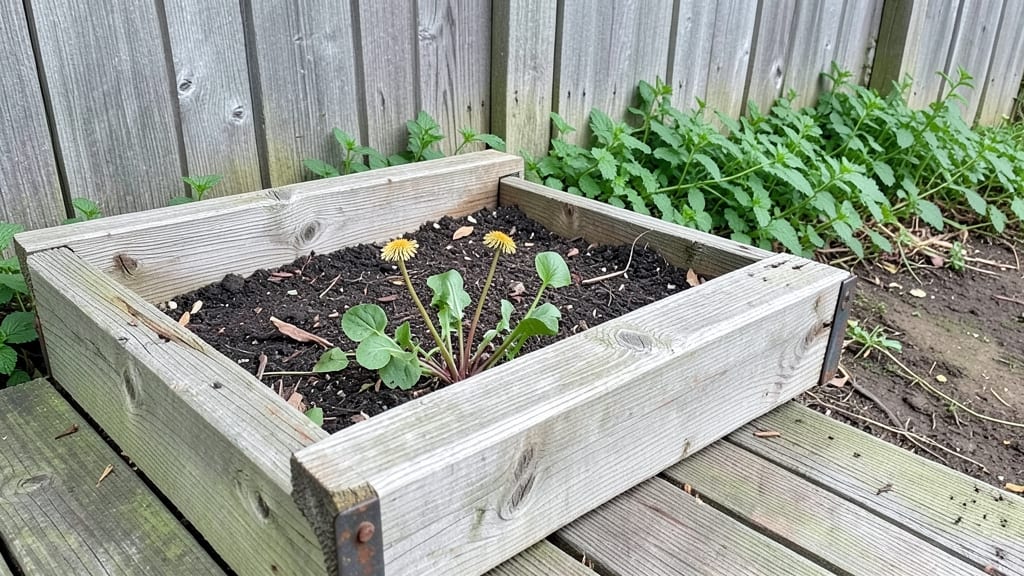
Building a decking garden bed transforms dead space into a lush, accessible green sanctuary. 🌿 I’ve turned my narrow deck into a thriving herb and flower display using just a few 2x6 boards and some landscape fabric—no fancy tools or heavy lifting required.
The best part? You can customize it to match your deck’s style while keeping maintenance simple.
Start with materials that won’t rot: cedar or redwood for the frame, and a sturdy container or liner to hold soil. Place it where it gets at least 6 hours of sunlight—near the deck’s edge for easy access while dining or relaxing.
Drainage holes or a gravel base prevent soggy roots, and lightweight potting mix keeps things manageable for small spaces.
Fill it with plants that thrive in containers: trailing petunias, dwarf herbs like thyme, or even shallow-rooted veggies like lettuce. The result? A fragrant, low-maintenance garden that blooms all season and makes your deck feel like an extension of the yard.
Plus, you’ll never have to bend over to tend it.
Works for balconies, patios, or even along deck railings—just adjust the height to avoid tripping hazards. Here’s how to build one that lasts for years without the hassle of in-ground gardening. Let’s get started!
📚 In This Guide
- What you need
- Instructions
- Tips and common mistakes
- Wrapping up and next steps
What you need
- ● Decking boards: Pressure-treated or composite (e.g., cedar, redwood, or treated pine) – quantity depends on bed size (e.g., 10–15 boards for a 4’x8’ bed).
- ● Base frame: 2x4 or 2x6 lumber (cut to size for bed dimensions + supports).
- ● Galvanized screws or decking nails: 2.5"–3" (100–200 screws, depending on size).
- ● Landscape fabric: Weed barrier (cut to bed dimensions + 6" overhang).
- ● Potting soil or garden mix: 2–3 cubic feet per square foot of bed depth (e.g., 12–18 bags for a 4’x8’ bed).
- ○ Drainage layer (optional but recommended): Gravel or landscape stones (1–2" depth).
- ● Measuring tape, pencil, and level: For precise cuts and alignment.
- ● Circular saw or handsaw: For cutting decking and lumber.
- ● Drill/driver: For assembling the frame and securing boards.
- ○ Staple gun (optional): For securing landscape fabric.
- ● Edge trim or metal flashing: For a polished look.
- ● Wood stain or sealant: To protect decking from weather.
- ● Drip irrigation kit: For hassle-free watering.
- ● Container plants or seedlings: Ready to pop in once your bed is built!
Step-by-Step instructions for building a decking garden bed
Here's how to create a sturdy, stylish elevated planter that keeps greenery thriving all year.
🪴 Step 1: Measure and Mark Your Decking Layout
Start by measuring your deck space where you want the garden bed. Use a tape measure to mark a rectangular area—typically 4 feet by 8 feet for a standard decking bed—with stakes and string for straight lines. I like to position mine along the edge of the deck for easy access to water and sunlight.
Check for level using a carpenter's level or a long board and straightedge. Uneven decking will cause your bed to tilt, so adjust the string lines until they're perfectly horizontal. This ensures your planter sits flush and stable. If your deck has slight slopes, build the bed's height accordingly to maintain a level planting surface.
🌱 Step 2: Build the Frame with Decking Materials
Cut 2x6 lumber to create the frame—four sides with corners reinforced by 2x4 corner braces. I use galvanized deck screws (included in your materials) to assemble the frame, pre-drilling holes to prevent wood splitting. The frame should be 12 inches tall for standard planting depth, or taller if you want raised edges for seating.
Lay the frame on your marked decking area and check for square by measuring diagonally from corner to corner. Both measurements should be equal—if not, adjust the frame until it's perfectly square. This step is critical; an uneven frame will make your bed wobbly or uneven once filled with soil.
💧 Step 3: Attach the Decking Boards for the Base
Lay decking boards (5/4x6 or wider) across the frame's bottom, spaced 1/4 inch apart for drainage. Secure them with stainless steel deck screws, driving them into the frame from underneath. Leave a 1-inch gap between the boards and the frame's inner edge to prevent soil from spilling through.
I like to stagger the seams of the decking boards for a cleaner look and added stability. Once attached, double-check that the base is level—any tilt now will affect the finished bed. If needed, shim the frame with scrap wood underneath to level it before securing the sides.
✂️ Step 4: Add the Side Panels and Reinforce Stability
Attach 1x6 or 1x8 boards vertically to the frame's sides, spacing them 6 inches apart for support. Use galvanized screws to secure them, pre-drilling holes to avoid splitting. For extra stability, add horizontal braces every 2 feet along the sides—this prevents wobbling when the bed is full of soil and plants.
Here's the thing—if your deck has railings, attach L-brackets to secure the bed to the railing for wind resistance. I've seen many a garden bed topple in a breeze, so this step isn't optional. Once the sides are up, fill the bed with 3 cubic feet of potting mix (or your chosen soil blend) for each 4x8-foot section.
☀️ Step 5: Finish and Plant for Year-Round Greenery
Stain or seal the wood with decking stain to protect it from weather and UV damage. I prefer a semi-transparent stain that lets the wood grain show while adding durability. Let it dry completely—usually 4-6 hours—before planting. This final step keeps your bed looking fresh and extends its lifespan for years.
Now it's time to plant! Choose drought-tolerant perennials like lavender or sedum for low maintenance, or mix in annuals for seasonal color. Water deeply after planting to settle the soil, and mulch with 2 inches of shredded bark to retain moisture. Your decking garden bed is now ready for year-round greenery—just add plants and enjoy!
Tips & tricks for perfect decking garden beds
A few key strategies will help you build a garden bed that stays sturdy, looks beautiful, and keeps your plants thriving for years. Here's what I've learned from building mine.
Level is Everything: In Step 1, when you're marking your layout, take the extra 10 minutes to double-check level with a carpenter's level at multiple points along your string lines. I've seen many beds tilt after filling with soil—this is your chance to prevent that. If your deck has slopes, build the bed's height gradually on the lower side to maintain a flat planting surface. Uneven beds cause drainage issues and make planting difficult.
Square Up Your Frame: The diagonal measurement check in Step 2 is non-negotiable. I've built frames that looked square but weren't—until I measured diagonally and found they were actually rectangles. When both diagonals measure the same, you know your frame is perfectly square. This precision prevents wobbling once filled with soil and plants. Pro tip: Use a speed square tool for quick, accurate measurements at the corners.
Drainage and Stability: That 1/4-inch gap between decking boards in Step 3 isn't just for looks—it's crucial for drainage. When you're attaching the base, make sure to maintain this spacing consistently. For extra stability, consider adding a second layer of 1x4 boards horizontally across the frame bottom before attaching the decking boards. This creates a more rigid base that won't flex when filled with soil.
Wind Resistance Matters: If your deck has railings, don't skip the L-brackets in Step 4. I've seen garden beds topple in strong winds when they weren't properly secured. Even without railings, adding horizontal braces every 2 feet along the sides makes a huge difference in stability. For larger beds (over 6 feet long), consider adding a center support brace to prevent sagging in the middle when filled with soil.
Pro Tips for Decking Garden Bed
- A few key strategies will help you build a garden bed that stays sturdy, looks beautiful, and keeps your plants thriving for years.
- Level is Everything: In Step 1, when you're marking your layout, take the extra 10 minutes to double-check level with a carpenter's level at multiple points along your string lines.
- Square Up Your Frame: The diagonal measurement check in Step 2 is non-negotiable.
Frequently asked questions
Got questions about creating or maintaining a decking garden bed? You’re not alone! Here are some of the most common queries—plus straightforward answers to help you get growing with confidence.
What’s the best material for a decking garden bed?
For durability and aesthetics, cedar, redwood, or composite decking are top choices. Cedar resists rot naturally, while composite won’t splinter or fade. Avoid pressure-treated wood for edible gardens—opt for untreated lumber instead. Pair with galvanized screws to prevent rust.
When is the best time to install a decking garden bed?
Spring or early fall are ideal—soil is workable, and extreme temps are avoided. If you’re in a mild climate, late winter (before planting season) works too. Skip summer heat or winter frost; both can stress materials and plants. Pro tip: Pre-drill screw holes to prevent wood splitting!
Can I use a decking garden bed for vegetables or just flowers?
Decking beds work for veggies, herbs, and flowers. Just ensure proper drainage (add landscape fabric or gravel at the bottom) and use lightweight, nutrient-rich soil. For heavy rooters like tomatoes, reinforce the bed with extra supports or deeper framing.
How do I fix warping or gaps in my decking bed over time?
Warping? Sand rough edges and tighten screws. For gaps, add wood filler (for small cracks) or replace damaged planks. Prevent future issues by:
- Sealing wood annually with waterproof sealant.
- Avoiding overwatering—decking needs drainage, not sogginess.
- Using galvanized hardware to resist corrosion.
Are there budget-friendly alternatives to traditional decking?
Yes! Try:
- Recycled plastic lumber (cheap, rot-proof, but less eco-friendly).
- Pallet wood (free/low-cost, but sand/stain thoroughly to avoid toxins).
- Cinder blocks or bricks (DIY-friendly, but heavier—check deck weight limits!).
Wrapping up and next steps
Transforming your decking into a thriving garden bed is easier than you think—and the rewards are worth every minute! 🌿 Whether you’re a seasoned gardener or a beginner, an elevated planter brings beauty, functionality, and year-round greenery to your outdoor space.
Start small, experiment with plants, and let your creativity grow!
Ready to get started? Sketch your design, gather your materials, and build your dream decking garden bed today! Your outdoor oasis awaits—happy planting! 🌱