
Landscaping
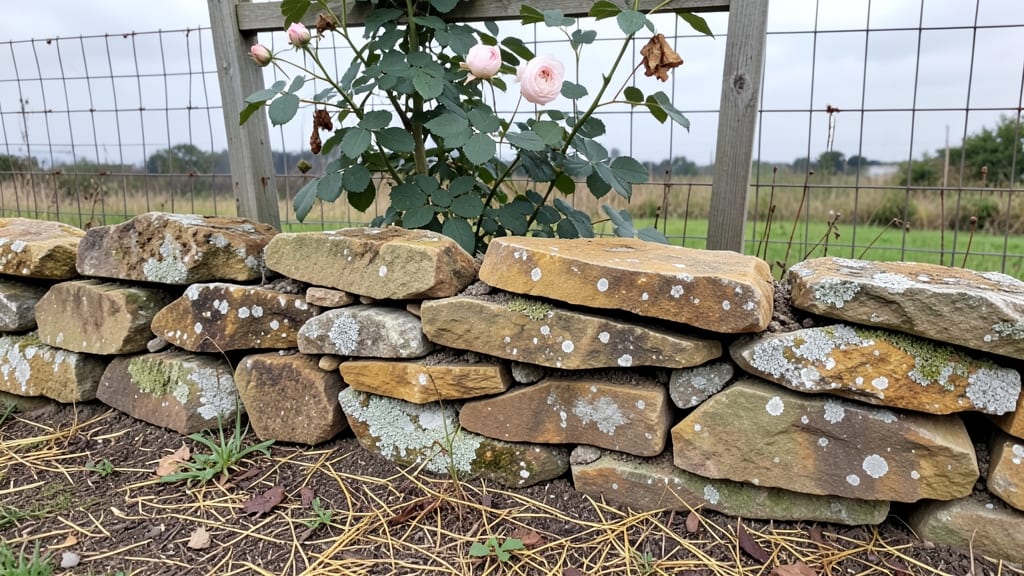
Decorating a garden wall with the right plants and a little structural smarts turns a plain surface into a thriving privacy screen.
I’ve turned my backyard’s dull concrete wall into a thriving green curtain using climbing vines and a sturdy trellis system—it’s the kind of project that makes neighbors stop and ask questions.
The secret isn’t just picking pretty plants; it’s choosing ones that thrive in your climate and won’t turn into maintenance nightmares.
You’ll need a few key supplies: a trellis or wire mesh for support, soil-friendly fertilizer, and plants like clematis, ivy, or jasmine that grow fast and spread beautifully. The setup takes about 4 hours for a 6-foot section, and the best part?
You’ll start seeing greenery climb within 2-3 weeks if you water consistently. This isn’t just decoration—it’s a functional screen that blocks noise, filters wind, and adds value to your outdoor space.
The result is a wall that feels alive, with fragrant blooms or velvety leaves depending on your plant choices. My clematis now drapes over the top like a natural canopy, and the ivy fills in the gaps with glossy, heart-shaped leaves.
It’s the kind of transformation that makes your garden feel like a secret retreat, not just another backyard. Ready to make your wall work harder?
Works for any wall height or style—whether it’s a fence, brick, or even a chain-link barrier. The same principles apply, so you can adapt this to your space without breaking the bank. Let’s get growing!
📚 In This Guide
- What you need
- Instructions
- Tips and common mistakes
- Wrapping up and next steps
What you need
- ● Plants: Fast-growing vines (e.g., Morning Glory, Clematis, or Wisteria) – 6-12 plants, depending on wall size
- ● Evergreen shrubs (e.g., Ivy, Boxwood, or Holly) – 4-8 plants for dense coverage
- ○ Climbing roses or flowering vines (optional for color) – 2-4 plants
- ● Support Structures: Trellis panels (6’x4’ or custom size) – 2-4 panels, depending on wall length
- ● Metal or wooden lattice (for vertical gardens) – 1-2 rolls
- ● Cable or wire mesh (for training vines) – 50-100 ft, 14-16 gauge
- ● Fasteners & Hardware: Stainless steel or galvanized screws/nails – 50-100 pieces
- ● Heavy-duty staples (for attaching wire mesh) – 1 box
- ● L-brackets or wall anchors (for securing trellises) – 6-12 pieces
- ● Soil & Amendments: Well-draining potting mix or garden soil – 2-4 bags (20 lbs each)
- ● Compost or organic fertilizer – 1-2 bags
- ● Mulch (for moisture retention) – 1-2 bags
- ● Pruning shears or hedge clippers – for shaping and maintenance
- ● Drill/driver with masonry bit (if attaching to brick/stone) – essential for wall prep
- ● Level – to ensure trellises are straight
- ● Measuring tape & pencil – for precise placement
- ● Gloves & safety goggles – protection while working
- ● Wheelbarrow or garden cart – for hauling materials
- ● Watering can or hose with nozzle – for post-planting care
- ● Drip irrigation kit – for automated watering
- ● Solar-powered garden lights – to highlight your wall at night
- ● Decorative planters or hanging baskets – for added texture
- ● Weather-resistant paint or stain – to refresh wooden trellises
- ● Plant ties or soft twine – to guide vines gently
Instructions for creating a bold greenery privacy screen on garden walls
Here's how to transform an ordinary wall into a lush, living privacy screen that thrives all season long.
Select and Prepare Climbing Plants for Your Wall
Choose fast-growing vines like ivy, clematis, or climbing roses that suit your climate. I always opt for disease-resistant varieties to avoid future headaches. Start with healthy nursery plants—look for strong stems and vibrant leaves. If using seeds, begin indoors 6-8 weeks before your last frost date to give them a head start.
Dig a hole twice as wide as the root ball but only as deep. This encourages roots to spread horizontally for better stability. Gently loosen the roots if they're circling tightly in the pot. The goal is to minimize transplant shock while giving them room to establish quickly.
Install Support Structures Along the Wall
Attach 1-inch thick wooden trellises or metal grids 12 inches apart vertically along the wall. Secure them with galvanized screws into wall anchors or heavy-duty staples—this prevents shifting in wind. For taller walls, add horizontal supports every 3 feet to distribute plant weight evenly.
I like to angle trellises slightly outward from the wall to create a natural cascade effect. This not only looks more organic but also gives plants room to grow without competing for space. If your wall is smooth, consider adding landscape fabric first to prevent roots from damaging plaster or brick.
Plant and Train Vines for Optimal Growth
Position each plant 12-18 inches away from the wall to allow airflow and prevent rot. Dig a hole matching the root ball size, place the plant in, and backfill with native soil mixed with compost. Water deeply until moisture reaches 6 inches down—this helps roots establish quickly.
Train the main stem along the trellis immediately using soft plant ties or twine. Avoid metal ties that can cut into stems as plants grow. Prune side shoots back by one-third to encourage thicker growth. Water 2-3 times weekly for the first month, then taper to once weekly once established.
Maintain and Encourage Year-Round Coverage
Fertilize lightly with balanced 10-10-10 formula every 6 weeks during growing season. I skip winter fertilizing—plants need to rest. Prune dead or overgrown vines in early spring to stimulate new growth. For evergreens like ivy, trim back one-third annually to maintain density.
Watch for pests like aphids or spider mites—spray with neem oil solution at first sign. Mulch the base with 2 inches of shredded bark to retain moisture and suppress weeds. Within 2-3 years, your wall will be fully covered, offering both privacy and beauty without sacrificing natural light.
Tips & tricks for creating a bold greenery privacy screen
Transforming your garden wall into a lush privacy screen takes patience and planning—here are my go-to strategies to ensure your vines thrive and your wall stays protected.
Plant Selection Matters: When choosing between ivy, clematis, or climbing roses, consider your climate and wall exposure. Ivy thrives in shade and grows quickly, while clematis prefers sun and adds vibrant blooms. For roses, opt for disease-resistant varieties like 'New Dawn' or 'Climbing Iceberg'—they're hardy and produce stunning flowers. I always check the plant tags for mature height and spread to ensure they'll fit your wall's dimensions without overcrowding.
Root Care is Key: In Step 1, the wide but shallow hole you dig is crucial—it encourages roots to spread horizontally for stability, especially important for taller walls. If you notice roots circling tightly in the pot, gently tease them apart before planting. This prevents girdling, where roots strangle themselves as they grow. For extra insurance, add a handful of mycorrhizal fungi to the planting hole—it helps roots establish faster and absorb nutrients more efficiently.
Support Structure Secrets: For Step 2, don't skimp on the 12-inch vertical spacing between trellises—this allows plants to breathe and reduces competition. If your wall is particularly tall, adding horizontal supports every 3 feet creates a sturdy framework that prevents sagging. Pro tip: Use galvanized screws instead of nails—they won't rust and provide a stronger hold. For extra durability, pre-drill holes in your trellises to prevent wood from splitting when you attach them.
Watering Wisdom: The first month is critical for root establishment, so stick to the 2-3 times weekly watering schedule in Step 3. Water deeply each time until moisture reaches 6 inches down—this encourages deep root growth. After the first month, you can taper to once weekly, but always check the soil first. If the top inch is dry, it's time to water. Mulching with 2 inches of shredded bark helps retain moisture and keeps roots cool, especially in hot climates.
Pro Tips for Decorating Garden Wall
- Transforming your garden wall into a lush privacy screen takes patience and planning—here are my go-to strategies to ensure your vines thrive and your wall stays protected.
- Plant Selection Matters: When choosing between ivy, clematis, or climbing roses, consider your climate and wall exposure.
- Root Care is Key: In Step 1, the wide but shallow hole you dig is crucial—it encourages roots to spread horizontally for stability, especially important for taller walls.
Frequently asked questions
What’s the best time of year to install a garden wall privacy screen?
The ideal time is early spring or fall when temperatures are mild. This allows plants to establish roots before extreme heat or cold. Avoid winter—frost can damage young plants, and summer heat may stress them during transplanting. If you’re using evergreens, fall planting gives them time to root before winter dormancy.
Can I build a garden wall privacy screen on a budget?
Opt for fast-growing, low-cost plants like bamboo, willow, or native shrubs (e.g., privet or forsythia). Use recycled materials like pallets or cedar fence panels for structure. DIY trellises with rebar and wire mesh also cut costs. Just prioritize sturdy anchoring to prevent leaning or shifting over time.
How do I keep my privacy screen from getting moldy or mildewy?
Mold thrives in shady, damp conditions, so ensure proper airflow by spacing plants 1–2 feet apart. Choose disease-resistant varieties (e.g., arborvitae over yew). Elevate soil slightly with gravel or raised beds to improve drainage. Prune for sunlight exposure and apply copper-based fungicide preventatively if your climate is humid.
What if my wall isn’t perfectly straight? Can I still decorate it?
Yes! Use flexible materials like lattice panels or climbing plants (e.g., ivy or clematis) to follow the wall’s contours. For a structured look, install a wire mesh framework first, then weave in plants or vines. If using rigid panels, cut them to fit uneven sections or stagger them for a natural, layered effect.
Will a garden wall privacy screen attract pests like bugs or rodents?
Most plants won’t attract pests, but deciduous trees or dense shrubs can harbor spiders, beetles, or rodents if debris accumulates. Reduce risks by:
- Keeping the base clean and dry (remove fallen leaves).
- Avoiding mulch piles near the wall.
- Choosing pest-resistant species (e.g., boxwood over wisteria).
- Installing a metal mesh barrier at the base if gnawing is a concern.
Wrapping up and next steps
Transforming your garden wall into a lush, private retreat is easier than you think!
With the right plants, tools, and a little creativity, you can create a stunning greenery screen that adds beauty and functionality to your outdoor space. 🌿 Whether you’re a seasoned gardener or just starting out, every step brings you closer to a serene, personalized garden oasis.
Ready to get started? Sketch your design, gather your materials, and dive in! Your garden wall deserves that extra touch of nature—so roll up your sleeves and make it happen. Happy planting! 🌱