Tools
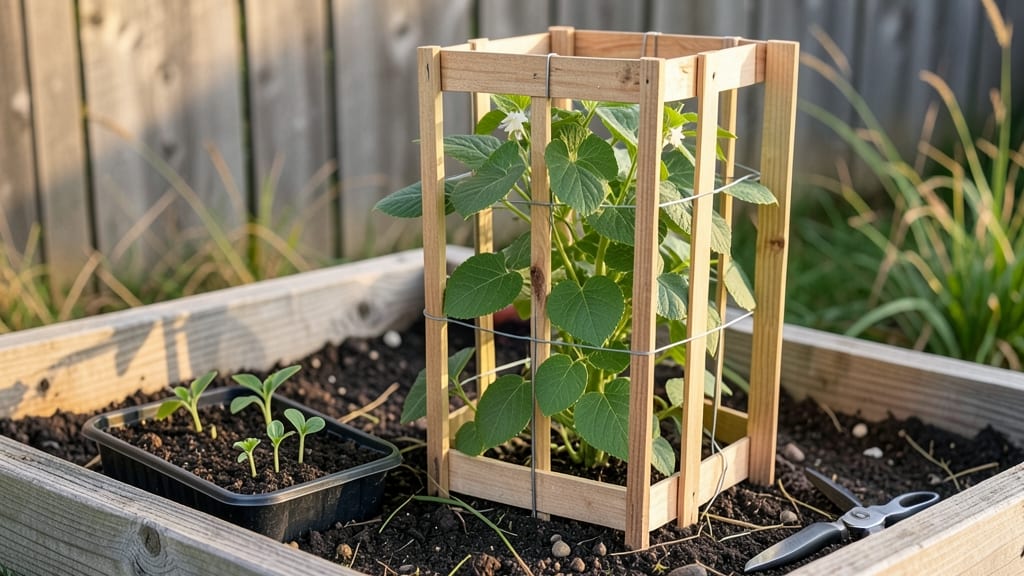
Building a sturdy DIY garden cage transforms your climbing plants into a lush vertical display. I started with scrap metal fencing and a few hours of cutting—now my morning glories and cucumbers climb like they’re in a botanical garden.
The best part? You can adjust the size to fit any space, from a balcony corner to a full garden bed.
You’ll need basic materials: galvanized wire fencing (24 inches wide), heavy-duty staples, wire cutters, and a measuring tape. No fancy tools here—just what’s already in your garage. For extra durability, add wooden posts at the corners or wrap the cage in chicken wire for added support.
This setup lasts for years, even in heavy winds.
The payoff is immediate: vines sprawl upward instead of across the ground, saving space and keeping fruits and flowers off the soil. My tomatoes now ripen cleaner, my beans grow straighter, and the whole garden looks like a curated art piece.
Plus, you can paint the frame to match your garden’s color scheme.
Works for everything from pole beans to passionflowers, and you can even build a decorative version for roses or clematis. The only limit is your imagination—and how tall you want your plants to grow. Let’s get building!
📚 In This Guide
- What you need
- Instructions
- Tips and common mistakes
- Wrapping up and next steps
What you need
- ● PVC pipes or metal rods: ½-inch to 1-inch diameter (quantity depends on cage size; ~10–20 pieces for a 4x4 ft cage).
- ● Concrete footings or heavy-duty stakes: 4–6 pieces (for stability, especially in windy areas).
- ● Connectors or elbow joints: 10–15 pieces (for PVC) or bolts/nuts (for metal rods).
- ● Twine, zip ties, or wire: For securing plants to the frame.
- ● Measuring tape, pencil, and level: For precise cuts and alignment.
- ● Hacksaw or PVC cutter: For clean cuts on pipes/rods.
- ○ Drill (optional): For pre-drilling holes in metal frames.
- ● Work gloves and safety goggles: Always prioritize safety!
- ● Powder-coated paint or spray paint: To match your garden’s aesthetic.
- ● Decorative lattice or trellis panels: For a polished look.
- ● Solar-powered lights: To illuminate your climbing plants at night.
- ● Plant supports (e.g., netting or mesh): For extra security against pests.
Step-by-Step instructions for building a DIY garden cage
Here’s how to create a sturdy, customizable frame that will support climbing plants for years.
Gather and Prepare Materials
Start by collecting all the materials you’ll need. For a 4-foot tall cage, you’ll want 4 galvanized metal or wooden stakes (each 6 feet long), 10-12 galvanized metal or PVC pipes (each 4 feet long), and heavy-duty zip ties or metal connectors. If using wood, pre-cut 4 vertical supports (each 4 feet tall) and 8 horizontal supports (each 2 feet long) from 2x2-inch lumber. Measure twice to ensure all pieces are uniform before assembling.
I like to pre-drill holes in the wood or PVC pipes where the connectors will go—this makes assembly faster and ensures everything fits snugly. For metal cages, skip this step and rely on the flexibility of the pipes to bend slightly as you shape the frame. Keep your workspace clean and organized so you don’t lose small parts like zip ties or screws.
Assemble the Vertical Supports
Begin by placing the 4 vertical stakes or supports in a square formation, spaced about 3 feet apart at the base. If using metal stakes, drive them 12 inches deep into the ground for stability. For wooden supports, dig small holes or use a post driver to secure them firmly. This square base will be the foundation of your cage.
Next, attach the horizontal supports to the top of the vertical stakes. For a 4-foot tall cage, place the first horizontal ring about 6 inches below the top of the stakes. Use 3 horizontal pieces per ring, spaced evenly around the cage (e.g., at 0 degrees, 120 degrees, and 240 degrees). Secure each piece tightly with zip ties, screws, or metal connectors. This creates a sturdy first ring to hold the structure together.
Add Additional Rings for Stability
Repeat the process to add 2-3 more horizontal rings, spacing them evenly between the base and the top. For example, place one ring at mid-height (2 feet) and another at 1 foot from the base. Each ring should mirror the first, with 3 horizontal pieces per level. This layered design ensures the cage can support heavy vines without bending or collapsing.
If you’re using PVC pipes, you can bend them slightly to create a dome shape for a more decorative look. Just be careful not to over-bend, as this can weaken the material. For wooden cages, pre-cut notches where the horizontal pieces meet the vertical supports to create a cleaner fit. Double-check that all connections are tight—wobbly joints will fail under the weight of mature plants.
Reinforce and Secure the Cage
Once all rings are in place, reinforce the structure by adding diagonal supports between the rings if needed. For extra stability, especially in windy areas, bury the vertical stakes 6-12 inches deeper or anchor them with concrete footings. If using metal, ensure all connections are rust-resistant by using stainless steel hardware.
Test the cage’s stability by gently pushing and pulling on each side. It should hold firm without swaying. If you notice any weakness, add more connectors or adjust the tension in the zip ties. Once satisfied, your cage is ready to support climbing plants like beans, peas, cucumbers, or even roses. The key is ensuring it’s tall enough for your plants’ mature height—most vines need at least 5-6 feet to thrive.
Plant and Maintain Your Climbing Garden
Now that your cage is built, it’s time to plant. Choose a sunny location with well-draining soil and water deeply before adding your climbing plants. Train the vines to grow upward by gently tying them to the cage with soft plant ties or twine as they grow. Avoid wrapping too tightly—you want to guide, not strangle, the stems.
Regularly check for loose connections, especially after heavy rain or wind. Prune any overgrown or tangled vines to keep the cage from becoming overloaded. With proper care, your DIY garden cage will provide years of support for lush, thriving plants. Happy gardening!
Tips & tricks for building a sturdy DIY garden cage
Building a garden cage that lasts takes a few smart tricks—here's how to avoid common pitfalls and create a frame that won't collapse under your plants.
Material Prep Matters: When pre-drilling holes in Step 1, use a drill bit slightly smaller than your connectors. This creates a snug fit that prevents wobbling when you add the horizontal rings. For wooden cages, I recommend pre-drilling all holes before assembly—this saves time and ensures perfect alignment when you attach the 2-foot horizontal supports in Step 3.
Square Base Stability: The 3-foot spacing between your 4 vertical stakes in Step 2 is critical. Mark the corners with stakes before digging to ensure perfect 90-degree angles. For extra stability in windy areas, consider adding a fifth stake in the center of your square base—this creates a pyramid effect that distributes weight more evenly.
Ring Spacing Logic: The instructions suggest placing rings at 6 inches from the top, mid-height (2 feet), and 1 foot from the base. This creates a natural triangle of support that prevents bending. For taller cages (over 5 feet), add an extra ring at 3 feet to handle heavier vines like pole beans or cucumbers.
Reinforcement Secrets: In Step 4, when adding diagonal supports, I like to use the same material as my main structure—this creates a seamless look. For wooden cages, pre-cut diagonal pieces at 45-degree angles before assembly. If using metal, stainless steel connectors prevent rust better than galvanized ones over time.
Pro Tips for Diy Garden Cage
- Building a garden cage that lasts takes a few smart tricks—here's how to avoid common pitfalls and create a frame that won't collapse under your plants.
- Material Prep Matters: When pre-drilling holes in Step 1, use a drill bit slightly smaller than your connectors.
- Square Base Stability: The 3-foot spacing between your 4 vertical stakes in Step 2 is critical.
Frequently asked questions
Got questions about building your own DIY garden cage?
Here are answers to the most common ones to help you get started with confidence!
What’s the best material for a sturdy DIY garden cage?
The best materials depend on your needs: galvanized steel pipes or PVC pipes are lightweight yet durable, while wood (like cedar or redwood) adds a rustic touch but requires sealing. For budget-friendly options, bamboo stakes or reclaimed wood work well for smaller plants. Choose based on your plant’s weight and your garden’s aesthetic!
How long does it take to build a DIY garden cage?
Most beginners finish a basic 4x4 ft cage in 1-2 hours, but larger or more intricate designs (like arched or spiral cages) can take 3-5 hours. Break it into steps—cutting, assembling, and securing—to save time. Pro tip: Pre-measure and pre-drill holes to speed up the process!
Can I use a DIY garden cage for heavy climbers like grapes or wisteria?
Yes, but you’ll need a heavier-duty frame. Use ½-inch galvanized steel pipes or 2x2-inch wood posts spaced 12-18 inches apart. For extra support, add diagonal braces or twine/zip ties to secure vines. Avoid flimsy materials like thin PVC for power climbers!
What’s the easiest way to secure the cage to the ground?
Drive stakes or T-posts into the ground at each corner and attach the cage frame with zip ties, wire, or screws. For windy areas, bury the posts 12 inches deep or use concrete anchors. A quick fix: Weigh down the base with rocks or heavy garden stones if staking isn’t an option.
What if my cage collapses under the weight of my plants?
Start with a wider, more open design to distribute weight evenly. Reinforce weak spots with additional crossbeams or metal corner braces. If using wood, treat it with a waterproof sealant to prevent rot. For quick repairs, replace sagging sections or add supporting stakes around the base.
Wrapping up and next steps
Building your own DIY garden cage is a rewarding project that adds both structure and charm to your outdoor space! With just a few materials and a little elbow grease, you’ve got a custom, sturdy frame to support your climbing plants—whether it’s roses, beans, or morning glories. 🌿✨
Now that you’re equipped with the know-how, why not roll up your sleeves and start building? Grab your tools, follow the steps, and watch your garden transform into a thriving vertical oasis. Happy gardening!