
Tools
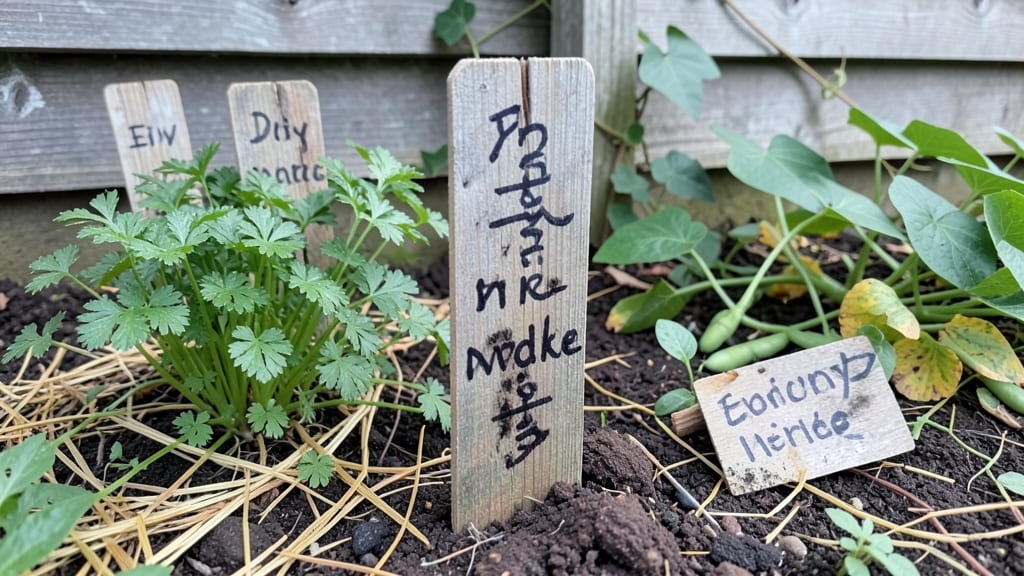
My garden labels DIY project started after losing track of which tomato plant was 'Brandywine' and which was 'Sungold'—until I made my own. These customizable wooden tags transformed my garden from a chaotic mess into an organized, beautiful space where every plant has its own identity.
The best part? They’re sturdy enough to last through rain and sun, yet simple enough to make in an afternoon with basic supplies.
You’ll need just a few things: pre-cut wooden sticks (or even chopsticks from the kitchen), a permanent marker or paint, and a drill for attaching them to stakes. No fancy tools required—this is beginner-friendly and budget-conscious.
The designs can be as simple as handwritten names or as creative as painted botanical sketches. I’ve even seen gardeners use recycled wine corks or metal tags for a rustic look. The key is matching the labels to your garden’s style while keeping them readable from a few feet away.
Once you’ve got your tags ready, place them at the base of each plant where they won’t get buried by mulch. A quick trick? Use a small dab of hot glue to secure them to stakes—this keeps them upright even in windy conditions.
Within days, you’ll glance at your garden and instantly know which basil needs harvesting or which roses need pruning. It’s the small details that turn a garden from functional to your sanctuary.
The real magic happens when you customize them to fit your space. Add plant care notes on the back, like watering preferences or last pruned dates, so you’ve got everything in one place.
These labels aren’t just practical—they’re a way to make your garden feel like yours, not just another plot of green. Ready to give it a try?
📚 In This Guide
- What you need
- Instructions
- Tips and common mistakes
- Wrapping up and next steps
What you need
- ● Wooden tags: Pre-cut or blank wooden labels (1–2 inches wide, 4–6 inches long). Quantity: 1 per plant (or more for bulk projects).
- ● Paint or chalk paint: Acrylic or outdoor-safe paint (waterproof for longevity). Colors: Choose earthy tones (e.g., sage green, terracotta) or bold hues for visibility.
- ● Paintbrushes: Fine-tip brushes (sizes #2 or #4) for detailing + a wider brush (size #6–8) for backgrounds.
- ○ Stencils (optional): Letter or design stencils (or freehand if you’re artistic!).
- ● Sandpaper (120–220 grit): Lightly sand tags to remove splinters and prep for paint.
- ○ Sealer (optional but recommended): Outdoor varnish or polyurethane to protect labels from weather.
- ● Pencil or marker: For sketching designs before painting.
- ● Ruler or measuring tape: Ensures consistent label sizes.
- ● Pallet or tray: For mixing paint and organizing supplies.
- ○ Hot glue gun + glue sticks (optional): Attach labels to stakes or directly to pots.
- ○ Twine or ribbon (optional): For hanging labels from garden stakes.
- ○ Plant marker pens (optional): If you prefer no-paint labels (e.g., Sharpie on wood or stone).
Step-by-Step instructions for crafting customizable wooden garden labels
Here's the straightforward method I use to create durable, weather-resistant labels that last through multiple growing seasons.
Gather Your Materials and Tools
Start by collecting all the items from your list: 4 wooden plant stakes, 1 bottle of outdoor-rated paint pen, 1 bottle of clear sealant, 1 ruler, 1 pencil, and 1 sandpaper block. I always lay everything out on a clean workspace before beginning—it keeps the process organized and prevents losing small pieces like the paint pen cap.
Check each wooden stake for splinters or rough edges. Lightly sand any uneven spots with the 120-grit sandpaper until the surface feels smooth to the touch. This step ensures your labels won't scratch delicate plant leaves when inserted into the soil. Wipe away any dust with a damp cloth before painting.
Measure and Mark Plant Information
Use the ruler to measure and mark a 2-inch section at the top of each stake where you'll write the plant name. This keeps labels readable at soil level while preventing them from getting buried. I like to draw a faint pencil line as a guide—it helps keep handwriting neat and centered.
Write the plant name, variety, and any other notes (like planting date or care instructions) in block letters within the marked section. Keep text short—3-4 words max—so it remains legible even after sealant application. If you're labeling perennials, include the year planted to track growth patterns over time.
Paint and Seal for Weather Resistance
Use the outdoor-rated paint pen to carefully trace over your pencil markings. This type of pen resists fading and moisture better than regular markers. Let the paint dry completely—about 15-20 minutes—before moving to the next step. You'll know it's dry when the surface no longer feels tacky to the touch.
Apply two thin coats of the clear sealant, allowing 30 minutes of drying time between coats. This creates a protective barrier that prevents rain from smudging your labels. Hold the can 12 inches away and use light, even strokes to avoid pooling. Once fully cured—about 1 hour—your labels are ready for the garden.
Insert Labels at Planting Time
Push each labeled stake 1-2 inches deep into the soil next to your plants at planting time. Angle them slightly toward you so the text remains visible from your walking path. For container plants, tuck the stake into the soil near the edge of the pot where you'll see it daily.
I like to insert labels immediately after planting while the soil is still loose—it prevents disturbing roots later. If you're labeling an established garden, gently loosen the soil with a trowel before inserting the stake to avoid damaging plant roots. This simple placement ensures your labels stay visible throughout the growing season.
Tips & tricks for perfect garden labels
These small details make all the difference between labels that last and ones that fade or fall over. Let me share what I've learned after making hundreds of these over the years.
Surface Prep is Everything: In Step 1, when you're sanding the wooden stakes, don't rush this part. Focus on removing any splinters or rough spots completely—even tiny imperfections can catch on plant leaves or make the paint pen drag. I've found that using a damp cloth after sanding removes all the dust, which prevents the paint from sticking unevenly later. This ensures your labels go into the garden completely smooth and ready for writing.
Pencil Marking Precision: For Step 2, when marking your 2-inch section, I recommend using a light pencil line as a guide before writing. This helps keep your block letters consistent and centered. The key is to write within that marked area—if text extends beyond, it might get buried or become unreadable after sealing. For perennials, I add a small "P" in the corner of my labels to remind myself to include the planting year in the notes section.
Sealant Application Technique: In Step 3, when applying the two thin coats of clear sealant, work in the same direction for both coats. This creates a more uniform finish and prevents streaks. I hold the can about 12 inches away and use light, even strokes—this prevents pooling that could make your labels look messy. The 30-minute drying time between coats is crucial; I set a timer so I don't accidentally smudge the first coat while applying the second.
Placement Strategy: For Step 4, when inserting your labels, consider using a small garden trowel to create a shallow hole before pushing the stake in. This makes placement easier in established gardens without disturbing roots. I angle the labels slightly toward my walking path so I can read them without bending down. For container plants, I tuck the stake into the soil near the edge where I'll see it daily—this prevents it from getting buried when I water.
Pro Tips for Garden Labels Diy
- These small details make all the difference between labels that last and ones that fade or fall over.
- Surface Prep is Everything: In Step 1, when you're sanding the wooden stakes, don't rush this part.
- Pencil Marking Precision: For Step 2, when marking your 2-inch section, I recommend using a light pencil line as a guide before writing.
Frequently asked questions
Got questions about DIY garden labels?
You’re not alone! Here are some of the most common queries—and their simple solutions—to help you create the perfect custom wooden tags for your garden.
What’s the best wood for outdoor garden labels?
Opt for cedar or redwood—they’re naturally rot-resistant and durable in wet or sunny conditions. Avoid softwoods like pine, which can warp or degrade faster. If you’re on a budget, pressure-treated plywood (sanded smooth) works too! Just seal it with outdoor varnish for extra protection.
How long do homemade garden labels last outside?
With proper sealing (use waterproof varnish or mod podge outdoor), wooden labels can last 1–3 years before needing a refresh. Check for cracks or fading annually, and reapply sealant as needed. Pro tip: Store extras in a dry place to extend their lifespan!
Can I use chalkboard paint for reusable labels?
Chalkboard paint (like Rust-Oleum Chalked) lets you erase and rewrite plant names with a damp cloth. Just add a clear sealant on top to protect the surface. For a rustic look, pair it with a twine or jute tag for a charming touch.
What’s the easiest way to write on wooden labels?
Start with a pencil sketch of your design, then use:
- Acrylic paint (for vibrant colors—let dry 24 hours before sealing).
- Permanent markers (like Sharpie Oil-Based) for quick, smudge-proof writing.
- Stencils (for crisp, repeatable designs—great for beginners!).
For a waterproof finish, seal with polyurethane or Mod Podge Outdoor after painting.
How do I keep labels from blowing away in windy areas?
Secure them with stakes, nails, or heavy-duty push pins—drive them into the soil at a slight angle for stability. For loose soil, try:
- Tying labels to bamboo skewers or small rocks.
- Using adhesive hooks on the back to clip onto fences or trellises.
Bonus: Add a weighted base (like a small pebble glued underneath) to prevent tipping.
What can I reuse if I don’t want to buy new wood?
Get creative with upcycled materials:
- Old book pages (laminated for weatherproofing).
- Broken terracotta pots (glue flat pieces to stakes).
- Plastic lids (from yogurt containers—paint and attach to sticks).
- Recycled glass bottles (cut and sanded for a sleek look).
Just ensure whatever you choose is durable and sealed for outdoor use!
Wrapping up and next steps
Creating your own garden labels DIY is a rewarding way to personalize your space while keeping your plants organized and thriving! 🌱 With just a few simple materials and a little creativity, you can craft beautiful, durable wooden tags that reflect your unique style.
Whether you're a seasoned gardener or just starting out, this project is the perfect next step to elevate your garden’s charm.
Now that you’re inspired, grab your tools and get started—your plants (and neighbors!) will thank you. Happy crafting! 🛠️✨