
Tools
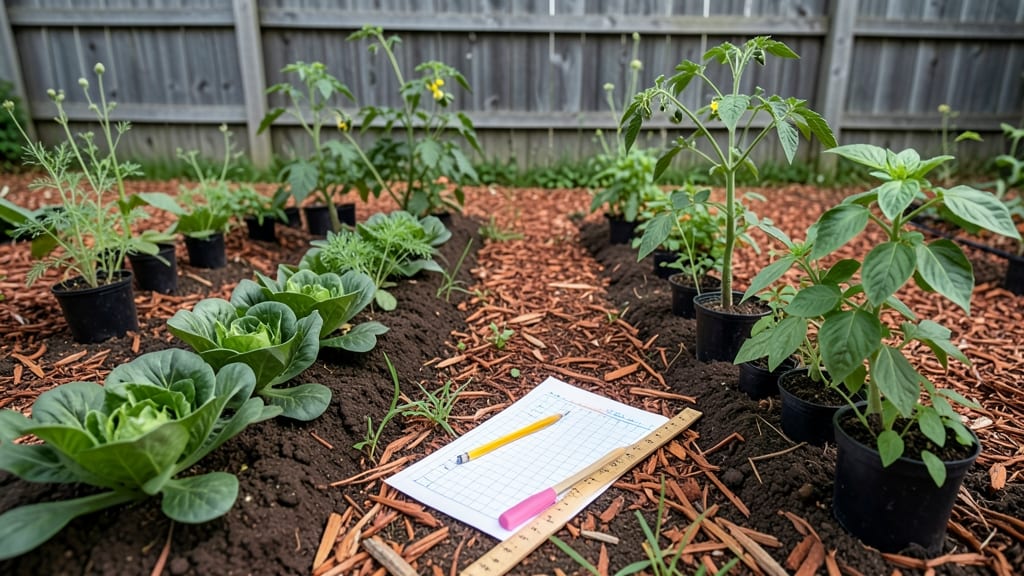
Creating a garden plan template that actually works saves you from the chaos of last-minute planting and crowded rows. I’ve designed mine over years of trial and error—sketching on graph paper, then digital tools, then back again.
The right template turns your backyard into a functional, beautiful space without the guesswork.
You don’t need fancy software to start. A simple grid sketch works for small spaces, while digital tools like Canva or even free printable PDFs handle larger plots. My go-to includes plant spacing guides, sunlight maps, and companion planting zones—all customizable for your yard’s size and sunlight patterns.
Within 30 minutes, you’ll have a layout that grows with you.
The payoff? No more wasted seeds, overcrowded plants, or midseason scrambling. You’ll see lush rows of vegetables, vibrant flower beds, and a layout that fits your space perfectly. Plus, you can tweak it yearly for new crops or seasonal changes. Let’s get your garden mapped out the right way.
Whether you’re working with a tiny balcony or a half-acre plot, these templates adapt easily. The key is balancing aesthetics with practicality—so your garden looks stunning and produces like a dream. Ready to sketch your first plan?
📚 In This Guide
- What you need
- Instructions
- Tips and common mistakes
- Wrapping up and next steps
What you need
- ● Graph paper or grid paper – 1-2 sheets (for sketching layouts; 8.5" x 11" or larger for bigger gardens).
- ● Ruler or measuring tape – 12" or 25-foot tape for accuracy.
- ● Pencils & erasers – 2-3 pencils (HB for sketching, softer for shading) + 1 eraser.
- ● Colored markers or pencils – 5-10 colors (for labeling plants, paths, and zones).
- ● Printed garden plan template – 1-2 copies (downloadable or hand-drawn).
- ● Stapler & sticky notes – For organizing notes or adjusting sections.
- ● Wheelbarrow or bucket – 1 (for transporting soil, mulch, or tools).
- ● Shovel & spade – 1 each (for digging and edging).
- ● Garden hose with spray nozzle – 25-50 ft (for watering and cleaning).
- ● String or twine – 50 ft (for marking layouts or measuring distances).
- ● Stakes or flags – 10-20 (wooden or plastic; 12"–18" long).
- ○ Laser level or bubble level – 1 (optional but helpful for flat surfaces).
- ● GPS or app tools – Like Gardenate or Planter for digital planning.
- ● Knee pads or kneeling pad – For comfort during long sessions.
- ● Plant labels & tags – 20-50 (wooden, metal, or reusable).
- ● Compost or mulch – 1-2 bags (for soil enrichment).
- ● Notebook & pen – For jotting down plant names, sunlight needs, or progress notes.
Instructions: designing your custom garden layout
Here's how to create a functional, beautiful garden plan that fits your space perfectly.
Measure Your Available Space
Start by measuring your garden area in feet, noting both length and width. I sketch this on graph paper where each square represents 1 square foot—this visual helps me see proportions immediately. Walk the perimeter with a tape measure, jotting down obstacles like sidewalks, trees, or utility lines that will affect plant placement. For example, a 10-foot by 12-foot rectangular plot gives you 120 square feet of planting space.
If your space is irregular, divide it into geometric sections you can measure separately. This makes it easier to calculate how many plants will fit. I always add 1 foot of buffer space around edges for pathways or borders. This prevents plants from feeling cramped against hard surfaces.
Choose Your Garden Style and Plant Groups
Decide whether you want a formal, cottage, or wildlife-friendly garden—each has different spacing needs. I typically group plants by their light, water, and height requirements to create zones. For instance, tall sun-loving perennials like black-eyed Susans go in the back, while shade-tolerant ground covers like creeping thyme fill the front. Write these groups on your sketch with colored pencils for clarity.
Consider 4 main plant layers: tall plants (like roses or hollyhocks), mid-height shrubs (such as lavender or boxwood), mid-level perennials (like coneflowers), and low-growing ground covers (such as ajuga or clover). This creates depth and visual interest. I always leave 18-24 inches between tall plants and 12 inches between mid-level ones to prevent competition.
Sketch Your Layout on Paper
Using your measurements, draw a scaled diagram where each plant gets its own spot. I like to start with anchor plants—those with bold foliage or flowers—that set the theme. For example, a hydrangea bush in one corner can anchor a cottage-style garden. Label each plant with its mature width (not just the pot size) to avoid overcrowding later.
Leave walkways at least 2 feet wide between plantings for easy access. If space is tight, use stepping stones or mulch paths to save room. I always include a legend on my sketch with plant names, sunlight needs, and spacing requirements. This keeps me from mixing up similar-looking varieties.
Adjust for Sunlight and Seasonal Interest
Trace the path of the sun across your garden at different times of day. Most gardens get morning sun on the east side and afternoon sun on the west. I mark these areas on my plan to ensure sun-loving plants (like daylilies or marigolds) get 6+ hours of direct light, while shade-tolerant plants (such as hostas or ferns) go in dappled or full shade. Adjust your layout if shadows shift in summer versus winter.
Plan for year-round interest by mixing spring bloomers (like tulips), summer perennials (such as coneflowers), and fall foliage (like Japanese maples). I add evergreen shrubs (like boxwood or junipers) to provide winter structure. This ensures your garden stays lively no matter the season.
Finalize with a Shopping List and Timeline
Once your sketch is complete, list all plants by quantity and size (e.g., 3 hydrangea bushes, 5-foot tall). I cross-reference this with your local nursery’s availability to avoid last-minute scrambling. Note whether you’re starting from seeds, seedlings, or mature plants—this affects your planting timeline. For example, perennials can go in early spring, while tender annuals wait until after the last frost.
Schedule planting dates based on your climate zone. I add reminders for mulching, fertilizing, and pruning to my garden calendar. This keeps everything on track without overwhelming you. Before breaking ground, I review my plan one last time to ensure every plant has the right conditions to thrive.
Tips & tricks for perfect garden layout planning
A well-designed garden starts with smart planning—here are the practical tips I wish I knew when I first sketched my own garden layouts.
Visual Scaling is Everything: When you're sketching your garden on graph paper, make sure each square represents exactly 1 square foot as mentioned in Step 1. This helps you visualize proportions accurately. I learned the hard way that eyeballing measurements leads to overcrowding—especially when working with plants that will mature to 3-5 feet wide. Use colored pencils to mark different plant groups as suggested in Step 2, but also add a scale reference in one corner of your sketch so you can verify measurements at a glance.
Layering Creates Depth: The four-layer approach from Step 2—tall plants, mid-height shrubs, mid-level perennials, and ground covers—is where magic happens. I recommend starting with your tallest plants first, then working downward. This prevents you from realizing too late that your beautiful hydrangea bush is blocking sunlight from your coneflowers. Leave those 18-24 inches between tall plants as specified—it's tempting to squeeze things closer, but plants need room to breathe and grow to their full potential.
Sunlight Mapping Prevents Disasters: Don't just trace the sun's path once—do it at different times of day, especially if your garden has tall structures that cast shifting shadows. I mark my plan with arrows showing morning sun on the east and afternoon sun on the west, just like in Step 4. This helps me place sun-loving daylilies where they'll get their required 6+ hours of direct light. Pro tip: Use a small mirror to check how shadows move across your space at different times of year—summer shadows are longer than winter shadows, and this affects your planting decisions.
Digital Tools Can Save Time: While paper sketches work perfectly, I've found that digital tools like garden planning apps or even simple spreadsheet programs can help visualize layouts more efficiently. You can easily adjust plant positions and see how changes affect your design. If you prefer traditional methods, try using a clear ruler to trace your measurements onto tracing paper—this lets you experiment with different arrangements without erasing your original sketch.
Pro Tips for Garden Plan Template
- A well-designed garden starts with smart planning—here are the practical tips I wish I knew when I first sketched my own garden layouts.
- Visual Scaling is Everything: When you're sketching your garden on graph paper, make sure each square represents exactly 1 square foot as mentioned in Step 1.
- Layering Creates Depth: The four-layer approach from Step 2—tall plants, mid-height shrubs, mid-level perennials, and ground covers—is where magic happens.
Frequently asked questions
Got questions about creating the perfect garden plan template? You’re not alone! Here are answers to the most common queries to help you get started with confidence.
What’s the best garden plan template for beginners?
Start with a simple grid or square-foot layout—they’re easy to visualize and scale. Templates with clear zones (vegetables, herbs, flowers) and basic spacing guides work best. Look for free printable options online or use apps like Gardenate or Planter for interactive planning.
When is the best time to create a garden plan?
Plan your garden 6–8 weeks before planting season (spring or fall, depending on your climate). For perennials or long-term designs, sketch ideas year-round. Pro tip: Use a seasonal checklist to track planting times and avoid overwhelm!
How do I adjust a template for a small space?
Opt for vertical gardening, container layouts, or square-foot gardening (1 square foot per plant). Use compact varieties (e.g., bush beans, dwarf tomatoes) and multi-level planters. Templates often include miniaturized versions—just resize the grid!
What if my soil or sunlight doesn’t match the template?
No worries! Most templates are customizable. Swap plants based on your USDA hardiness zone or sunlight (e.g., shade-tolerant greens like kale). Add notes to your plan for amendments (compost, mulch) or shade solutions (trellises, reflective surfaces).
Can I reuse a garden plan template from last year?
Yes, but update it! Rotate crops to prevent disease, note what thrived (or flopped), and adjust spacing. Use a fresh template as a base and layer in last year’s successes. Pro tip: Keep a plant journal to track changes!
| Quick Fix | Problem |
|---|---|
| Use raised beds or containers | Poor soil quality |
| Move plants or add shade cloth | Too much direct sun |
| Choose drought-resistant plants | Limited water access |
Wrapping up and next steps
Creating your dream garden starts with a solid garden plan template—whether you have a sprawling backyard or a cozy balcony! 🌱 The key is to visualize your space, choose the right plants, and design with both aesthetics and functionality in mind.
With the right tools and a little creativity, you’ll transform even the smallest plot into a thriving oasis.
Ready to dive in? Grab your sketchbook or digital tool and start sketching your layout today—your future garden is waiting! 🌿