Landscaping
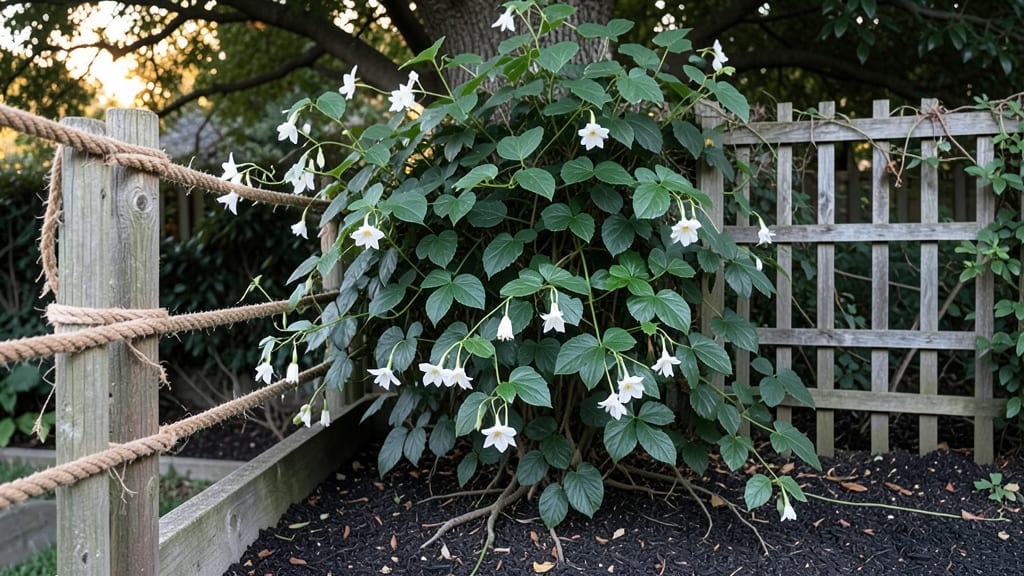
A garden rope fence transforms any yard into a cozy, organized retreat without the fuss of permanent fencing. 🌿 I installed mine last spring, and it instantly gave my small patio a sense of enclosure and style—no heavy materials or digging required.
The modular panels clip together like building blocks, letting you adjust the height, length, and even the look by swapping out different rope textures or colors.
The best part? It’s lightweight, weather-resistant, and easy to store when you need to move it. I used it to create a private dining nook, screen out an unsightly alley view, and even divide my vegetable garden into neat sections.
For durability, I chose a UV-stabilized rope on a sturdy metal frame, which held up through last summer’s heat and a few windy days.
You’ll love how it softens hard edges while adding structure—think lush greenery framed by clean lines. The rope lets light filter through, so it doesn’t feel like a solid wall, and you can mix in climbing plants for extra charm.
Plus, it’s a breeze to customize: add solar lights, hang baskets, or even paint the frames to match your garden’s vibe.
Perfect for renters, small spaces, or anyone who wants flexibility. Whether you’re defining a seating area, creating a play zone for kids, or just adding a touch of privacy, this fence does the job without permanent commitment. Let’s get your space organized—and stylish—in no time.
📚 In This Guide
- What you need
- Instructions
- Tips and common mistakes
- Wrapping up and next steps
What you need
- ● Rope fence panels: Pre-made modular panels (e.g., 4' x 8' or custom sizes) – quantity depends on your fence length and height.
- ● Stakes or posts: Galvanized metal or wooden posts (4"–6" diameter, 3'–4' long) – 1 post per 4–6 feet of fence.
- ● Heavy-duty zip ties or rope: For securing panels to stakes (waterproof if outdoor use).
- ○ Ground anchors (optional but recommended): Metal spikes or sandbags for stability in windy areas.
- ● Measuring tape, level, and chalk line: For precise layout and alignment.
- ● Post hole digger or auger: For setting stakes (manual or powered).
- ● Mallet or hammer: To drive stakes into the ground.
- ● Scissors or utility knife: For trimming rope if customizing.
- ● Gloves and knee pads: Comfort and protection for hands and knees!
- ○ Decorative accents (optional): Solar lights, plants, or lattice for a polished look.
Step-by-Step instructions for building a garden rope fence
Here's how to create a flexible, modular privacy screen that adapts to any garden shape or size.
🪴 Step 1: Measure and Mark Your Garden Perimeter
Start by measuring the length of your garden area where you want the rope fence. Use a tape measure to mark the perimeter with wooden stakes and string—this creates a clean guide for your first row. I like to place stakes every 6 feet to keep the line straight, especially if your garden has curves.
For a modular design, you can work in 4-foot sections at a time. This makes adjustments easier if you realize you need to curve around a tree or adjust for uneven ground. Press the stakes firmly but not too deep—you'll want them stable enough to hold the string but removable if you need to modify the layout later.
🌱 Step 2: Attach the First Row of Rope
Take your 1/4-inch thick garden rope and tie it securely to the first stake using a simple square knot. Pull the rope taut but not overly tight—you want some give to accommodate slight ground variations. As you move along the marked line, secure the rope to each stake with another square knot, keeping the tension consistent.
Here's the thing—don't worry if the rope isn't perfectly straight at first. You can adjust it as you go. For corners or curves, wrap the rope around the stakes to create smooth transitions. If you're working with a helper, one person can hold the rope taut while the other secures the knots—this keeps everything aligned effortlessly.
💧 Step 3: Add the Second and Third Rows for Structure
Once the first row is complete, measure 12-18 inches inward from the first row and mark a second line with more stakes. This second row will create depth and add privacy. Tie the rope to the stakes in the same way, but this time, leave it slightly loose—you'll be weaving it between the first and third rows.
For the third row, mark a line 12-18 inches beyond the second row. This creates a layered effect that blocks more light and adds visual interest. Weave the second row's rope between the first and third rows, securing it with additional knots every 2 feet to keep everything stable. Think of it like a lattice—each row supports the others.
☀️ Step 4: Secure the Rope to Anchors or Posts
If your garden has strong winds, drive 4-foot wooden posts into the ground every 8 feet along the perimeter. These act as anchors for the rope, preventing it from sagging or blowing out of shape. Tie the rope securely to the posts using a bowline knot—it's easy to tie and won't slip, even when wet.
For smaller gardens or areas with less wind exposure, you can skip the posts and rely on the stakes alone. Just make sure the rope is tight enough to stand upright but flexible enough to sway gently in the breeze. If you notice any sagging after a few days, simply retie the knots to pull the rope taut again.
✂️ Step 5: Trim and Finish for a Polished Look
Once all the rows are in place, trim any excess rope at the ends with sharp scissors or a utility knife. Leave about 6 inches of extra rope at the corners or ends so you can tie them off neatly. For a cleaner finish, you can tuck the excess rope under the last knot or trim it flush with the stake.
Here's where it gets fun—you can add decorative elements like flowers, greenery, or even small solar lights to the rope for extra charm. Just tie them loosely to the rope so they can sway in the wind. This not only enhances the privacy screen but also makes your garden feel more inviting and personalized.
Tips & tricks for perfect garden rope fence design
Between us, these little details make all the difference when building a rope fence that lasts—and looks intentional. Here's what nobody tells you about creating a sturdy, beautiful privacy screen.
Stake Placement Matters: In Step 1, when you're placing stakes every 6 feet, consider your garden's specific challenges. For rocky soil, use longer stakes (8-10 inches) to get proper purchase. If you're working near a slope, angle the stakes slightly into the uphill side to prevent them from popping out. I learned this the hard way after watching stakes lean dramatically in my first attempt on uneven ground.
The Knot Technique: For Step 2 and beyond, master the square knot for your first row—it's simple but strong. For the weaving in Step 3, try a basic overhand knot every 2 feet to secure the layers. Pro tip: Wet your fingers slightly before tying knots—they'll slide more easily through the rope fibers. This makes a huge difference when you're working with multiple rows and need to keep everything neat.
Wind Resistance Strategy: If your garden gets breezy, don't skip the 4-foot posts in Step 4. I've seen rope fences that looked perfect after installation but turned into a tangled mess after one strong wind. For extra stability, add posts at corners and any point where the fence changes direction. You can even use metal rebar instead of wood if you're in a high-wind area—just hammer it deeper into the ground.
Decorative Additions: In Step 5, when you're ready to personalize, consider adding elements that complement your garden's existing aesthetic. For a cottage garden look, tie in fresh flowers or trailing vines. For a modern vibe, try small solar lights or even miniature birdhouses. Just remember to tie them loosely—you want them to move with the wind, not become permanent fixtures that weigh down your fence.
Pro Tips for Garden Rope Fence
- Between us, these little details make all the difference when building a rope fence that lasts—and looks intentional.
- Stake Placement Matters: In Step 1, when you're placing stakes every 6 feet, consider your garden's specific challenges.
- The Knot Technique: For Step 2 and beyond, master the square knot for your first row—it's simple but strong.
Frequently asked questions
Got questions about garden rope fences?
Here are answers to the most common ones to help you make the best choice for your space!
1. How long does a garden rope fence typically last?
A well-maintained garden rope fence can last 5–10 years, depending on material quality and weather exposure. Polypropylene ropes (common for modular fences) resist UV rays and moisture but may degrade faster in extreme sun or harsh climates. Opt for UV-stabilized ropes or replace sections as needed to extend its life.
2. Can I install a rope fence myself, or do I need a professional?
Most garden rope fences are DIY-friendly! They’re lightweight and modular, designed for easy assembly with basic tools (like a drill, tape measure, and staples). However, if your space has uneven terrain or requires anchoring to concrete, hiring a pro ensures stability. Pro tip: Watch a few YouTube tutorials first for step-by-step guidance!
3. Are there affordable alternatives to rope fences?
Yes! If rope isn’t your style, consider:
- Bamboo screens – Budget-friendly and natural (but may need waterproofing).
- Wooden lattice panels – Sturdy and customizable, though heavier.
- Vinyl or fabric privacy screens – Low-maintenance but less eco-friendly.
- Living hedges – Long-term but slower to grow (e.g., boxwood or privet).
4. How do I keep my rope fence from blowing in the wind?
Wind can be a nuisance, but these fixes help:
- Secure the top and bottom of panels with heavy-duty staples or screws into a sturdy frame (e.g., PVC pipes or wooden posts).
- Use rope tensioners or bungee cords to tighten sections.
- Add weighted bases (like sandbags) or bury the bottom frame slightly.
- For high winds, opt for thicker ropes or double-layered panels.
5. Will a rope fence keep pets or small animals out?
Standard rope fences aren’t pet-proof—small animals (like rabbits or squirrels) can squeeze through gaps. For pets:
- Use tighter rope spacing (1–2 inches max).
- Add a lower barrier (e.g., chicken wire) if digging is a concern.
- For cats/dogs, consider a solid base (like wood or metal) to prevent burrowing.
Wrapping up and next steps
A garden rope fence offers a flexible, budget-friendly, and stylish way to create privacy without sacrificing your outdoor space. Whether you’re enclosing a cozy seating area, defining garden zones, or adding a touch of charm to your yard, modular rope screens are easy to customize and install. 🌿
Ready to transform your outdoor space? Start small—pick a section of your garden, gather your materials, and begin with a single panel. Before you know it, you’ll have a functional, eye-catching privacy solution that grows with your vision! Happy fencing!