Tools
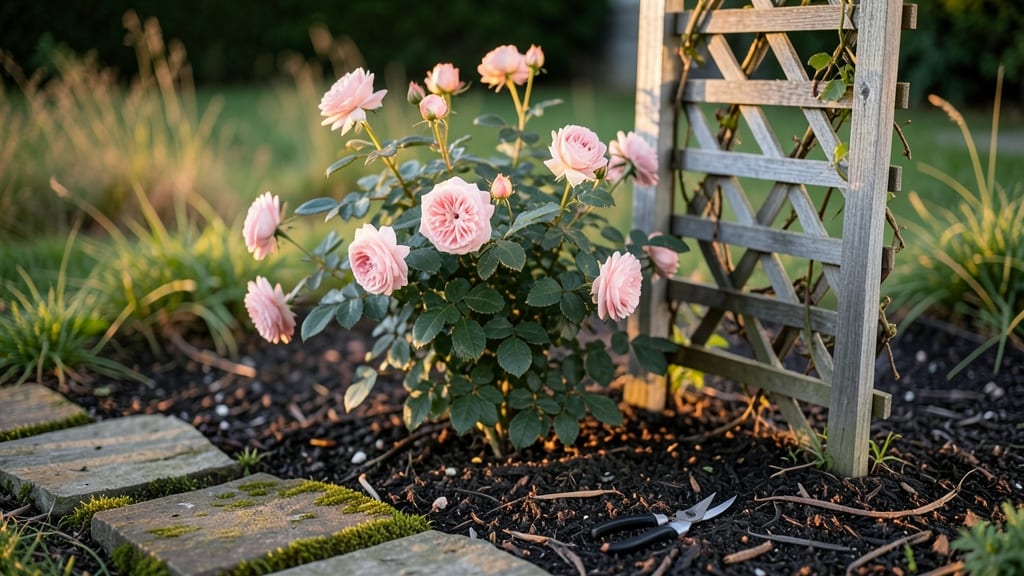
Crafting cottage garden pathways that feel like stepping into a storybook starts with materials that whisper charm—think uneven flagstone, crushed limestone, or even a winding row of stepping stones. 🌿 I learned the hard way that straight paths scream "modern," while gentle curves invite lingering.
My favorite? A mix of gravel for easy maintenance and mossy stones that blend into the landscape like hidden treasures.
The magic happens when you pair pathways with plants that spill over edges—lavender along the borders, creeping thyme between stones, or climbing roses that arch overhead. These combinations turn walking into an experience, where every step reveals something new.
The best part? Most materials cost less than you’d expect, and the DIY process is simpler than framing a picture.
Imagine strolling through a garden where the path isn’t just a route but a character in the scene—soft underfoot, framed by fragrant blooms, and leading you to hidden corners.
You’ll design pathways that feel intentional yet effortless, blending rustic texture with lush greenery. Ready to turn your garden’s bones into something enchanting?
Works for any yard size, from cozy suburban plots to sprawling countryside gardens. The key is balancing structure with spontaneity—just like the plants themselves. Let’s make your garden feel like a place you never want to leave.
📚 In This Guide
- What you need
- Instructions
- Tips and common mistakes
- Wrapping up and next steps
What you need
- ● Pathway Base: Crushed gravel or decomposed granite (4–6 inches deep, ~1 cubic yard per 10 sq ft)
- ● Landscape fabric (to suppress weeds, 1 roll covers ~400 sq ft)
- ● Sand (for leveling, 1–2 bags per 10 sq ft)
- ● Pathway Surfaces (Pick Your Style!): Stepping stones (natural flagstone, slate, or concrete; ~1 stone per 2 sq ft)
- ● Wooden planks (2x6 or 2x8, varies by path width)
- ● Brick or cobblestones (herringbone or staggered pattern)
- ● Mulch or bark chips (2–3 inches deep)
- ● Edging & Decor: Metal or plastic edging strips (1 roll ~50 ft)
- ● Garden stakes or low fencing (for soft borders)
- ● Moss, wildflowers, or low-growing perennials (e.g., creeping thyme)
- ● Wheelbarrow or shovel (for hauling materials)
- ● Level (to ensure even pathways)
- ● Rubber mallet (for setting stones)
- ● String line & stakes (for marking paths)
- ● Pruners & gloves (for planting edging plants)
- ○ Optional: Plate compactor (for ultra-firm gravel paths)
- ● Clear the area of weeds/grass (or use landscape fabric)
- ● Check soil drainage (amend with compost if needed)
- ● Sketch a rough path layout (even a doodle helps!)
Step-by-step guide to designing whimsical cottage garden pathways
Transform your garden into an enchanting retreat with pathways that invite exploration and charm.
🪴 Step 1: Choose Path Materials and Layout
Cottage garden pathways thrive on organic shapes and varied textures. I favor stepping stones for defined paths and gravel or crushed stone for meandering routes, as they blend seamlessly with the garden's rustic aesthetic. Sketch your layout on paper first—cottage paths should feel natural, not rigid, so avoid straight lines unless they follow existing structures like fences or sheds.
For a 4-foot-wide path (ideal for two people to walk side by side), arrange stepping stones 12-18 inches apart to create a comfortable stride. If using gravel, opt for 1-2 inches of depth to allow for drainage while keeping it manageable for weeding. Mark the path with stakes and string before digging—this ensures your design stays true once you start laying materials.
🌿 Step 2: Prepare the Base for Durability
Before adding any decorative elements, prepare the base to prevent sinking or shifting over time. Remove existing vegetation, then dig down 4-6 inches along the path’s outline. For stepping stones, create a compacted 2-inch layer of coarse sand as a leveling bed—this prevents stones from settling unevenly. For gravel paths, use a 3-inch layer of crushed gravel as a foundation, then add a landscape fabric to suppress weeds without smothering the soil beneath.
I like to tamp the base lightly with a plank or tamper to eliminate air pockets, but don’t overdo it—you want the soil to stay slightly loose for drainage. If your garden has heavy clay soil, mix in 1 part perlite to 3 parts soil in the base layer to improve aeration. This step is critical: a poorly prepared base will cause your path to shift or become muddy after rain.
☀️ Step 3: Install Stepping Stones or Gravel
Place stepping stones directly onto the sand base, spacing them evenly. For a cottage-style look, mix flat stones with irregular shapes—no need for uniformity here. If using gravel, spread it evenly over the fabric, then rake it into place with a sloped edge to keep it contained. Leave 2-3 inches of gravel at the path’s edges to create a natural border and prevent erosion into the garden beds.
For extra whimsy, embed small decorative elements like broken pottery shards, mosaic tiles, or even old teacups along the path. These add character without overwhelming the design. Water the base lightly before adding gravel to help it settle, and avoid walking on it until everything is set—this prevents uneven compaction. If using stepping stones, arrange them in a slightly staggered pattern to mimic a natural, hand-laid feel.
✂️ Step 4: Edge and Soft-Scape the Path
Define the path’s edges with low-growing perennials or ornamental grasses like creeping thyme, ajuga, or carex sedges. These plants soften the transition between hard and soft landscaping while suppressing weeds. Plant them 6-12 inches from the path’s edge, allowing room for occasional foot traffic without damaging the plants.
For a more structured look, use brick or stone edging buried 2-3 inches deep to create a clean border. If you prefer a softer edge, mound soil and plant evergreen shrubs or boxwood along the sides. Mulch the path’s edges with 3-4 inches of shredded bark or straw to keep weeds at bay and enhance the cottage garden’s cozy, lived-in charm. Avoid using dyed mulch—it fades and looks unnatural in a rustic setting.
🌱 Step 5: Add Finishing Touches for Whimsy
This is where cottage gardens truly shine. Scatter wildflower seeds along the path’s edges for spontaneous blooms, or tuck in low-growing annuals like sweet alyssum or violas for instant color. Hang wind chimes or solar lights along the route to encourage evening strolls, and consider adding small benches or birdbaths at key points to create focal areas.
I like to incorporate unexpected textures—like a patch of moss between stones or a mosaic stepping stone—because these details make the path feel like a journey, not just a functional space. Test each element’s placement by walking the path: if a plant or object feels out of place when viewed from different angles, adjust it until it flows naturally. The goal is to make every step feel like a discovery.
Tips & tricks for perfect cottage garden pathways
These thoughtful touches will transform your pathway from functional to enchanting, creating a magical experience that invites visitors to linger and explore.
Material Selection Matters: When choosing stepping stones, prioritize uneven shapes and varying textures—this organic irregularity is key to that authentic cottage garden charm. For gravel paths, opt for a mix of stone sizes (¼-inch to ½-inch) to create visual interest while maintaining traction. I've found that locally sourced materials often have the most character, and their natural variations tell a story about your garden's unique history.
Base Preparation is Non-Negotiable: The 4-6 inch deep excavation in Step 2 might seem excessive, but trust me—this depth prevents future shifting and ensures your path remains stable for years. For clay-heavy soils, that perlite-to-soil ratio (1:3) is critical; without it, your path could become a muddy mess after heavy rains. I learned this the hard way after my first attempt sank dramatically during spring thaw.
Whimsical Elements Elevate the Design: The decorative touches in Step 3 are where personality shines. I recommend embedding elements like mosaic tiles or pottery shards in a staggered pattern along the path's center rather than edges—this creates visual interest without interfering with foot traffic. For extra magic, place a few "hidden surprises" like small birdhouses or miniature garden ornaments that visitors might discover while walking.
Edge Planting Creates Natural Boundaries: The 6-12 inch spacing for edge plants in Step 4 is perfect—close enough to define the path but far enough to allow occasional foot traffic without damage. Creeping thyme is my go-to because it's drought-tolerant and spreads beautifully, but ajuga's purple foliage adds stunning contrast. For a softer look, interplant with white clover to create a lush, meadow-like transition between path and garden.
Pro Tips for Cottage Garden Pathways
- These thoughtful touches will transform your pathway from functional to enchanting, creating a magical experience that invites visitors to linger and explore.
- Material Selection Matters: When choosing stepping stones, prioritize uneven shapes and varying textures—this organic irregularity is key to that authentic cottage garden charm.
- Base Preparation is Non-Negotiable: The 4-6 inch deep excavation in Step 2 might seem excessive, but trust me—this depth prevents future shifting and ensures your path remains stable for years.
Frequently asked questions
Got questions about crafting charming cottage garden pathways? You’re not alone! Here are answers to the most common queries to help you create pathways that feel magical yet practical.
What’s the best material for a low-maintenance pathway?
For effortless charm, opt for crushed gravel, stepping stones, or decomposed granite. These require minimal upkeep while adding rustic texture. If you prefer softer options, wood chips or mulch blend beautifully with cottage aesthetics but may need occasional refreshes. Avoid materials like loose bark—it can scatter and create mess.
When is the ideal time to install a pathway?
The best time is early spring or fall, when soil is workable but not frozen. Spring lets you prep before planting season, while fall avoids summer heat and pests. If you’re using materials like gravel or pavers, dry weather is key—wet conditions can delay curing and settling.
Can I add pathways to an existing garden without major digging?
Use surface-level solutions like flagstone slabs (laid on landscape fabric), gravel with edging, or pre-made pathway kits. For slopes, consider staircase-style stones or cobblestone paths secured with adhesive. Always check for underground utilities before digging, even shallowly!
How do I keep weeds from taking over my pathway?
Prevent weeds with landscape fabric under loose materials (like gravel) or by using dense mulch. For hard surfaces (stone, brick), regular sweeping removes seeds before they sprout. Vinegar spray (10% acetic acid) is a natural herbicide for stubborn weeds—just avoid nearby plants!
How can I make my pathway feel more “cottage-core”?
Layer in whimsical touches: wind chimes along the edges, wildflower borders, or hand-painted stepping stones. Add soft lighting with solar-powered lanterns or twinkle string lights for evening magic. Mix materials—like weathered wood with smooth river rocks—for a lived-in, storybook vibe.
Wrapping up and next steps
Creating a charming cottage garden pathway is all about embracing nature’s whimsy while crafting a functional, inviting space. Whether you’re weaving through wildflowers, stepping over rustic stones, or winding along a gravel trail, these pathways don’t just guide—they delight.
The key? Start small, let your creativity flow, and remember: imperfection is part of the magic! 🌿✨
Now that you’re inspired, why not sketch your dream layout or gather materials for a weekend project? Every step you take—literally—brings your garden closer to becoming a storybook retreat. Happy gardening!