Tools
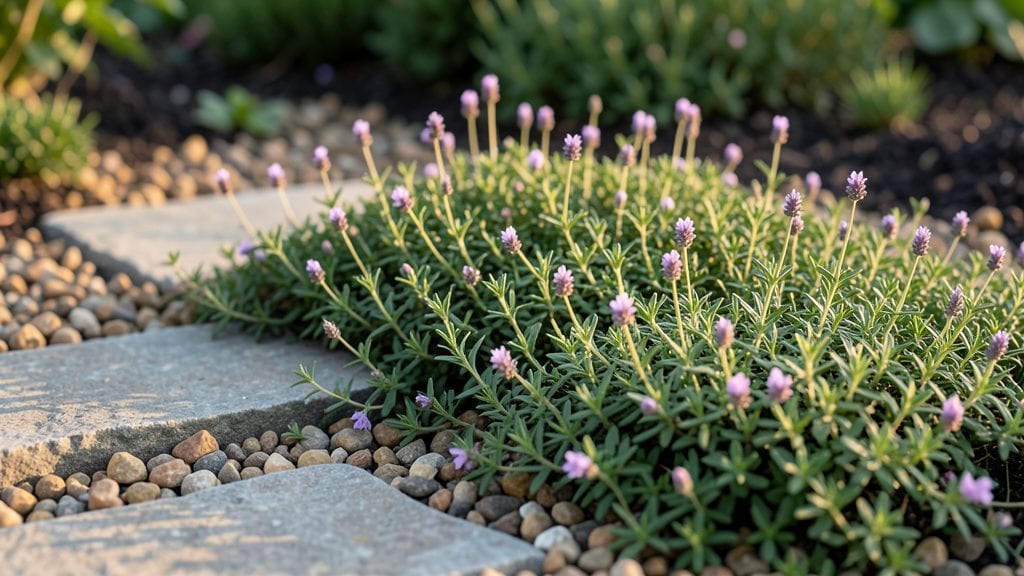
Your garden walkway materials should balance beauty, durability, and how they stand up to rain, foot traffic, and shifting seasons. I’ve tested everything from rustic wood planks to sleek concrete pavers, and the right choice depends on your garden’s personality—whether you want a natural, organic look or clean, structured lines.
The key is matching the material to your climate and how much maintenance you’re willing to handle.
Gravel offers a low-cost, permeable solution that drains well but requires occasional raking, while bricks and pavers provide long-term stability with minimal upkeep. Wood adds warmth but needs sealing every few years, and natural stones bring a timeless, earthy feel—though they can be pricey upfront.
For a budget-friendly option, mulch or decomposed granite works surprisingly well in informal spaces.
What you’ll end up with is a pathway that doesn’t just get you from point A to B but enhances your garden’s flow and style. A well-chosen walkway frames your plants, guides visitors, and even boosts curb appeal—think of it as the garden’s backbone.
The best part? Once installed, it’ll last for years with minimal fuss, freeing you up to focus on the plants themselves.
Whether you’re working with a small urban yard or a sprawling countryside garden, these materials adapt to any scale. The trick is starting with your garden’s existing elements—soil, plants, and overall vibe—and building the walkway to complement them. Ready to pick the perfect fit for your space?
📚 In This Guide
- What you need
- Instructions
- Tips and common mistakes
- Wrapping up and next steps
What you need
- ● Base Material: Crushed gravel (3–4 inches deep, 10 sq. ft. per bag)
- ● Compactable sand (1 inch deep, 40 lb. bags)
- ● Walkway Surface Options: Pavers (e.g., concrete, brick, or stone; ~10 sq. ft. per 50-count box)
- ● Flagstone slabs (1–2 sq. ft. per slab, varies by size)
- ● Gravel (20–30 lb. bags, depending on coverage)
- ● Timber planks (e.g., cedar or redwood; 4x6 ft. sections)
- ● Concrete mix (60 lb. bags, ~0.6 cu. ft. per bag)
- ● Edging & Stabilization: Plastic or metal edging strips (10–20 ft. rolls)
- ● Landscape fabric (10 ft. x 50 ft. rolls)
- ● Shovel & spade
- ● Wheelbarrow (2–3 cu. ft. capacity)
- ● Rubber mallet
- ● Plate compactor or hand tamper
- ● Level (4 ft. or laser)
- ● String line & stakes (for marking layout)
- ● Safety gear (gloves, goggles, knee pads)
- ○ Optional: Vibratory plate compactor (for large projects)
- ● Check local codes: Some areas require permits for concrete or permanent structures.
- ● Measure twice: Calculate walkway length/width and account for 10% extra material for cuts/waste.
- ● Slope considerations: Ensure a 1–2% grade for drainage (¼ inch per foot).
- ● Weather prep: Work on dry days to avoid mud or uneven settling.
Step-by-step guide to building a durable garden walkway
Here's how to create a sturdy, attractive pathway that handles foot traffic and weather for years.
Measure and Mark Your Walkway Layout
Start by measuring the length and width of your desired pathway using a tape measure. A standard walkway is typically 2-3 feet wide for comfortable walking, but adjust based on your garden layout. Mark the outline with spray paint or stakes—this keeps you on track as you dig.
Use a garden hose or string line to create straight edges, especially for curves. Double-check measurements diagonally to ensure your pathway is square or properly shaped. I like to walk along the marked line to visualize how it will feel underfoot before digging.
Dig the Base to the Correct Depth
Dig down 4-6 inches along the marked path using a shovel or edging tool. The depth depends on your chosen material—gravel needs less depth, while pavers require a deeper, compacted base. Remove any rocks, roots, or debris to create a clean, level foundation.
For uneven ground, use a level tool to check depth consistency. If you hit hardpan or clay, loosen it further with a pickaxe or rent a soil aerator for better drainage. This step is critical—skipping it leads to sinking or uneven walkways over time.
Add and Compact the Base Layer
Spread a 2-3 inch layer of crushed gravel or sand over the dug-out area. This layer ensures proper drainage and prevents erosion. Use a tamping tool or plate compactor to press it down firmly—you want it as solid as possible before adding the final material.
For extra stability, add a geotextile fabric over the base layer if you're in a high-traffic area or clay soil. This keeps weeds out and prevents the base from mixing with surrounding soil. Moisten the gravel slightly before compacting for even better results.
Install Your Chosen Walkway Material
For gravel paths, spread a 3-4 inch layer evenly, then use a rake to create a smooth surface. For pavers or stepping stones, lay them directly on the compacted base or in sand for a more polished look. Press each piece firmly into place—this prevents shifting over time.
If using mulch or decomposed granite, spread it evenly and tamp lightly. For wood chips, apply a 4-6 inch layer and refresh annually. Avoid over-tamping—you want the material to stay loose enough for drainage but compacted enough to support weight.
Finish and Maintain for Long-Term Durability
Add edging materials like metal strips or bricks to keep the pathway contained and prevent soil from creeping in. For gravel paths, consider a border of pavers or stones to define the edges neatly. Water the base lightly after installation to help settle everything.
Check your walkway after heavy rain or seasonal changes—top off gravel or mulch as needed. For pavers, occasionally inspect joints for weeds or shifting and refresh the sand. With proper care, your pathway will stay sturdy and attractive for years.
Tips & tricks for perfect garden walkway materials
A few simple strategies will help you avoid common mistakes and create a walkway that lasts for years. The key is in the details—from precise measurements to proper material selection.
The Width Factor: While the instructions suggest a standard 2-3 feet width, consider your specific needs. For garden pathways between raised beds, 2 feet often works perfectly, while wider paths (up to 4 feet) accommodate wheelbarrows or garden carts. Always measure the space between plants or features to ensure comfortable passage without trampling your garden.
Material-Specific Depth: The 4-6 inch base depth mentioned is ideal, but adjust based on your chosen material. Gravel paths can start with just 3-4 inches of compacted base, while pavers need the full 6 inches for stability. For wood chips, you'll need a deeper base (6-8 inches) to prevent settling over time. Always check your material's manufacturer recommendations for optimal depth.
Compaction is Critical: When compacting your 2-3 inch gravel or sand base in Step 3, work in small sections—about 2 feet at a time. This ensures even pressure and prevents uneven settling. For extra stability in high-traffic areas, consider using a vibrating plate compactor instead of a manual tamper. Moisten the base slightly before compacting to help the particles bind together more effectively.
Edging Solutions: The instructions mention edging materials, but here's a pro tip: for gravel paths, use flexible plastic edging that can be cut to fit curves perfectly. For more permanent solutions, consider landscape timbers or metal edging strips. These not only contain your pathway material but also create a clean, finished look that blends with your garden design.
Pro Tips for Garden Walkway Materials
- A few simple strategies will help you avoid common mistakes and create a walkway that lasts for years.
- The Width Factor: While the instructions suggest a standard 2-3 feet width, consider your specific needs.
- Material-Specific Depth: The 4-6 inch base depth mentioned is ideal, but adjust based on your chosen material.
Frequently asked questions
Got questions about choosing the perfect garden walkway material? You’re not alone! Here are some of the most common concerns—and their answers—to help you make an informed decision.
What’s the most durable material for a garden walkway?
For long-lasting durability, natural stone (like bluestone or slate) and composite pavers are top picks. They resist cracking, fading, and weather damage better than concrete or gravel. If you want low maintenance, brick or concrete pavers are also solid choices, lasting 20+ years with proper sealing.
How long does it take to install a garden walkway?
Installation time varies by material and project size. Gravel paths can be DIY’d in a weekend (4–8 hours), while stone or pavers may take 1–3 days for a professional. Concrete requires curing time (7+ days), so plan ahead if you’re eager to use your new path!
What’s the most budget-friendly walkway option?
For cost savings, gravel or crushed stone (under $1/sq. ft.) or concrete pavers ($3–$8/sq. ft.) are great starter options. If you’re handy, DIY gravel paths can cut labor costs significantly. Recycled materials (like reclaimed brick) also offer eco-friendly affordability.
Which materials handle rain and freeze-thaw cycles best?
Avoid unreinforced concrete or untreated wood in freeze-thaw climates—they crack easily. Instead, opt for permeable pavers (allow drainage) or natural stone like granite, which resists moisture damage. Composite decking is another frost-resistant alternative for wetter areas.
Can I install a walkway myself, or should I hire a pro?
Simple projects like gravel or stepping stones are DIY-friendly! For stone, pavers, or concrete, pros ensure proper base prep and alignment. If your path has curves, slopes, or requires heavy materials, hire a contractor to avoid costly mistakes. Pro tip: Rent tools like a plate compactor for even, stable bases!
Wrapping up and next steps
Choosing the right garden walkway materials can transform your outdoor space into a durable, functional, and beautiful retreat—one that stands up to rain, foot traffic, and seasonal changes.
Whether you opt for the natural charm of gravel, the low-maintenance appeal of pavers, or the rustic elegance of wood, the key is selecting materials that align with your style, budget, and climate. 🌿
Now that you’re armed with the best options and tips, it’s time to roll up your sleeves and bring your vision to life! Start by sketching a simple layout, gathering your tools, and take it step by step.
Before you know it, you’ll be strolling through a walkway that’s as stunning as it is sturdy—and totally worth the effort.