
Tools
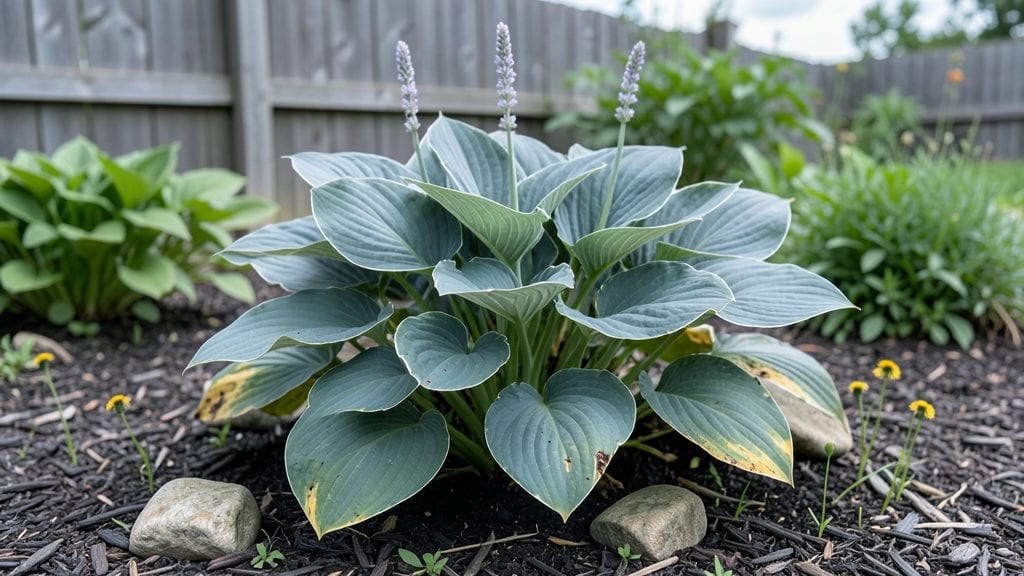
Browse these stunning hosta garden images to see how these shade-loving plants turn dull corners into jewel-toned living art—then I’ll show you how to design your own. 🌿 layering textures—glossy blue leaves next to velvety gold, frilly edges beside bold variegation.
The right combination turns a shady spot into a year-round showpiece, even when other plants are dormant.
You don’t need a huge space—just a few well-chosen varieties and a little strategic placement. Pair broadleaf hostas like ‘Blue Angel’ with upright types such as ‘Halcyon’ to create movement, and tuck in dwarf ferns or heucheras for contrast.
Containers work too: mix hostas with caladiums for summer color or hemlock for winter structure. The key is balancing heights and leaf shapes so the eye flows naturally through the garden.
What you’ll end up with is a garden that feels like a secret retreat—cool, lush, and impossibly green even in the hottest summer. The foliage alone offers seasonal interest: spring’s fresh shoots, summer’s deep shadows, and fall’s crisp edges.
Add a few late-blooming asters or Japanese anemones for pops of color, and you’ve got a space that’s both serene and stunning. Ready to see how these designs come together?
Whether you’re working with a shady backyard, a balcony, or a small corner of your yard, hostas adapt beautifully. The layouts here work in zones 3-9, so no matter where you garden, you can create that dreamy, textured shade haven.
Let’s dive into the designs that’ll make your garden the envy of the neighborhood.
📚 In This Guide
- What you need
- Instructions
- Tips and common mistakes
- Wrapping up and next steps
What you need
- ● Hosta plants – Choose varieties based on size, color, and texture (e.g., Hosta 'Blue Angel', Hosta 'Francee'). Aim for 5-10 plants for a small garden or 20+ for larger spaces.
- ● High-quality potting soil – 1-2 cubic yards (depending on garden size), rich in organic matter for moisture retention.
- ● Mulch – 2-3 bags (2 cu. ft. each) of shredded bark or pine needles to retain moisture and suppress weeds.
- ● Garden gloves – A pair of durable, breathable gloves (e.g., Wolford or Gloves USA) to protect your hands.
- ● Hand trowel or transplanting spade – A 5-inch stainless steel trowel for digging and planting.
- ● Watering can or hose with a gentle spray nozzle – 1-2 gallons capacity for deep watering.
- ● Pruners or shears – Bypass pruners for clean cuts during maintenance.
- ● Decorative stones or pebbles – For borders or pathways (e.g., slate or river rocks).
- ● Garden stakes or labels – To mark hosta varieties and track growth.
- ● Slow-release fertilizer – 10-20 lb bag (e.g., Osmocote) for nutrient boosts.
- ● Garden kneeler or stool – For comfort during planting and maintenance.
- ● String lights or solar-powered stakes – To highlight your hosta garden after dark!
Designing a stunning hosta garden in shady areas
Hostas thrive where others falter—here’s how to create a lush, low-maintenance shade garden that steals the show.
🌿 Step 1: Assess Your Shade and Soil Conditions
Hostas love dappled to full shade, but not all shade is equal. Walk your space at different times of day to note how light shifts—morning sun can scorch delicate foliage, while evening light creates dramatic variegation. Test your soil’s moisture by digging a 6-inch hole—if water pools or drains in under 30 minutes, amend with 2-3 inches of organic compost to improve drainage and fertility.
I always dig a small trench around the planting area to redirect water away from the crowns—hostas rot faster than they wilt. If your soil is sandy, mix in 1 part peat moss to retain moisture; if it’s clay-heavy, blend in 1 part perlite to loosen compaction. Hostas reward patience: the right soil means fewer pests and bigger leaves.
🪴 Step 2: Plan Your Layout for Visual Impact
Start by grouping hostas by height and leaf size—tall varieties like ‘Blue Angel’ (36 inches) belong at the back, while compact types like ‘Halcyon’ (12 inches) shine in front. I sketch a rough map, spacing plants 12-36 inches apart depending on maturity (check tags!). For a wow factor, pair contrasting colors: chartreuse ‘Francee’ next to deep purple ‘Blue Mouse Ears’ creates instant drama.
Add 3-5 focal plants—like a variegated hosta in a ceramic pot or a stone border—to anchor the design. Mulch with 3 inches of shredded bark to suppress weeds and keep roots cool. Pro tip: Place larger hostas slightly off-center to create natural flow, like a painter’s brushstroke.
☀️ Step 3: Plant for Season-Long Interest
Dig holes twice as wide as the root ball but no deeper—hostas hate sitting too low. Gently tease out circling roots to encourage outward growth, then backfill with native soil mixed with 1 cup of compost per plant. Water deeply until soil is evenly moist to 6 inches down, then let it settle for 24 hours before adding mulch.
For year-round appeal, layer in shade-tolerant perennials like ferns or astilbes—hostas pair beautifully with heucheras or foamflower for texture. I always plant a few extra as spacer plants to fill gaps in 2-3 years. Slugs love hostas, so I place copper tape around the base of prized varieties as a natural deterrent.
✂️ Step 4: Maintain for Year-Round Lushness
Water deeply once a week in dry spells, aiming for 1 inch total—hostas wilt faster than they show thirst. Yellowing leaves? It’s often overwatering, not underwatering. I check by lifting the mulch: if the top 2 inches of soil feel damp, wait. Fertilize in early spring with a balanced 10-10-10 formula, then again in mid-summer—hostas grow best with steady nutrients, not heavy doses.
Deadhead spent flower stalks in late summer to redirect energy to foliage, but leave the leaves until early spring—they protect the crowns from freeze-thaw cycles. Divide clumps every 3-4 years when centers go bare: dig up, split with a sharp spade, and replant sections immediately. Hostas multiply fast, so plan to share with neighbors!
💧 Step 5: Protect and Preserve Your Investment
Slugs and deer are the biggest threats. I’ve had ‘Patriot’ hostas devoured overnight—now I use iron phosphate bait in high-risk areas. For deer, a 8-foot-tall fence or repellent spray applied every 2 weeks works best. In winter, add a 2-inch layer of shredded leaves over mulch to insulate crowns from temperature swings.
Take monthly photos to track growth—hostas change dramatically over seasons. The first year, they’ll focus on roots; by year two, you’ll see bold foliage that makes your shade garden the envy of the neighborhood. Real talk: Hostas are the ultimate “plant and forget” stars, but a little attention turns them into showstoppers.
Tips & tricks for perfect hosta garden layouts
A few strategic moves will transform your shade garden from ordinary to extraordinary—here's how to maximize every inch of space and create visual drama.
Soil Prep Secret: The 30-minute drainage test in Step 1 is non-negotiable. I've learned the hard way that hostas in soggy soil develop root rot faster than you can say "slug problem." For clay soils, mix in perlite at a 1:1 ratio with your native soil—this creates the perfect air-to-moisture balance that hostas crave. The trench you dig around planting areas acts like a natural moisture barrier, preventing crown rot that can wipe out your entire garden in weeks.
Plant Spacing Strategy: Those 12-36 inch spacing guidelines in Step 2 aren't arbitrary—they account for mature plant sizes. I always mark planting locations with stakes before digging, then use a string line to create perfectly straight rows. This creates that "designed by a pro" look while giving each plant room to develop its full foliage potential. Pro move: Place your tallest varieties ('Blue Angel') 18-24 inches from the back border to prevent them from leaning over and blocking light from shorter plants.
Color Theory for Impact: The chartreuse-purple pairing in Step 2 works because these colors sit opposite each other on the color wheel, creating maximum visual contrast. For a moody, sophisticated look, try pairing deep burgundy hostas ('Pandora's Box') with silver-variegated types ('Halcyon'). I always photograph my color combinations in natural light before planting to ensure they'll look stunning throughout the day—morning light brings out blues, while afternoon light intensifies yellows.
Make-Ahead Strategy: You can prep your entire planting area up to 24 hours in advance by amending soil, digging trenches, and marking planting locations. Store your hostas in a shaded, cool spot (like a garage) with their roots wrapped in damp burlap—this keeps them hydrated while you finish soil prep. The 24-hour settling period before adding mulch (Step 3) prevents soil compaction that can stunt root growth for years.
Pro Tips for Hosta Garden Images
- A few strategic moves will transform your shade garden from ordinary to extraordinary—here's how to maximize every inch of space and create visual drama.
- Soil Prep Secret: The 30-minute drainage test in Step 1 is non-negotiable.
- Plant Spacing Strategy: Those 12-36 inch spacing guidelines in Step 2 aren't arbitrary—they account for mature plant sizes.
Frequently asked questions
Got questions about creating a stunning hosta garden?
You’re not alone! Here are answers to the most common queries to help you design a thriving, shade-loving oasis with ease.
When is the best time to plant hostas?
Plant hostas in early spring or early fall when soil temperatures are cool but not frozen. This gives roots time to establish before extreme heat or cold. Avoid planting in summer—hostas hate stress from intense sun or drought. Pro tip: If planting in containers, do it anytime, but keep them consistently moist.
How much shade do hostas really need?
Hostas thrive in partial to full shade, but their needs vary by variety. Most prefer 3–6 hours of indirect light daily. Too much sun can scorch leaves, while deep shade may lead to leggy growth. Test your spot: If it’s bright but filtered (like under tall trees), it’s perfect!
Why are my hosta leaves turning yellow or brown?
Yellowing leaves often signal overwatering or poor drainage, while brown edges can mean too much sun, dehydration, or slug damage. Check soil moisture (hostas like it damp but not soggy) and inspect leaves for pests. Fix it: Mulch to retain moisture and use organic slug bait if needed.
Can I grow hostas in containers?
Hostas adapt well to containers, making them ideal for patios or small spaces. Use a well-draining potting mix and a pot with drainage holes. Choose compact varieties like 'Blue Mouse Ears' or 'Halcyon' for smaller containers. Watering tip: Containers dry out faster—check soil moisture daily in hot weather.
What are some low-maintenance hosta alternatives for busy gardeners?
If hostas seem high-maintenance, try these shade-loving, low-fuss plants:
- Heuchera (Coral Bells): Vibrant foliage, drought-tolerant once established.
- Ferns (e.g., Japanese Painted Fern): Lush texture, minimal care.
- Astilbe: Feathery plumes, thrives in moist shade.
- Lungwort (Pulmonaria): Early blooms, deer-resistant.
Wrapping up and next steps
Transforming your shady garden into a stunning hosta haven is easier than you think! With the right hosta garden images for inspiration and a few key tips, you’ve got everything you need to create a lush, low-maintenance retreat.
Whether you’re a seasoned gardener or just starting out, these vibrant foliage layouts will bring your vision to life.
Ready to take the next step? Sketch your design, gather your plants, and start digging! 🌿 Before you know it, your shady corner will be the envy of the neighborhood.