
Pests
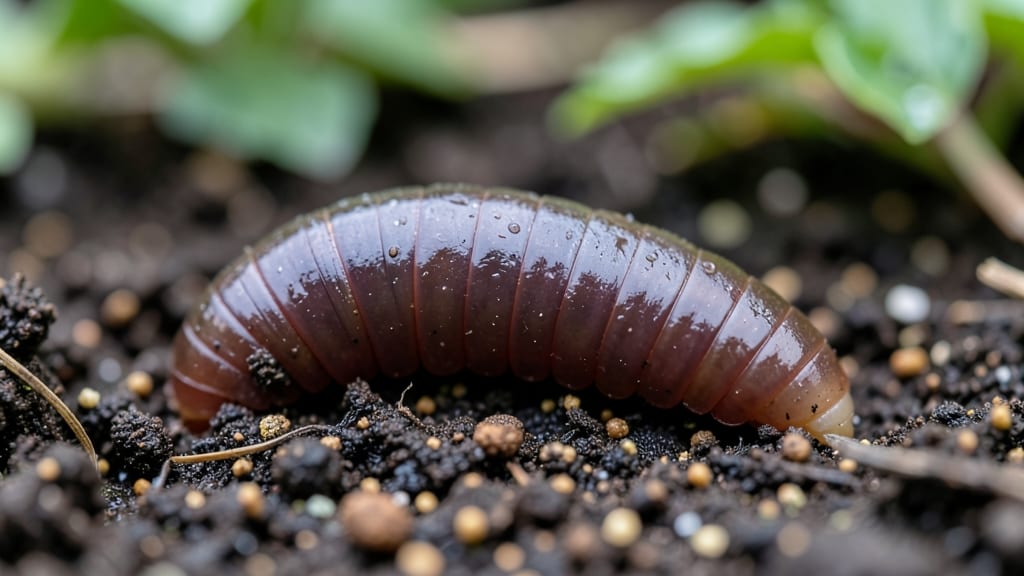
Getting garden worms fast starts with understanding their secret love language—moist, organic-rich soil with plenty of hiding spots. 🌱 I used to think you had to buy them, but the real magic happens when you create the perfect conditions for them to find you.
Worms aren’t just helpers; they’re the unsung heroes that turn your garden soil into a nutrient powerhouse overnight.
The fastest way? Start with compost—not just any compost, but the damp, crumbly kind that worms can’t resist. Spread a 2-inch layer over your garden beds, then top it with mulch like shredded leaves or straw.
Within 2-4 weeks, you’ll start seeing worm activity as they migrate up from deeper soil layers. The key is consistency—keep the soil moist but not soggy, and avoid chemical fertilizers that repel them.
Once they arrive, your garden transforms. Worms aerate the soil, breaking up compacted earth and creating tunnels that improve drainage. They devour organic matter, leaving behind castings—the gold standard of natural fertilizer.
By summer’s end, you’ll notice plants growing taller, blooming brighter, and producing more because the soil is alive with these tiny engineers.
This method works in any climate, from dry desert gardens to rainy Pacific Northwest yards. The only rule? Never till when worms are active—they’ll just retreat deeper.
With patience and the right approach, you’ll have a thriving worm population that keeps your garden fertile for years. Let’s get those tunnels digging!
📚 In This Guide
- What you need
- Instructions
- Tips and common mistakes
- Wrapping up and next steps
What you need
- ● Organic bait: 1–2 cups of rotted fruit or veggie scraps (banana peels, apple cores, or citrus work best!)
- ● OR 1 lb of moistened bran or oatmeal (soaked in water until damp but not soggy).
- ● Container: A small plastic or metal container (e.g., a tuna can, yogurt cup, or 1-gallon bucket with drainage holes).
- ○ Optional: A bait trap (DIY with a plastic bottle cut in half).
- ● Location setup: Shady, moist spot in your garden (avoid direct sunlight).
- ● Loose, well-draining soil (earthworms love 60–70°F soil).
- ● Water source: A spray bottle or small watering can for keeping bait moist.
- ● Coffee grounds (adds nitrogen and attracts worms—use sparingly!).
- ● Molasses or sugar (1 tbsp mixed into bait for a sweet lure).
- ● Cardboard or newspaper strips (to create a cozy, dark microhabitat).
- ● Garden gloves (to handle bait or worms without getting dirty!).
- ● Nightlight or flashlight (for spotting worms after dark—they’re nocturnal!).
Step-by-step guide to attracting earthworms in your garden
Here’s how to lure these soil superstars in under a week—no digging required.
🌱 Step 1: Set Up the Perfect Bait Station
Choose a shady, moist spot in your garden where the soil stays damp but not soggy. Earthworms avoid direct sun and dry conditions. Dig a small hole about 6 inches deep and 8 inches wide—this mimics their natural burrowing space. The hole should be just big enough for a handful of bait to fit comfortably.
I like to use a mix of rotted leaves and grass clippings as bait because worms love decaying organic matter. Add a thin layer of moistened newspaper or cardboard over the bait—this creates a dark, humid environment that worms find irresistible. Water the hole lightly afterward to settle the bait and signal to worms that it’s a safe, moist spot.
💧 Step 2: Keep the Bait Moist and Hidden
Earthworms are sensitive to light and dryness, so your bait station must stay moist and shaded. Check the hole every 2-3 days and add a little water if the top layer feels dry to the touch. Overwatering can wash away the bait, though, so just enough to keep it damp is perfect.
Cover the hole with a flat rock or a small piece of wood to block sunlight while still allowing worms to crawl in. I’ve found that worms are most active after rain or in the early morning, so setting up the bait station on a cloudy day or right after watering gives you the best chance of success. Avoid disturbing the area—worms are shy and will retreat if they sense movement.
⏰ Step 3: Wait and Check for Worms
Give the bait station 3-5 days to attract worms. You’ll know it’s working when you see tiny holes or tunnels in the soil around the hole—this is their way of exploring. If you’re impatient, gently lift the rock or wood after 48 hours and peek inside. You might spot worms crawling toward the bait or already buried in it.
If you don’t see any worms after a week, try switching the bait to something like crushed eggshells or coffee grounds, which worms also love. Avoid meat or dairy—these attract pests instead. Once you spot a few worms, you can carefully relocate them to other parts of your garden by placing them in a bucket of soil and letting them settle before transplanting.
🌿 Step 4: Encourage Worms to Stay Long-Term
Now that you’ve lured some worms, keep them happy by maintaining a healthy garden. Mulch your soil with compost or leaf litter to create a cozy, nutrient-rich environment. Worms thrive in soil that’s 60-75°F and has plenty of organic matter to munch on.
Water your garden deeply but infrequently—worms need moisture but will leave if the soil becomes waterlogged. Avoid chemical fertilizers or pesticides, as these can harm or repel worms. Instead, use natural amendments like worm castings or well-aged compost to keep your soil worm-friendly. Within a few weeks, you’ll have a thriving worm population improving your soil naturally.
Tips & tricks for fast earthworm attraction
Luring earthworms doesn't have to be a slow process—these tricks will help you spot them in record time while keeping your bait station effective.
The Location Factor: I can't stress enough how important that shady, moist spot is. Earthworms avoid sunlight like we avoid Monday mornings—it dries them out. If your garden has limited shade, create artificial shade with a small board or tarp during peak sun hours. Also, avoid areas where you've recently used chemical fertilizers or pesticides, as these repel worms for weeks.
Timing Secret: The 48-hour check is your golden opportunity to spot early arrivals. I've found that worms are most active in the early morning or right after rain. Set up your bait station on a cloudy day or water your garden thoroughly before creating the hole—this mimics natural moisture conditions and signals to worms that it's safe to explore. The key is patience combined with strategic timing.
Bait Upgrade: While rotted leaves and grass clippings work great, adding a sprinkle of crushed eggshells or coffee grounds can supercharge your results. These items provide extra calcium and nutrients that worms love. Just be careful with the amounts—too much can make the bait too dense for worms to burrow through. A light layer over the existing bait is perfect.
Long-Term Strategy: Once you've established your worm population, maintain that 60-75°F soil temperature range for optimal activity. I like to use a soil thermometer in my garden beds to monitor this. During hot summer months, water your garden in the early morning to keep the soil cool and moist. This creates an ideal environment that will keep worms coming back—and multiplying—long after your initial bait station.
Pro Tips for Get Garden Worms
- Luring earthworms doesn't have to be a slow process—these tricks will help you spot them in record time while keeping your bait station effective.
- The Location Factor: I can't stress enough how important that shady, moist spot is.
- Timing Secret: The 48-hour check is your golden opportunity to spot early arrivals.
Frequently asked questions
Got questions about wrangling those wiggly helpers?
You’re not alone! Here are answers to the most common queries about getting garden worms—so you can start composting like a pro.
Where can I find worms for my garden?
Look in moist, shaded spots like under logs, mulch piles, or leaf litter. Avoid digging in chemical-treated soil. Pro tip: Early morning or after rain is prime time—worms love the dampness!
When is the best time to collect worms?
Spring or fall is ideal—soil is soft and worms are active. Avoid extreme heat or freezing temps, which make them sluggish. Bonus: Collect after rain for easier access!
Can I use nightcrawlers as bait instead?
Yes! Nightcrawlers are great for fishing, but they’re also excellent composters. Just bury them 6–8 inches deep in your garden bed—they’ll thrive and multiply. Warning: Avoid overcrowding to prevent stress.
What if I can’t find any worms locally?
No sweat! Buy them online from bait shops or worm farms. Look for Eisenia fetida (red wigglers) or Lumbricus terrestris (nightcrawlers). Store them in a cool, damp container until planting.
Why aren’t my worms staying in the garden?
Check soil moisture—too dry or soggy? Worms flee! Aim for damp, not wet soil. Also, avoid pesticides or salt—these repel them. Fix: Add compost or mulch to create a worm-friendly zone.
How many worms do I need for a good compost pile?
Start with 1 pound of worms per square foot of compost area. For a 3’x3’ bin, ~100–200 worms should do the trick. More = faster decomposition!
Wrapping up and next steps
Getting garden worms doesn’t have to be a mystery—with the right techniques, you’ll attract these helpful critters in no time! Whether you’re using apple cores, peelings, or even old newspapers, the key is patience and consistency.
Remember, a thriving worm population will reward you with healthier soil and fewer pests.
Now that you’re armed with the secrets, take action today! Start with one of the methods above, and soon, your garden will be teeming with these natural helpers. Happy worm hunting! 🐛✨