Propagation
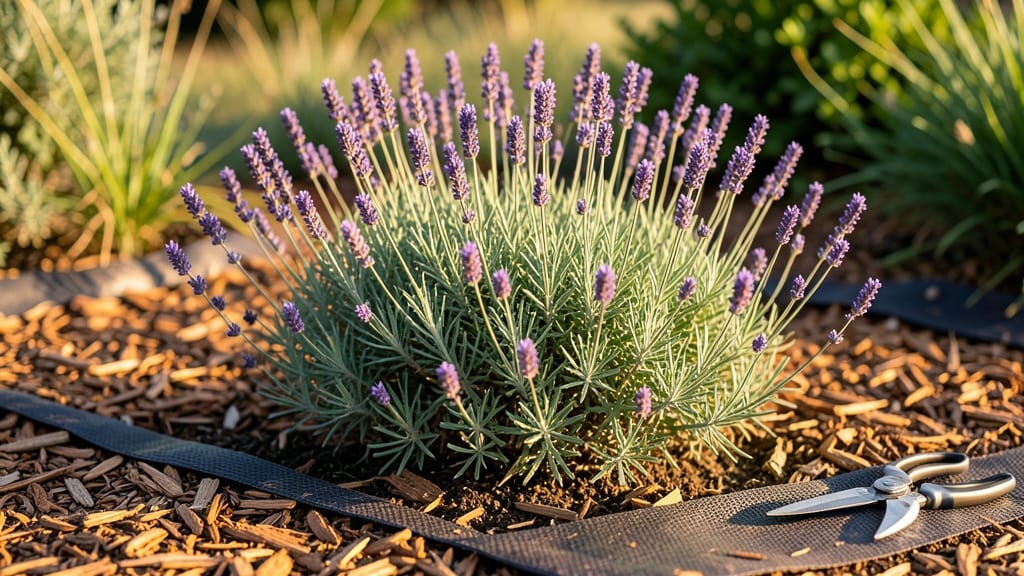
Learn how to stop weeds from growing in your garden by starting with the right permanent block—and no, I’m not talking about plastic sheets that smother your soil forever.
After years of battling stubborn creeping Charlie and dandelions, I’ve landed on a layered approach that actually works without sacrificing your plants’ health. The key? Combining physical barriers, smart mulching, and a little strategic timing to outsmart weeds before they sprout.
You don’t need fancy tools or toxic chemicals to make this happen. A sturdy cardboard base, 2-3 inches of wood chips or straw, and a weekly 10-minute walk through your beds with a hoe are all it takes.
The cardboard blocks light from reaching weed seeds, while the mulch smothers what slips through. Best part? Your soil stays loose, your perennials thrive, and you’ll spend less than an hour weeding all season—honestly, I’ve cut my time by 80% since switching to this method.
What you’ll end up with is a garden where weeds barely show their faces, and your intended plants get all the nutrients and water they need. The wood chips break down slowly, feeding your soil as they go, while the cardboard decomposes into compost.
By late summer, you’ll notice fewer weeds popping up, and your garden beds will look neater, healthier, and way more manageable than ever before. Here’s exactly how to layer it for maximum effectiveness.
This works in raised beds, in-ground gardens, and even around shrubs—no matter your soil type or climate. The only real rule? Apply it before weeds get a foothold, and refresh the mulch every few months.
Trust me, once you try this, you’ll wonder why you ever pulled weeds by hand.
📚 In This Guide
- What you need
- Instructions
- Tips and common mistakes
- Wrapping up and next steps
What you need
- ● Garden gloves (1 pair) – Heavy-duty, chemical-resistant gloves (e.g., nitrile-coated) for protection.
- ● Hand trowel or garden fork – For digging and loosening soil (5–7 inches deep).
- ● Hoe or weed puller – A sturdy stirrup hoe or Japanese puller works best for deep roots.
- ● Pruners or shears – Sharp, bypass pruners for cutting stubborn weeds at the base.
- ● Garden mulch (2–4 inches thick) – Organic options like straw, wood chips, or pine needles or inorganic like landscape fabric.
- ○ Pre-emergent herbicide (optional) – Look for corn gluten meal (natural) or glyphosate-free synthetic options (e.g., pendimethalin).
- ● Vinegar (white, 20–30% acetic acid) (1 gallon) – For spot treatments (mix with 1 tbsp dish soap for adhesion).
- ● Boiling water (1–2 gallons) – A quick, eco-friendly weed killer for small areas.
- ● Salt (coarse or rock salt) (1–2 lbs) – Use sparingly! Only for non-organic paths or driveways (harms soil long-term).
- ○ Black plastic sheeting (optional) – Heavy-duty, 3–4 mil thickness for solarization (sun-baking weeds).
- ● Compost or topsoil (1–2 cubic yards) – For replenishing soil after weed removal.
- ● Weed torch – Propane-powered for large, dry weed patches (use cautiously!).
- ● Corn gluten meal – Natural pre-emergent (apply before weeds sprout).
- ● Landscape fabric – Perforated type to allow water drainage while blocking light.
- ● Dandelion or clover spray – Homemade vinegar-based sprays for targeted weeds.
- ● Kneeling pad – For comfort during long gardening sessions.
- ● Wheelbarrow or bucket – For hauling mulch, soil, or debris.
Step-by-Step instructions for creating a permanent weed block in your garden
Here’s the foolproof method I use to choke out weeds for good—no chemicals, no backbreaking work.
Clear Existing Weeds and Loosen Soil
Before you do anything, remove all existing weeds by hand or with a hoe. Pull them out at the root to prevent regrowth. I like to use a garden fork to loosen the top 6 inches of soil afterward—this breaks up compaction and helps your weed-block material settle properly. If your soil is particularly hard, rent a rototiller for 10-15 minutes to do the job efficiently.
Work in sections no larger than 4 feet by 4 feet so you don’t have to retread the same area. Once the soil is loose, rake it smooth to create an even surface. This step is critical—uneven soil means gaps where weeds will eventually push through.
Apply a Layer of Cardboard or Newspaper
Lay down 2-3 sheets of overlapping cardboard or 4-6 sheets of newspaper over the prepared soil. Use only plain, uncoated cardboard or black-and-white newspaper—no glossy inserts or colored paper, as these can contain chemicals that might leach into the soil. The layers should completely cover the area, overlapping by at least 2 inches to prevent light from sneaking through.
Wet the cardboard or newspaper thoroughly with water to help it break down and settle into the soil. This also prevents it from blowing away if you’re working in a windy area. I like to weigh down the edges with rocks or bricks until the next layer is added.
Cover with a Thick Layer of Mulch
Spread a 3-4 inch layer of organic mulch—such as wood chips, straw, or shredded leaves—over the cardboard or newspaper. This layer smothers any remaining weed seeds and prevents light from reaching the soil below. For best results, use coarse mulch like wood chips, as they break down more slowly and provide longer-term weed suppression.
Rake the mulch evenly so it’s about 3-4 inches deep everywhere. If you’re using straw, fluff it up slightly to avoid compaction. This layer will also help retain moisture in the soil, reducing the need for frequent watering. Leave a 1-2 inch gap around the edges of garden beds to prevent mulch from spilling into walkways.
Add a Top Layer of Landscape Fabric (Optional but Effective)
For an extra barrier against weeds, lay down landscape fabric over the mulch. Secure it tightly with stakes or rocks to prevent shifting. This step is optional but highly effective in high-weed areas or where you want a permanent solution. The fabric blocks light completely, ensuring no weeds can germinate or grow through.
If you skip this step, just ensure your mulch layer stays thick—4 inches or more—to maintain weed suppression. Over time, the mulch will break down, so you may need to top it up every 1-2 years to keep the layer effective.
Maintain the Weed Block Long-Term
After the initial setup, your weed block should stay effective for 2-3 years with minimal maintenance. Check the mulch layer every 6 months and add more if it’s broken down to less than 2 inches thick. If you notice weeds poking through, simply pull them out and add a fresh layer of mulch or fabric.
This method works for any garden soil—sandy, clay, or loamy—because it focuses on blocking light and smothering weeds rather than altering soil chemistry. Over time, the cardboard or newspaper will decompose, enriching the soil naturally, while the mulch keeps weeds at bay.
Tips & tricks for creating a permanent weed block in your garden
A few smart strategies will help you get the most out of your weed-blocking efforts and keep those pesky plants at bay for years to come.
The Soil Prep Secret: When loosening the top 6 inches of soil in Step 1, pay special attention to any stubborn roots or buried weed seeds. I like to use a garden fork to gently lift and turn the soil—this exposes hidden seeds to sunlight, which helps kill them before they sprout. If you're working with clay soil, the 10-15 minutes with a rototiller is especially valuable, as compacted clay can trap moisture and encourage weed growth.
Cardboard vs. Newspaper: While both work well, I've found that newspaper breaks down slightly faster than cardboard, making it a better choice for temporary weed suppression in areas where you might want to plant later. For permanent blocks, cardboard provides a sturdier barrier that lasts longer. If using newspaper, make sure to use at least 4-6 sheets to create enough thickness—single sheets won't block enough light effectively.
Mulch Depth Matters: The 3-4 inch layer of mulch in Step 3 is crucial for long-term success. If you're using wood chips, aim for the thicker end of that range—they break down more slowly and provide better weed suppression. For areas with heavy foot traffic, consider adding an extra inch of mulch to prevent compaction. Remember to leave that 1-2 inch gap around edges to keep mulch contained and prevent it from spilling into walkways or flower beds.
Long-Term Maintenance Strategy: The 6-month check you'll do in Step 5 is your best defense against weeds. I like to mark my garden beds with small stakes or flags to remember where my weed blocks are located. When you notice weeds poking through, don't just pull them—add a fresh layer of mulch or fabric immediately. This creates a thicker barrier and prevents new weeds from establishing themselves.
Pro Tips for Stop Weeds From Growing In Garden
- A few smart strategies will help you get the most out of your weed-blocking efforts and keep those pesky plants at bay for years to come.
- The Soil Prep Secret: When loosening the top 6 inches of soil in Step 1, pay special attention to any stubborn roots or buried weed seeds.
- Cardboard vs.
Frequently asked questions
What’s the best time of year to apply weed-blocking methods?
The ideal time is early spring or late fall—when weeds are dormant but soil is workable. For mulching or pre-emergent herbicides, apply before weed seeds sprout (spring). If using organic methods like corn gluten, do it in early spring to prevent germination. Avoid treating during peak summer heat, as it can stress plants or reduce effectiveness.
Will these methods harm my plants or vegetables?
Most natural weed-blocking techniques—like mulch, cardboard barriers, or vinegar-based sprays—are safe for plants if applied correctly. Pre-emergent herbicides can harm seedlings, so wait 2–4 weeks after planting before using them. Always spot-test homemade sprays (e.g., vinegar) on a small plant area first. Organic options (e.g., boiling water, salt) are safer but may require repeat applications.
Are there affordable DIY alternatives to commercial weed blockers?
Try these zero-cost or low-cost solutions:
- Cardboard + mulch: Lay down wet cardboard (ink-free) under mulch to smother weeds.
- Boiling water: Pour on weeds at the base (avoid desirable plants!).
- Salt or vinegar: Mix 1 gallon vinegar + 1 cup salt for a targeted spray (test first!).
- Corn gluten: A natural pre-emergent ($10–$20 per pound) that also fertilizes soil.
How often do I need to maintain weed control?
Frequency depends on your method:
- Mulch: Refresh every 6–12 months or when it breaks down.
- Pre-emergent herbicides: Reapply every 3–6 months (check product labels).
- Hand-pulling: Weekly checks in spring/summer; less often in winter.
- Natural barriers (landscape fabric): May last 2–5 years but can trap heat—use cautiously.
What if weeds keep coming back no matter what I do?
Persistent weeds often mean:
- Soil isn’t properly blocked: Ensure mulch/herbicide covers bare soil completely (even cracks!).
- Underground roots: Dig out perennial weeds (e.g., dandelions) with a dandelion weeder or repeat vinegar treatments.
- New seed sources: Rake or till the area to bury seeds deeper (they need light to sprout).
- Soil health: Amend with compost to crowd out weeds naturally.
Wrapping up and next steps
Stopping weeds doesn’t have to be a never-ending battle—with the right strategies, you can reclaim your garden and enjoy a low-maintenance, lush space! 🌱 Whether you choose mulching, natural barriers, or organic sprays, consistency is key.
Start small, experiment with methods, and soon you’ll see those pesky intruders retreat for good.
Ready to take action? Pick one technique from this guide and give it a try this weekend. Your future self (and your garden!) will thank you.