
How To
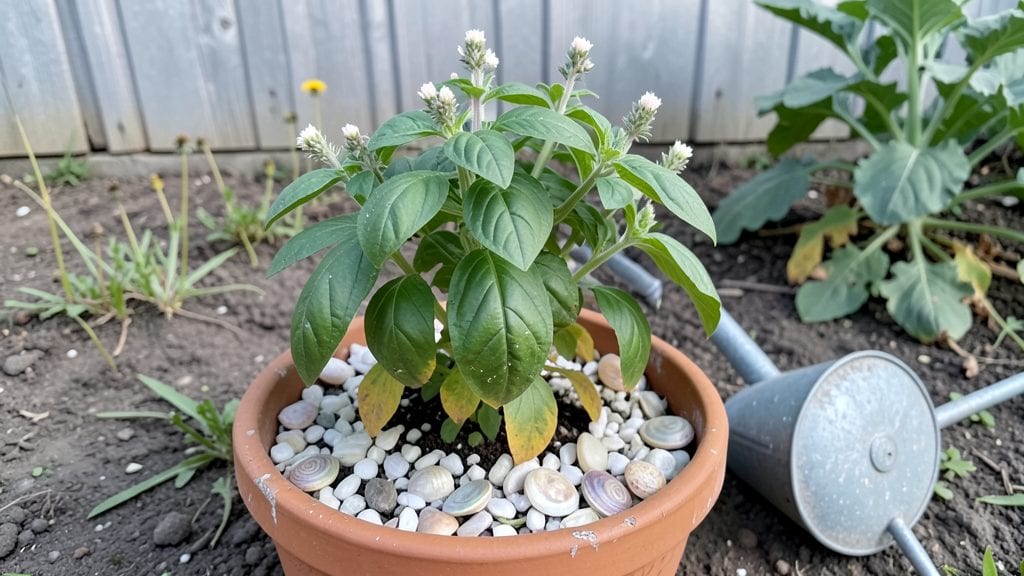
How to use seashells in the garden is easier than you think—just start by collecting those sun-bleached treasures from the shore. 🌊 I’ve turned them into everything from low-maintenance mulch to artistic borders, and the best part?
They never need watering, weeding, or replanting. The key is pairing the right shells with your garden’s style—whether that’s a Zen rock garden, a tropical oasis, or a classic cottage look.
You don’t need a beachfront to get started—just clean, safe shells (avoid sharp edges) and a vision for where they’ll shine. Crushed shells work as a natural, slow-release calcium boost for soil, while whole ones add texture to pathways or edging.
For DIY projects, mosaics or wind chimes let you get creative without breaking the bank. Sourcing sustainably is easy: collect responsibly, or buy from eco-friendly suppliers.
The payoff is instant: a garden that looks like it belongs by the sea, with zero upkeep. Imagine stepping onto a pathway lined with shells that catch the light, or a border that frames your flower beds like a natural frame.
Even a single statement piece—like a large conch shell as a planter—elevates the space. Plus, the coastal scent lingers after rain, adding a sensory touch.
Works in any garden style, from modern minimalism to whimsical cottage charm. The only rule? Let your personality guide the placement. Now, let’s get those shells to work for you—without the ocean view required.
📚 In This Guide
- What you need
- Instructions
- Tips and common mistakes
- Wrapping up and next steps
What you need
- ● Seashells: Collect or purchase a variety of shells (cowries, conchs, scallops, or small clams work best). Aim for at least 50–100 shells per square foot for full coverage in decorative areas.
- ● Garden gloves: A pair to protect your hands while handling shells and soil.
- ● Garden trowel or hand shovel: For digging small holes or moving shells into place.
- ○ Garden twine or landscape fabric: Optional but helpful for securing shells in windy areas or creating borders.
- ● Garden hose or watering can: To keep shells clean and damp before placement (prevents dust and dirt buildup).
- ○ Sand (optional but recommended): A small bag (10–20 lbs) to mix with shells for mulch or to fill gaps in pathways.
- ● Decorative stakes or pebbles: To outline shell borders or pathways.
- ● Epoxy or outdoor sealant: For sealing shells into place (e.g., for mosaic-style projects).
- ● Solar-powered garden lights: To highlight shell features at night.
- ● Driftwood or coral: For a more natural, beachy aesthetic.
- ● Child-safe shells: If you have kids or pets, avoid sharp-edged shells like cone shells.
Step-by-Step guide to incorporating seashells in your garden
Transform your garden into a serene coastal retreat with these effortless seashell ideas.
🌿 Step 1: Create a Natural Pathway or Border
Rinse collected seashells thoroughly with fresh water to remove salt and debris. Choose medium to large shells for a bold look—think cowries, conchs, or scallops. Arrange them along garden paths or borders like a natural mosaic, spacing them about 3-6 inches apart for a cohesive flow.
Here's the thing—I like to bury them slightly into the soil (about ½ inch deep) so they don't shift with foot traffic. For extra stability, use a trowel to create small pockets for each shell. This also prevents them from becoming projectiles when stepped on.
☀️ Step 2: Build a Coastal-Themed Water Feature
Group smaller shells (like clams or winkles) around a small pond, fountain, or even a birdbath to mimic a beachy shoreline. Use about 10-15 shells per square foot for a natural, organic feel. Place them in a circular pattern around the water's edge, with some partially submerged for a wavy effect.
Don't skip rinsing these shells first—the salt residue can harm aquatic life if left unchecked. I always soak them in fresh water for 24 hours before arranging them near water features. You'll see the difference immediately in how they look (less dull, more vibrant) and how they integrate into the scene.
🪴 Step 3: Design a Low-Maintenance Shell Garden
Fill a shallow container or raised bed with a mix of sand and potting soil (about 50/50 ratio) to create a dedicated shell garden. Press shells of varying sizes into the surface, leaving about 1-2 inches of space between them for a natural, uneven look. Add a few succulents or drought-tolerant plants like sedum to complement the coastal vibe.
This is the moment that matters: the contrast between the organic shapes of the shells and the structured lines of the plants creates visual interest without requiring any upkeep. I've found that adding a thin layer of pebbles around the edges helps keep shells in place and adds another textural element.
✂️ Step 4: Use Shells for Pest Deterrence and Soil Aeration
Crush larger shells into small pieces (about ½ inch or smaller) and sprinkle them around plants prone to slugs and snails. The sharp edges deter pests naturally, and the calcium-rich shell fragments improve soil structure over time. Apply a light layer—just enough to cover the soil surface—around the base of plants.
Don't overdo it; a ¼-inch layer is plenty. Too much can alter soil pH or create a barrier that roots can't penetrate. I like to mix these crushed shells into the top inch of soil when planting new perennials—it's a slow-release benefit that keeps giving.
💧 Step 5: Enhance Containers and Hanging Planters
Tuck whole or broken shells into the soil of container gardens or hanging baskets for a whimsical touch. Use shells that complement the plant colors—white and pastel shells pair beautifully with lavender or white flowers, while darker shells contrast well with deep greens or purples. Place them near the edges of containers where they're visible but won't interfere with drainage.
Real talk: this step is all about creativity. I've seen gardeners embed shells into the sides of terracotta pots or even create mosaic patterns on the surface of larger containers. Just ensure the shells are clean and dry before placing them—moisture trapped inside can lead to mold or unpleasant odors over time.
Tips & tricks for perfect coastal garden decor with seashells
Transforming your garden into a coastal haven doesn't require complicated techniques—just a few thoughtful touches that make all the difference.
Shell Selection Matters: For Step 1, prioritize shells with smooth, intact surfaces for pathways and borders. Cowries and conchs create bold visual impact, while smaller clams or winkles work beautifully for water features (Step 2). Avoid fragile shells that might break underfoot—think durability first! I've found that shells with natural holes or textures add unexpected visual interest, especially when arranged in clusters.
Prep is Everything: That 24-hour soak for shells near water features isn't just about cleanliness—it's about transformation. Salt residue can dull shells and harm aquatic life, but the soaking also removes any lingering sand or debris that could cloud your water feature. Pro tip: Use a mesh laundry bag to contain shells during soaking, making cleanup effortless. For Step 4's crushed shells, I recommend using a hammer and mortar to achieve that perfect ½-inch or smaller size—it's safer than food processors and gives you more control.
Stability Secrets: In Step 1, burying shells just ½ inch deep creates instant stability, but don't forget to angle them slightly toward the center of pathways. This subtle technique prevents them from becoming tripping hazards while maintaining that natural beachy look. For containers (Step 5), I've started using a dab of garden-safe adhesive on the bottom of each shell before pressing them into place—it keeps them from shifting over time without looking unnatural.
Color Coordination: The shell colors you choose can dramatically impact your garden's mood. For a serene coastal vibe, pair whites and pale blues with lavender or white flowers (as mentioned in Step 5). Darker shells like conchs create striking contrasts against deep greens or purples. Don't be afraid to mix textures too—rough, textured shells next to smooth ones add unexpected depth to your designs. I've even seen gardeners use iridescent shells as focal points—they catch the light beautifully in the right sunlight.
Pro Tips for Use Seashells In The Garden
- Transforming your garden into a coastal haven doesn't require complicated techniques—just a few thoughtful touches that make all the difference.
- Shell Selection Matters: For Step 1, prioritize shells with smooth, intact surfaces for pathways and borders.
- Prep is Everything: That 24-hour soak for shells near water features isn't just about cleanliness—it's about transformation.
Frequently asked questions
Got questions about transforming seashells into garden magic? Here’s what you need to know before diving in!
Can I use any seashells in my garden, or are there restrictions?
Stick to clean, unbroken shells from sandy beaches (avoid rocky shores or polluted areas). Skip shells with barnacles, algae, or sharp edges—these can harbor pests or harm plants. Rinse them with fresh water and sunlight to kill any lingering bacteria or salt residue. Never use shells from tidal pools or areas with chemical runoff.
How long does it take for seashells to break down in the garden?
Seashells decompose very slowly—think years, not months. Crushed shells (like crushed oyster or clam shells) will break down faster, but whole shells act as long-term mulch or decorative accents. For faster results, pair them with compost or organic matter to speed up nutrient release. Pro tip: Use them near perennials or as edging where you won’t disturb the soil often.
What’s the best way to use seashells if I don’t have a beach nearby?
No beach access? No problem! Buy food-grade crushed seashells (often labeled as "crushed oyster shell" or "calcium carbonate") from garden centers or online. These are sterilized and safe for soil amendment. Alternatively, collect shells from aquarium stores (rinse thoroughly) or repurpose clean, broken shells from coastal souvenirs.
Will seashells attract pests like slugs or snails?
Seashells deter slugs and snails—these pests avoid the sharp edges and rough texture. However, whole, hollow shells (like those from whelks or conches) can become homes for earwigs or spiders. To prevent this, crush them or place them upside down in the soil. Bonus: Sprinkle crushed shells around hostas or lettuce for natural pest control!
Do seashells work in all climates, or are they better for certain regions?
Seashells thrive in temperate to warm climates (like coastal gardens or Zone 7+) where they won’t freeze and crack. In cold climates (Zones 3–6), use them as mulch in spring or bury them to prevent winter damage. For dry climates, pair them with moisture-retentive plants like succulents—they’ll help slow evaporation while adding calcium.
Wrapping up and next steps
Seashells aren’t just souvenirs—they’re a zero-maintenance, budget-friendly way to add coastal charm to your garden while boosting soil health and repelling pests. From creating stunning pathways to crafting natural mulch or even building a DIY slug barrier, these versatile treasures turn gardening into a relaxing, creative adventure. 🌊✨
Ready to transform your outdoor space? Grab a bucket, head to the shore, and start experimenting today! Your garden—and future visitors—will thank you. 🌸