
Tools
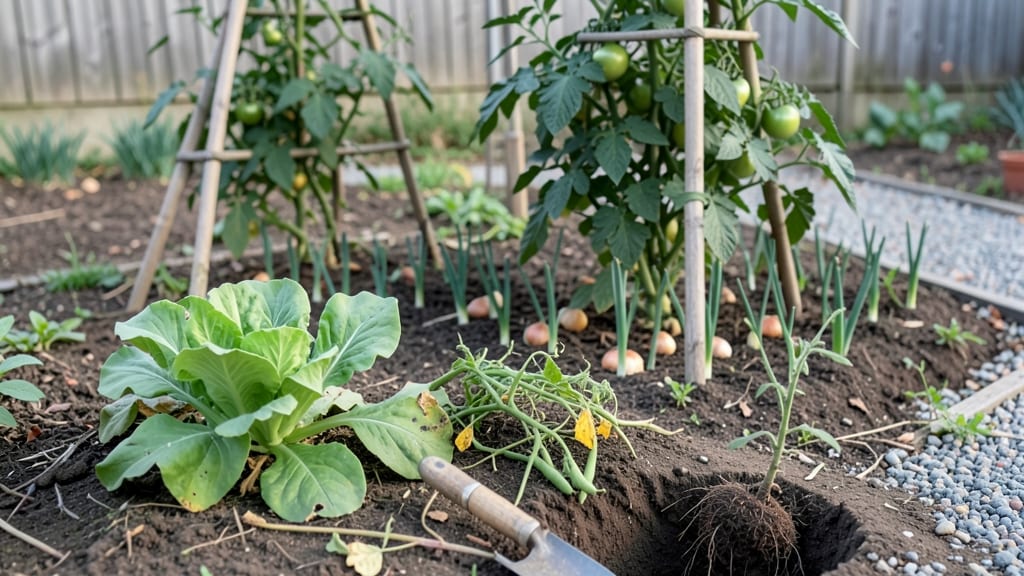
A potager garden layout transforms a simple yard into a lush, productive kitchen garden where every square foot counts. I fell in love with this design after watching my square-foot grid turn into a tangled mess—until I switched to the French intensive method.
The key? Four distinct squares for vegetables, herbs, flowers, and a central pathway that keeps everything accessible without stepping on plants.
This layout thrives on repetition and symmetry, but don’t let that fool you—it’s practical too. Vegetables get the sunniest spots, herbs cluster near the kitchen for easy snipping, and flowers lure pollinators while suppressing weeds.
My 4’x4’ squares fit neatly into a 16’x16’ space, but you can scale it down to 4’x4’ for patios or expand it for larger yards. The soil stays loose and fertile because we rotate crops every season, and the paths stay clean for easy harvests.
What you end up with is a garden that looks like a painting but works like a dream. Imagine rows of vibrant green basil framing a central bed of deep purple eggplants, with snapdragons spilling over the edges like confetti.
The French intensive method gives you twice the harvest in half the space, and the layout makes weeding and watering a breeze. Plus, your neighbors will ask how you pulled it off—because it’s that stunning.
Best of all, this design adapts to any climate. In hot zones, add shade cloth over summer crops; in cooler areas, extend the season with cold-hardy plants.
Whether you’re working with a small balcony or a half-acre, the four-square approach keeps things manageable. Ready to turn your garden into a high-yield masterpiece?
📚 In This Guide
- What you need
- Instructions
- Tips and common mistakes
- Wrapping up and next steps
What you need
- ● Garden beds: 4 raised beds (4’ x 8’ each) or in-ground plots of the same size. Use untreated wood (cedar or redwood) or metal for raised beds.
- ● Soil: 10–12 cubic yards of high-quality, organic mix (60% topsoil, 30% compost, 10% perlite or sand for drainage).
- ● Compost: 2–3 cubic yards (for ongoing amendments).
- ● Mulch: Straw or wood chips (1–2 bags, ~2 cubic feet each).
- ● Tools: Garden fork (heavy-duty, 18–24” shaft).
- ● Hoe (stirrup or standard).
- ● Pruners (bypass type).
- ● Wheelbarrow (2–3 cubic feet capacity).
- ● Watering can or drip irrigation kit (with emitters).
- ● Measuring tape (25’+ for precision).
- ● Kneeling pad (for comfort).
- ● Fencing/row covers: Lightweight netting or chicken wire (to deter pests).
- ○ Pathway materials: Gravel, stepping stones, or landscape fabric (optional but practical).
- ● Soil tester kit (to check pH/nutrients).
- ● Seed-starting trays (for transplants).
- ● Trellises or tomato cages (for vertical plants).
- ● Garden journal/notebook (to track plantings and yields).
- ● Solar-powered stake lights (for evening care).
- ● Compost thermometer (if making your own compost).
Step-by-Step instructions for designing your four-square potager garden
Here's how to create a classic French potager layout that maximizes space and harvests.
Divide Your Space Into Four Equal Quadrants
Start by marking your garden bed into four equal squares using string lines or wooden stakes. Each quadrant should be roughly 4 feet by 4 feet for a total of 16 square feet—this size works perfectly for a family of four. I like to use a 2-foot wide pathway between quadrants to allow easy access without trampling plants. This layout keeps everything organized while giving you room to move.
Use a tape measure to ensure each quadrant is identical in size. If your space is larger, you can expand the design by adding additional squares while maintaining the same proportions. The key is symmetry—it makes maintenance and harvests much easier. Once marked, remove any grass or weeds from the pathways to create clean, defined borders.
Assign Plant Families to Each Quadrant
The French potager thrives on companion planting, so group plants by family to maximize compatibility and minimize pests. In one quadrant, plant leafy greens like lettuce, spinach, and kale—these thrive in partial shade and benefit from being near herbs. In the opposite quadrant, place root crops such as carrots, radishes, and beets, which need loose soil and plenty of space to grow.
Use the remaining two quadrants for fruit-bearing plants (tomatoes, peppers, eggplants) and herbs (basil, parsley, thyme). This arrangement ensures that each plant gets the right conditions while naturally repelling pests. For example, basil planted near tomatoes deters whiteflies, and carrots near onions keep aphids away. Label each quadrant with stakes or small signs to track what’s planted where.
Plan Your Planting Rows and Succession Crops
Within each quadrant, create raised beds or mounded rows that are 12 inches wide—this width allows you to reach the center without stepping on the soil. Space rows 18 inches apart to accommodate tools and airflow. In the leafy greens quadrant, plant fast-growing crops like radishes in early spring, followed by lettuce as the weather warms. This succession planting ensures a continuous harvest.
For root crops, plant seeds in staggered rows every 2 weeks to prevent bolting and extend the harvest season. In the fruit-bearing quadrant, use trellises or cages for vining plants like cucumbers or pole beans to save space and improve air circulation. This vertical growth keeps the garden tidy and maximizes yield in a small area. Always rotate crops yearly to prevent soil depletion and disease buildup.
Add Mulch and Companion Plants for Long-Term Health
After planting, apply a 2-inch layer of organic mulch (like straw or shredded leaves) to each quadrant to retain moisture, suppress weeds, and regulate soil temperature. This layer also breaks down slowly, enriching the soil as it decomposes. In the herb quadrant, interplant marigolds or nasturtiums—these flowers deter pests and add beauty without competing for space.
Water deeply once a week (or more during dry spells) to encourage deep root growth. Avoid overhead watering to prevent fungal diseases. Instead, use a soaker hose or drip irrigation to deliver moisture directly to the roots. This method also saves water and keeps foliage dry. Monitor each quadrant weekly for signs of pests or nutrient deficiencies, adjusting your care as needed.
Maintain and Harvest for Continuous Yield
Throughout the growing season, thin seedlings to the recommended spacing (usually 2-4 inches apart for greens, 3-6 inches for roots) to give plants room to thrive. Harvest leafy greens outer leaves first, leaving the inner growth to continue producing. For root crops, harvest as soon as they reach maturity—waiting too long makes them tough or woody.
After the first harvest, replant the same quadrant with a fast-growing crop like bush beans or turnips to keep the space productive. This interplanting strategy ensures your potager stays lively and bountiful all season. By late fall, remove spent plants and add compost to prepare the soil for next year’s rotations. This cycle keeps your garden healthy and high-yielding year after year.
Tips & tricks for perfect potager garden layout
Creating a functional and productive potager garden requires attention to detail, and these tips will help you maximize your harvest while keeping maintenance simple.
Symmetry is Key: When dividing your space into four equal quadrants, use a tape measure to verify each quadrant is exactly 4 feet by 4 feet. I've found that even a 2-inch difference can throw off your entire layout. For larger gardens, maintain the same proportions by adding additional squares while keeping the 2-foot pathways between them. This symmetry makes weeding, watering, and harvesting much more efficient in the long run.
Companion Planting Secrets: The French potager's success relies on strategic companion planting. In Step 2, when assigning plant families, remember that leafy greens and herbs make natural partners. I've noticed that planting basil near tomatoes in the fruit-bearing quadrant dramatically reduces whitefly infestations. Similarly, onions planted near carrots deter carrot flies—this natural pest control saves time and eliminates the need for chemical interventions.
Row Width and Spacing Matters: The 12-inch wide rows mentioned in Step 3 are perfect for reaching the center without stepping on soil, but the 18-inch spacing between rows is equally important. This spacing allows for proper airflow, which prevents fungal diseases and makes harvesting easier. I've seen gardens where rows were too close together, leading to crowded plants that struggled to reach their full potential. Trust me on this—proper spacing makes all the difference in yield quality.
Mulch Application Technique: When applying the 2-inch layer of organic mulch in Step 4, don't just pile it on randomly. Spread it evenly across each quadrant, leaving a small gap around plant stems to prevent rot. I've found that straw works best for most vegetables, but shredded leaves work well for moisture retention in hot climates. This mulch layer doesn't just suppress weeds—it also regulates soil temperature and slowly releases nutrients as it decomposes, creating a healthier growing environment.
Pro Tips for Potager Garden Layout
- Creating a functional and productive potager garden requires attention to detail, and these tips will help you maximize your harvest while keeping maintenance simple.
- Symmetry is Key: When dividing your space into four equal quadrants, use a tape measure to verify each quadrant is exactly 4 feet by 4 feet.
- Companion Planting Secrets: The French potager's success relies on strategic companion planting.
Frequently asked questions
Got questions about designing your potager garden layout? You’re not alone—let’s tackle the most common ones to help you plan like a pro!
What’s the best time of year to start a potager garden?
The ideal time depends on your climate! In temperate zones, spring (after the last frost) is perfect for planting cool-season crops like lettuce and peas. For warm-season veggies (tomatoes, peppers), wait until soil warms (60°F+). In hot climates, start in late summer for fall/winter harvests. Pro tip: Use raised beds to extend your growing season!
How do I adjust the four-square layout for a small space?
The four-square design is flexible! If you’re short on space, shrink the squares to 2’x2’ or 3’x3’—just keep pathways narrow (12–18”) to maximize planting area. Use vertical gardening (trellises for beans, peas) or interplanting (e.g., radishes under cucumbers) to boost yields. Bonus: A 4’x4’ potager can still fit 16+ plants!
What are the most beginner-friendly crops for a potager?
Start with easy-to-grow, high-yield crops like:
- Leafy greens (lettuce, spinach, kale)
- Radishes (fast harvest in 3–4 weeks!)
- Bush beans (low-maintenance and prolific)
- Zucchini (one plant = plenty of squash!)
- Herbs (basil, parsley, chives—great for flavor + pest control)
My potager plants are wilting—what’s the fix?
Wilting usually means underwatering, overwatering, or poor drainage. Check soil moisture (top 1” should be dry before watering). If roots look mushy, you’re overwatering—amend soil with compost to improve aeration. Mulch heavily to retain moisture and prevent weeds. For heat stress, provide afternoon shade with row covers or shade cloth.
Can I use cheap or repurposed materials for a potager?
Save money with:
- Pallet wood (untreated, for raised beds)
- Cinder blocks or bricks (stacked for low borders)
- Old fencing or chicken wire (as trellises)
- Cardboard or newspaper (as weed barriers under mulch)
How do I handle pests organically in a potager?
Prevention is key! Use companion planting (e.g., marigolds repel nematodes, basil deters flies). Introduce beneficial insects like ladybugs (aphids) or praying mantises (caterpillars). For tough pests, try neem oil or homemade sprays (garlic/chili pepper mix). Rotate crops yearly to break pest cycles.
Wrapping up and next steps
Creating a potager garden layout using the four-square French intensive design is your ticket to a bountiful, organized, and efficient harvest! 🌱 With its structured yet flexible approach, you’ll maximize space, minimize waste, and enjoy fresh produce year-round.
Whether you’re a seasoned gardener or just starting, this method makes growing easier—and more rewarding.
Ready to dig in? Start small—sketch your design, gather your tools, and plant with confidence. Your future self (and taste buds!) will thank you. Bon jardinage! 🌿