
Picking
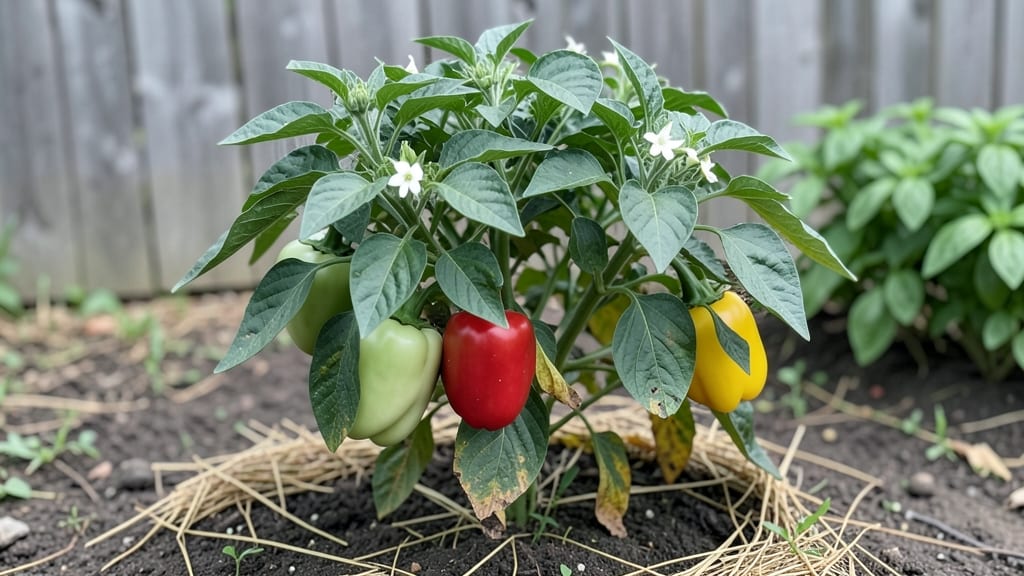
Growing bell peppers in a square foot garden delivers jewel-toned harvests in tight spaces—no sprawling rows required. 🌿 I used to struggle with peppers taking over my garden, but this method keeps them contained, productive, and pest-resistant.
The key is choosing compact varieties like 'Lunchbox' or 'Sweet Banana' that thrive in 1 square foot per plant, freeing up space for other crops.
You'll need a raised bed or grid system, pest-resistant pepper varieties, and a mix that drains well but holds moisture. Start seeds indoors 8-10 weeks before your last frost, then transplant when soil hits 60°F.
The square foot layout lets you fit 16 plants in just 4 square feet—perfect for balconies or small yards. I've doubled my yield by eliminating wasted space between plants.
Expect glossy green peppers within 60-70 days of transplanting, with continuous harvests all summer. The grid system makes it easy to rotate crops yearly, reducing soil-borne diseases.
Plus, you'll spot pests like aphids early and tackle them before they spread. This method turns even the smallest space into a pepper powerhouse.
Works for urban gardeners, container setups, or anyone tired of peppers bolting or sprawling. The same principles apply whether you're growing in a 4x4-foot bed or a window-box-sized grid. Let's get those peppers planted!
📚 In This Guide
- What you need
- Instructions
- Tips and common mistakes
- Wrapping up and next steps
What you need
- ● Square Foot Garden Grid: 1x 4’ x 4’ raised bed frame (or modular sections for smaller spaces)
- ● 1x 12” x 12” grid layout (pre-drilled or DIY with string)
- ● Soil & Amendments: 27 cubic feet (1 cubic foot per square) of high-quality mel’s mix or equivalent (50% peat moss, 30% vermiculite, 20% compost)
- ● 1 lb. balanced organic fertilizer (10-10-10 or composted manure)
- ● 1 lb. lime (to adjust pH to 6.0–6.8)
- ● Seeds or Seedlings: 16–25 pest-resistant bell pepper plants (e.g., ‘Carmen,’ ‘Jupiter,’ or ‘Aristotle’—resistant to viruses/wilt)
- ● Biodegradable seedling pots (if starting indoors)
- ● Watering & Irrigation: 1x drip irrigation kit (with emitters for precise watering) or 1x watering can with a fine rose
- ○ 1x moisture meter (optional but helpful for square foot gardens)
- ● Pest Control: 1x row cover fabric (for early season protection)
- ● 1 quart neem oil or insecticidal soap (for organic pest management)
- ● 1x soil thermometer (bell peppers thrive at 70°F+)
- ● 1 roll mulch fabric (to retain moisture and suppress weeds)
- ● 1x plant support cage or stakes (for heavy pepper varieties)
- ● 1x pruning shears (for maintaining plant health)
Step-by-Step instructions for planting bell peppers in a square foot garden
Here’s how I grow robust, high-yielding bell peppers using the square foot method—with pest-resistant varieties that thrive in confined spaces.
🪴 Step 1: Divide and Prep Your Square Foot Grid
Square foot gardening for bell peppers starts with precision. Divide your 1-foot square into a 4x4 grid (16 cells), spacing each cell 6 inches apart—this gives mature plants enough room to spread without crowding. Bell peppers need 1 plant per cell to prevent competition for nutrients and airflow.
Fill the square with 2-3 inches of compost mixed into the top layer of your square foot garden soil. I always blend in a handful of worm castings in each cell to boost microbial activity—this helps roots establish faster and keeps pests at bay. Press the mix down lightly so it’s firm but not compacted.
🌱 Step 2: Plant Pest-Resistant Transplants at the Right Time
Use 4 pest-resistant bell pepper transplants (like ‘Carmen’ or ‘Jupiter’) from your nursery. Handle seedlings gently—bell peppers have delicate root systems. Dig a hole in each cell deep enough to bury the stem up to the first set of leaves, which encourages stronger root growth.
Plant in the late spring, after the last frost when soil temperatures reach at least 65°F. If you’re in a cooler climate, use a black plastic mulch over the square to warm the soil faster. Water each transplant deeply right after planting to settle the soil around the roots—this prevents air pockets that can stunt growth.
☀️ Step 3: Provide Consistent Light and Water
Bell peppers demand full sun (6-8 hours daily)—place your square foot garden in the sunniest spot possible. If shade creeps in during the afternoon, supplement with a reflective mulch (like white plastic) to bounce extra light onto the plants. You’ll notice leaves turning pale or stretching? That’s a sign they’re reaching for more light.
Water deeply 1-2 times per week, aiming for 1 inch of moisture per week. Use a soaker hose or drip irrigation to keep water at the roots—bell peppers hate wet foliage, which invites fungal diseases. Check soil moisture by sticking your finger 1 inch deep; if it feels dry, it’s time to water.
💧 Step 4: Fertilize and Mulch for Pest Resistance
Two weeks after planting, feed each plant with ½ teaspoon of 5-10-5 fertilizer per cell. I mix it into the soil surface and water it in—this avoids burning young roots. Repeat every 4-6 weeks during the growing season. For extra pest protection, sprinkle dried neem leaves around the base of each plant; the scent deters aphids and spider mites naturally.
Cover the soil with 2 inches of organic mulch (like straw) to retain moisture and suppress weeds. Mulch also keeps soil temperatures stable, which is critical for bell peppers—fluctuations stress plants and reduce fruit production. Replenish mulch as it breaks down to maintain coverage.
✂️ Step 5: Prune and Harvest for Continuous Yield
When plants reach 18 inches tall, prune the lower leaves to improve airflow and reduce disease risk. Focus on removing yellowed or damaged foliage—this redirects energy to fruit production. You’ll see white flowers appear in early summer; these will turn into peppers in 60-70 days. Harvest when peppers are firm and fully colored—this encourages more blooms.
Real talk: Overcrowding is the #1 mistake. If you see peppers touching each other, thin out the weakest plant in the cell. A well-spaced square foot garden gives you 4-6 pounds of peppers per season—enough for fresh eating, roasting, or preserving.
Tips & tricks for square foot gardening bell peppers
Square foot gardening transforms how you grow bell peppers—here’s how to maximize yield while keeping pests at bay.
Soil Preparation Matters: In Step 1, don’t just add compost—amend your soil with a 50/50 mix of compost and worm castings. The worm castings introduce beneficial microbes that help roots absorb nutrients more efficiently. I’ve found that pre-mixing this blend in a wheelbarrow ensures even distribution across all 16 cells. This microbial boost is what gives your pest-resistant varieties the competitive edge they need to thrive in confined spaces.
Planting Depth is Critical: When placing your 4 transplants in Step 2, burying the stem up to the first set of leaves isn’t just about root growth—it’s about creating a stronger plant overall. The buried stem develops additional roots, which means more stability and better nutrient uptake. I’ve seen plants that were planted too shallow struggle with wind and develop weak stems. Pro tip: Use a pencil to mark the depth before planting so you can verify you’re hitting that sweet spot.
Light Management is Non-Negotiable: The 6-8 hours of full sun in Step 3 is your golden rule, but here’s the secret: Monitor your plants’ behavior. If you notice leaves turning pale or stretching toward the sun (a condition called etiolation), it’s time to intervene. Move your square foot garden to a sunnier location or add reflective mulch immediately. I’ve had to relocate entire gardens mid-season when afternoon shade crept in—don’t make my mistake. The difference between a thriving plant and a struggling one often comes down to these small adjustments.
Fertilizer Timing Makes All the Difference: That ½ teaspoon of 5-10-5 fertilizer in Step 4 should be applied precisely two weeks after planting, but here’s what nobody tells you: The real magic happens in the 4-6 week intervals. I’ve found that applying fertilizer right before a rain shower helps the nutrients penetrate deeper into the soil. Also, mix the fertilizer with a bit of compost when applying—this creates a slow-release effect that prevents burning those delicate roots. Think of it as giving your plants a steady diet rather than a single large meal.
Pro Tips for Square Foot Gardening Bell Peppers
- Square foot gardening transforms how you grow bell peppers—here’s how to maximize yield while keeping pests at bay.
- Soil Preparation Matters: In Step 1, don’t just add compost—amend your soil with a 50/50 mix of compost and worm castings.
- Planting Depth is Critical: When placing your 4 transplants in Step 2, burying the stem up to the first set of leaves isn’t just about root growth—it’s about creating a stronger plant overall.
Frequently asked questions
Got questions about growing bell peppers in a square foot garden? You’re not alone! Here are answers to the most common queries to help you cultivate a thriving, pest-resistant harvest.
How many bell pepper plants can I fit in a 1-square-foot square?
A single bell pepper plant needs about 1 square foot of space to thrive. However, if you’re growing smaller varieties like ‘Lunchbox’ or ‘Pico de Gallo’, you can fit 2-4 plants per square foot. Just ensure they’re spaced 6–12 inches apart for airflow and sunlight.
When is the best time to plant bell peppers in a square foot garden?
Start seeds indoors 8–10 weeks before your last frost date, then transplant seedlings after the soil reaches at least 60°F (15°C). For most U.S. climates, this means late spring or early summer. If you’re in a warm region, you can plant as early as February!
What are the best pest-resistant bell pepper varieties for square foot gardening?
Look for varieties bred for disease resistance, like ‘Carmen’ (resistant to bacterial spot and pepper virus Y), ‘Jupiter’ (tolerates heat and pests), or ‘Aristotle’ (disease-resistant and prolific). Companion planting with basil, marigolds, or onions can also deter pests naturally.
How often should I water bell peppers in a square foot garden?
Water deeply 1–2 times per week, ensuring the soil stays consistently moist (but not soggy). Mulch around plants to retain moisture and prevent weeds. Avoid wetting the leaves to reduce fungal diseases like blight. A drip irrigation system works best for even watering.
Why are my bell peppers turning yellow or dropping off the plant?
Yellowing peppers often signal overwatering, nutrient deficiency (like nitrogen or calcium), or pests like aphids. Dropping peppers may mean inconsistent watering, extreme heat, or poor pollination. Check soil moisture, fertilize with a balanced 10-10-10, and hand-pollinate flowers if needed.
Can I grow bell peppers in a square foot garden during winter?
Bell peppers are not cold-hardy and need warmth to grow. However, in mild winters (zones 8–10), you can extend the season with row covers or grow them in a greenhouse. Otherwise, save seeds or enjoy stored peppers until spring!
Wrapping up and next steps
Square foot gardening with bell peppers is a rewarding way to grow vibrant, pest-resistant crops in small spaces! 🌱 By choosing the right varieties—like ‘Jalapeño M’ or ‘Carmen’—and following smart spacing and care tips, you’ll enjoy a bountiful harvest with minimal effort.
Whether you’re a beginner or a seasoned gardener, these techniques make bell peppers accessible and delicious.
Ready to get started? Sketch your garden layout today and pick your favorite pepper varieties—your kitchen (and taste buds) will thank you! 🌶️