Picking
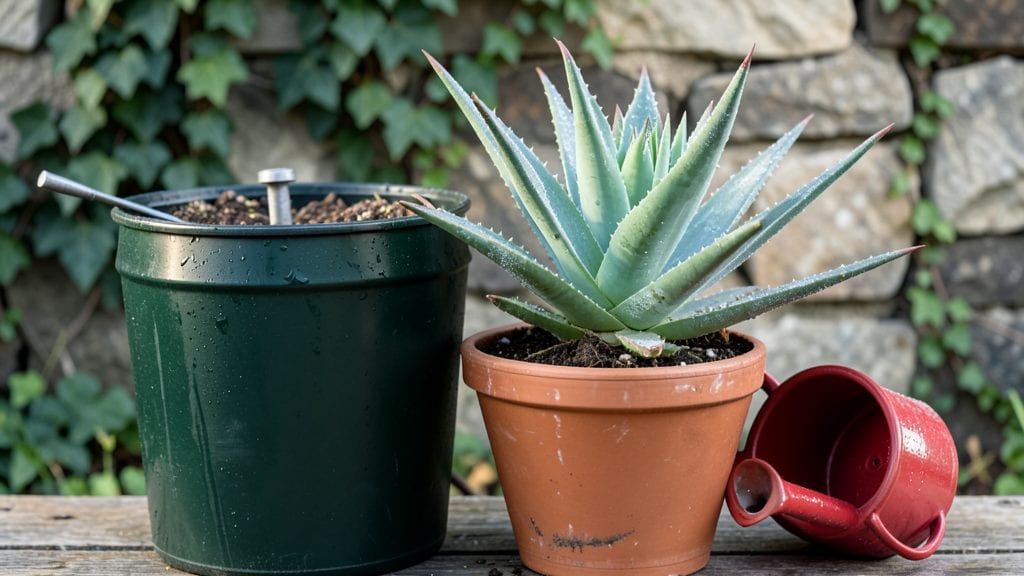
A rainwater harvesting garden starts with a simple but powerful idea: turn every drop of rain into a resource for your plants. I designed mine after watching my drought-tolerant lavender wither during dry spells—until I captured rainwater in a barrel and saw those purple blooms bounce back within weeks.
The system isn’t just about saving water; it’s about creating a garden that thrives because of the rain, not despite it.
You’ll need just three key components: a collection surface (like a roof or patio), a storage container (barrels or underground tanks work well), and a delivery system (gravity-fed or pump).
My setup uses a 55-gallon barrel under a downspout, costing under $100, and it’s already cut my water bill by half. The best part? You can scale this from a single barrel for herbs to a full underground cistern for fruit trees.
What you’ll get is a garden that stays lush even in summer droughts. My tomatoes stay juicy, my basil doesn’t bolt, and the soil stays consistently moist—no more guessing when to water.
The water’s also softer than tap, which means fewer mineral buildups in pots and healthier plants overall. Plus, you’re reducing runoff that can overwhelm storm drains.
This works for any climate—from arid deserts to humid coasts—just adjust your storage size and plant choices. Container gardens, raised beds, and even lawns can all benefit. Let’s turn your next rainstorm into free fertilizer for growth.
📚 In This Guide
- What you need
- Instructions
- Tips and common mistakes
- Wrapping up and next steps
What you need
- ● Rainwater Collection System: 1–2 food-grade barrels (55–75 gallons each, with tight-sealing lids)
- ● OR 1 larger cistern (250–500 gallons, if space allows)
- ● Gutters & Downspouts: Gutters (length matching your roof’s perimeter, typically 5–10 inches wide)
- ● Downspout extensions (1–2, with elbow connectors to direct water to barrels)
- ● Filtration System: 1 first-flush diverter (to remove debris from the first rain)
- ● 1 fine mesh screen (for barrel intake, 100–200 micron)
- ● Pumps & Hoses: 1 submersible pump (12V or solar-powered, 1–2 GPM flow rate)
- ● Garden hose (½-inch diameter, 25–50 feet long)
- ● Hardware & Fasteners: Roofing screws, gutter spikes, or brackets (stainless steel or galvanized)
- ● Sealant tape (for waterproofing joints)
- ● Soil & Amendments: Compost (2–3 cubic feet, for enriching harvested rainwater soil)
- ● Perlite or vermiculite (1–2 bags, for drainage)
- ● Plants: Drought-tolerant seedlings or cuttings (e.g., succulents, herbs, or native plants)
- ○ Optional Upgrades: Solar-powered light for nighttime watering
- ● pH test kit (to monitor water quality)
- ● Rainwater storage bag (for portable top-ups)
Step-by-step instructions for building a rainwater harvesting garden
Transform your garden into a self-sufficient water source with this simple, effective system.
Select and Prepare Your Collection Site
Choose a location that receives at least 6 inches of rainfall monthly and has a slight slope for natural drainage. Avoid areas where debris or leaves accumulate heavily, as they can clog your system. I prefer a spot near existing garden beds so I can easily connect irrigation lines later. Clear the area of weeds and level the ground with a shovel, creating a 4-foot by 6-foot base for optimal coverage.
Place a 1-inch layer of landscape fabric over the prepared area to prevent soil and weeds from mixing with your collection system. Secure the edges with landscape staples. This step is critical—it keeps your collection area clean and extends the life of your setup by preventing clogs. Test the fabric by walking on it; if it ripples, add more staples to smooth it out.
Install the Collection Surface
Lay down a perforated corrugated metal sheet or a plastic rainwater collection tray over the fabric. The tray should extend slightly beyond the edges of your garden bed to ensure maximum water capture. For a 4-foot by 6-foot area, a 5-foot by 7-foot tray works perfectly. Secure the tray with U-shaped ground anchors at each corner to prevent shifting during heavy rain.
If using metal sheets, angle them slightly (about 5 degrees) toward the center to help water flow toward your collection point. Avoid sharp edges that could damage plants or irrigation lines. I always run a test with a hose to check for proper drainage before planting—this ensures water will flow where you need it.
Set Up the Storage and Distribution System
Position a 55-gallon rain barrel or food-grade plastic barrel near the lowest point of your collection surface. Use a downspout diverter to redirect water from your roof or collection tray into the barrel. If your barrel lacks a spigot, drill a 1-inch hole near the bottom and screw in a ball valve for easy access. Place the barrel on a pallet or cinder blocks to elevate it 12-18 inches off the ground—this prevents contamination from soil and makes water flow more efficiently.
Connect a drip irrigation line or soaker hose from the barrel’s spigot to your garden beds. Run the line along the edges of your planting area so water reaches the roots directly. For a 4-plant system, a 25-foot soaker hose provides even coverage. Test the setup by filling the barrel and observing how quickly water flows—adjust the valve to control the rate.
Plant Water-Efficient Species
Select drought-tolerant plants like lavender, rosemary, succulents, and native grasses to maximize efficiency. These species thrive with minimal watering and complement a rainwater system perfectly. Space plants 12-18 inches apart to allow airflow and reduce evaporation. For a 4-plant setup, I recommend 2 lavender bushes, 1 rosemary plant, and 1 sedum ground cover—this combination stays lush with little maintenance.
Mulch the area with 2-3 inches of wood chips or straw to retain moisture and suppress weeds. Avoid organic mulches like grass clippings, as they can introduce pests or diseases. Water the plants deeply once a week during dry spells to help them establish strong roots. You’ll notice healthier foliage and fewer brown leaves within 3-4 weeks—this is your sign the system is working.
Maintain and Expand Your System
Clean your collection surface twice a year (spring and fall) to remove debris and algae. Scrub the tray or metal sheets with a mild vinegar solution (1 part vinegar to 3 parts water) to prevent buildup. Check the barrel’s spigot monthly for leaks or clogs, especially before the growing season. If your barrel fills quickly, consider adding a second barrel or a larger collection tray to increase capacity.
Monitor rainfall patterns and adjust your watering schedule accordingly. In low-rainfall months, supplement with 1-2 gallons of collected rainwater per plant weekly. Over time, you’ll develop a rhythm—your garden will tell you when it needs more. This system isn’t just sustainable; it’s a game-changer for low-maintenance gardening.
Tips & tricks for perfect rainwater harvesting garden
A few smart strategies will help you create a system that works flawlessly for years to come.
Site Selection Wisdom: When choosing your 4-foot by 6-foot collection site, prioritize areas that get consistent rainfall and have good drainage. I’ve learned the hard way that flat spots can become muddy messes after heavy rains—always look for that subtle slope. Also, position your system near existing garden beds to minimize irrigation line length and reduce water loss during transport. This small detail saves both time and water in the long run.
Collection Surface Precision: For the 5-foot by 7-foot collection tray, make sure it extends at least 6 inches beyond your garden bed edges. This extra coverage captures water that would otherwise run off. If using metal sheets, that 5-degree angle toward the center is crucial—it ensures water flows smoothly toward your collection point. I’ve seen systems fail when the angle was too steep or too shallow, so take the time to adjust it properly before planting.
Barrel Placement Strategy: Elevating your 55-gallon barrel on pallets or cinder blocks to 12-18 inches off the ground isn’t just about preventing contamination—it also creates pressure for better water flow through your irrigation system. Place the barrel at the lowest point of your collection surface to maximize gravity flow. I’ve found that positioning it near the center of your garden bed makes water distribution even more efficient, especially for that 4-plant setup.
Planting and Maintenance Insight: The 12-18 inch spacing between plants might seem generous, but it’s essential for proper airflow and water distribution. I’ve noticed that when plants are too close, some get overwatered while others dry out. For the 2-3 inches of mulch, stick with wood chips or straw—they retain moisture perfectly and suppress weeds without introducing pests. This simple layering makes all the difference in maintaining a healthy, low-maintenance garden.
Pro Tips for Rainwater Harvesting Garden
- A few smart strategies will help you create a system that works flawlessly for years to come.
- Site Selection Wisdom: When choosing your 4-foot by 6-foot collection site, prioritize areas that get consistent rainfall and have good drainage.
- Collection Surface Precision: For the 5-foot by 7-foot collection tray, make sure it extends at least 6 inches beyond your garden bed edges.
Frequently asked questions
Got questions about turning rainwater into a garden powerhouse?
Here are answers to the most common queries—so you can dive in with confidence!
How much rainwater can I realistically collect in my garden?
This depends on your setup! A 100 sq. ft. roof can yield 600–1,200 gallons per inch of rain (varies by climate). Urban areas average 30–50 inches/year, while rural zones may see 100+ inches. Use a rainwater calculator to estimate your yield based on local rainfall data.
When is the best time to install a rainwater harvesting system?
Ideally, spring or early summer—before peak rainfall seasons. This gives your system time to acclimate and lets you test for leaks before heavy downpours. If retrofitting, dry months (like late fall/winter) work too, so you’re not disrupting irrigation during growing seasons.
Are there cheaper alternatives to barrels or cisterns?
Yes! DIY options include:
- Reused containers: Clean food-grade barrels, livestock tanks, or even repurposed bathtubs (line with a UV-resistant liner if needed).
- Swales or berms: Low-cost earthworks that slow and absorb rainwater naturally (great for sloped gardens).
- Community sharing: Partner with neighbors to split costs for a larger cistern.
What do I do if my harvested water smells or looks cloudy?
Cloudiness or odors usually mean algae, sediment, or bacteria. Fix it with these steps:
- Add 1 tsp of bleach per 100 gallons (unscented) and let sit for 30 minutes, then flush.
- Install a first-flush diverter to bypass roof contaminants.
- Use a fine mesh filter or berkey-style filter for ongoing clarity.
Can I use rainwater for all my plants, or are some off-limits?
Most plants thrive on rainwater, but avoid it for:
- Citrus or acid-loving plants (like blueberries)—rainwater can leach nutrients from soil over time.
- Hydroponic systems (unless filtered to remove debris).
- Plants sensitive to chlorine/fluoride (e.g., orchids)—use distilled water instead.
Wrapping up and next steps
Transforming your garden into a self-sustaining water source through rainwater harvesting isn’t just eco-friendly—it’s empowering! 🌱 By collecting and reusing rainwater, you’ll reduce waste, cut water bills, and nurture thriving plants all year round. Whether you’re a seasoned gardener or just starting, every drop counts.
Ready to take the next step? Start small—assess your space, gather supplies, and design a system that fits your needs. Your garden (and the planet) will thank you!