
Tools
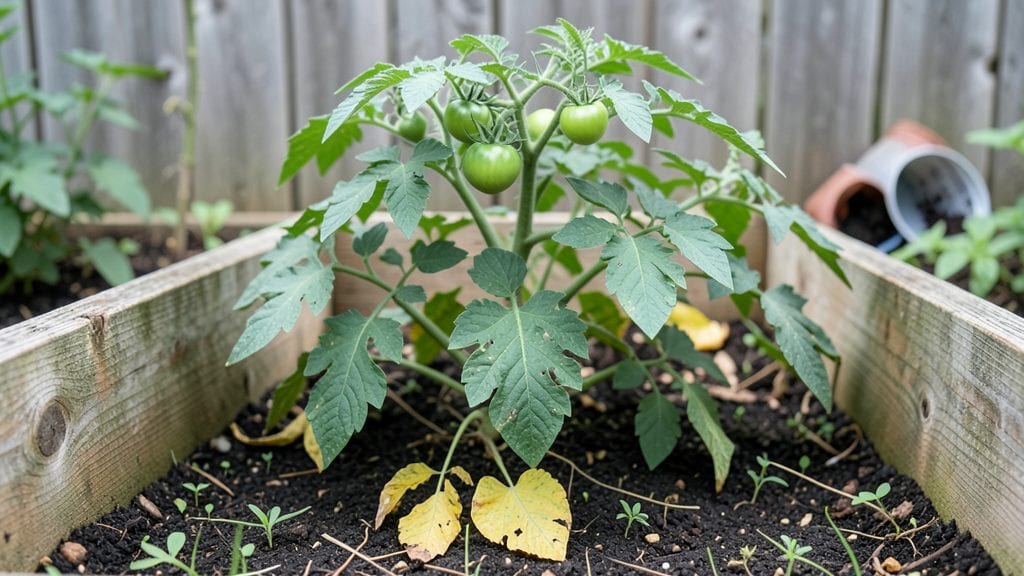
Follow these raised garden instructions to turn a patch of grass into a thriving food factory—no backbreaking bending required, and I started with a simple 4x8-foot cedar box. winter. The key isn’t fancy materials but smart design: drainage holes, sturdy corners, and soil that stays loose and fertile.
You’ll need basic tools—a drill, screws, and lumber—but no prior carpentry skills. Cedar resists rot, pressure-treated wood lasts years, and galvanized hardware keeps everything secure. The soil mix is where the magic happens: equal parts compost, topsoil, and perlite for drainage.
This combo keeps roots happy and weeds at bay, even in heavy rain.
Once planted, your raised garden becomes a low-maintenance powerhouse. Vegetables mature faster in warm soil, herbs stay fragrant and pest-free, and flowers bloom nonstop. You’ll harvest crisp lettuce in spring, juicy tomatoes in summer, and hardy kale through fall—all while avoiding soil compaction and back pain.
The best part? Extend the season with row covers or move containers indoors during frost.
Whether you’re growing in full sun or partial shade, this setup adapts to your space and climate. From urban balconies to rural backyards, the same principles apply—just adjust height for accessibility or width for more plants. Let’s get your garden built and growing in no time!
📚 In This Guide
- What you need
- Instructions
- Tips and common mistakes
- Wrapping up and next steps
What you need
- ● Raised Garden Bed Kit or Materials: Untreated lumber (cedar, redwood, or composite wood recommended for durability) – 2x6s or 2x8s, 8 ft long (quantity depends on bed size; e.g., 4 boards for a 4x8 ft bed).
- ● OR Pre-cut raised bed kit (check dimensions for your desired size).
- ● Hardware: Galvanized or stainless steel screws (2.5"–3") – 20–40 screws (depends on bed size and corner brackets).
- ○ Corner brackets (optional but recommended for stability) – 4 pieces.
- ● Landscape Fabric or Cardboard: To block weeds (1–2 sheets, cut to fit bed base).
- ● Soil & Amendments: High-quality garden soil (avoid topsoil with weeds/seeds) – 1–2 cubic yards (depends on bed depth and size).
- ● Compost or aged manure – 1–2 bags (for nutrient boost).
- ○ Perlite or vermiculite (optional, for drainage) – 1–2 bags.
- ● Tools: Drill/driver with screwdriver bit.
- ● Tape measure.
- ● Level (to ensure even bed placement).
- ● Shovel or garden fork (for soil prep).
- ● Wheelbarrow (for hauling soil).
- ● Enhancements: Drip irrigation kit or soaker hoses (for easy watering).
- ● Timers for automated watering systems.
- ● Garden edging (to define the bed neatly).
- ● Comfort & Safety: Work gloves (to protect your hands).
- ● Knee pads (for long assembly sessions).
- ● Safety glasses (if cutting lumber).
- ● Long-Term Care: Mulch (straw, wood chips, or leaves) – 1–2 bags (for moisture retention).
- ● Plant markers or labels (to track your crops).
Step-by-step instructions for building a productive raised garden
Here's how I build a raised bed that stays fertile, drains perfectly, and grows vegetables all season long.
Choose and Prepare the Location
Pick a spot with at least 6 hours of sunlight daily—most vegetables need full sun to thrive. I always check the morning sun path because afternoon shade can still work for leafy greens like lettuce and spinach. Avoid low-lying areas where water pools after rain, as raised beds need excellent drainage.
Clear the ground of grass, weeds, and debris within the bed's footprint. I use a sharp spade to cut through roots and remove any competing plants. A 4-foot by 8-foot bed gives enough space for four people to grow a variety of crops without overcrowding. Lay down cardboard or landscape fabric to smother remaining weeds—this keeps them from regrowing and blocks light from new sprouts.
Build the Frame and Add Drainage
Construct the frame using untreated wood, cedar, or composite lumber that won't rot quickly. I use 2x6 boards for the sides, cutting them to your desired dimensions. Assemble the frame with galvanized screws or corner brackets—this ensures stability and prevents warping over time. For drainage, I drill ¼-inch holes along the bottom of each board before assembly. These holes allow excess water to escape while keeping soil and roots contained.
Place the frame in your chosen location and check for level using a carpenter's level. Adjust the legs or supports if needed—an uneven bed leads to poor water distribution and root stress. Once level, fill the bottom with 2-3 inches of coarse gravel or broken pottery to create a drainage layer. This prevents waterlogging and keeps roots healthy even after heavy rains.
Layer the Soil for Optimal Growth
Start with a 4-inch layer of untreated wood chips or straw as a carbon-rich base. This improves soil structure over time and adds organic matter as it breaks down. Next, add 6 inches of a mix of topsoil and compost—I use a 50/50 blend for balanced fertility. Avoid garden soil from your yard, as it compacts easily and may contain weeds or pests.
Top the bed with 2-3 inches of finished compost or well-aged manure to provide nutrients for your plants. Mix everything gently with a garden fork to aerate the soil without disturbing the layers. The goal is loose, fertile soil that holds moisture but drains well. Water the soil lightly after filling to settle it and remove any air pockets.
Plant and Maintain for Year-Round Success
Plan your layout by grouping plants with similar water and sunlight needs. I always place taller crops like tomatoes or peppers along the north side to avoid shading smaller plants. Space seedlings according to their mature size—crowding leads to poor air circulation and disease. Water deeply 1-2 inches per week, focusing on the base of plants rather than overhead spraying to prevent fungal issues.
Mulch the surface with 2-3 inches of straw or wood chips to retain moisture, suppress weeds, and regulate soil temperature. Check the soil moisture weekly by sticking your finger 1 inch deep—if it feels dry, it's time to water. In hot climates, mulch also protects roots from extreme heat. Rotate crops annually to prevent soil depletion and pest buildup, keeping your raised bed productive for years.
Tips & tricks for building a productive raised garden
A few simple tricks can transform your raised garden from good to exceptional—here's what I've learned after years of trial and error.
Sunlight Strategy: While the instructions mention 6 hours of sunlight, I've found that most vegetables actually thrive with 8 hours, especially during peak growing months. For leafy greens like lettuce and spinach, you can push it to 5 hours of morning sun if afternoon shade is unavoidable. Use a simple sunlight tracker app for a week to determine your garden's actual light exposure before planting.
Drainage Detail: The ¼-inch holes in the frame might seem small, but they make all the difference. If you're working with clay soil that drains poorly, consider adding a layer of landscape fabric over the gravel before adding soil. This prevents fine particles from clogging the drainage holes over time. I also recommend testing drainage by filling the empty frame with water—if it drains completely within 30 minutes, you're good to go.
Soil Layering Secret: When creating your 6-inch topsoil and compost mix, I recommend adding a handful of perlite or vermiculite to improve aeration. This lightens the soil without affecting fertility. For the 2-3 inches of finished compost on top, I like to mix in some worm castings—they provide gentle, long-lasting nutrients that won't burn young plants. The key is to keep everything loose so roots can grow freely.
Maintenance Shortcut: Instead of checking soil moisture weekly by sticking your finger 1 inch deep, I've found a faster method: press your thumb into the soil. If it springs back quickly, you're good. If it stays indented, it's time to water. This works particularly well for the 1-2 inches of weekly watering requirement mentioned in the instructions. For hot climates, I water in the early morning to reduce evaporation and fungal risks.
Pro Tips for Raised Garden Instructions
- A few simple tricks can transform your raised garden from good to exceptional—here's what I've learned after years of trial and error.
- Sunlight Strategy: While the instructions mention 6 hours of sunlight, I've found that most vegetables actually thrive with 8 hours, especially during peak growing months.
- Drainage Detail: The ¼-inch holes in the frame might seem small, but they make all the difference.
Frequently asked questions
Got questions about building and maintaining a raised garden? You’re not alone! Here are some of the most common concerns—plus straightforward answers to help you grow with confidence.
What’s the best time of year to build a raised garden?
Spring or early fall are ideal for building a raised garden, as the soil is workable and temperatures are mild. In warmer climates, you can start anytime, but avoid extreme heat or freezing conditions. If you’re in a colder region, plan ahead—building in winter may require extra prep to prevent soil compaction.
Can I reuse materials like lumber or bricks from an old project?
Reusing materials like untreated cedar, redwood, or composite lumber saves money and reduces waste. Just ensure they’re in good condition—no rot, cracks, or chemical treatments (like pressure-treated wood, which can leach toxins). Bricks or pavers also work well if they’re clean and stable. Pro tip: Check local regulations for height restrictions or material guidelines!
How do I keep my raised garden from overheating in summer?
Overheating can dry out soil and stress plants. To combat this, mulch the top with straw or wood chips (2–3 inches deep) to retain moisture and cool the soil. Plant shade-tolerant crops like lettuce or spinach on the north or west sides. Elevating the garden slightly (if possible) also improves airflow. For extreme heat, consider a shade cloth for delicate plants.
What’s the easiest way to deter pests in a raised garden?
Physical barriers and natural repellents work best. Use fine mesh hardware cloth to block burrowing pests like gophers, and row covers to keep flying insects at bay. Interplanting (e.g., marigolds with tomatoes) confuses pests, while companion planting (like basil with peppers) deters specific bugs. Avoid chemical pesticides—they can harm beneficial insects and soil health.
How long does it take for a raised garden to become fully functional?
With proper prep, you can plant within 2–4 weeks of building, depending on soil quality. If you’re starting with fresh soil, mix in compost and let it settle for at least 2 weeks before planting. For year-round gardens, layer with mulch in fall to protect soil over winter. Patience pays off—healthy soil takes time, but you’ll see faster growth in subsequent seasons!
Wrapping up and next steps
Building and maintaining a raised garden is a rewarding journey that brings fresh produce and beauty to your space—no matter the season! 🌱 With the right materials, careful planning, and a little patience, you’ll create a thriving garden that’s easier on your back and more productive than ever. Now that you’re equipped with step-by-step instructions and pro tips, it’s time to roll up your sleeves and get growing!
Ready to take the next step? Start by sketching your garden layout, gathering your supplies, and planting your first seeds or seedlings this weekend. Happy gardening—your future harvests will thank you! 🌿