
Tools
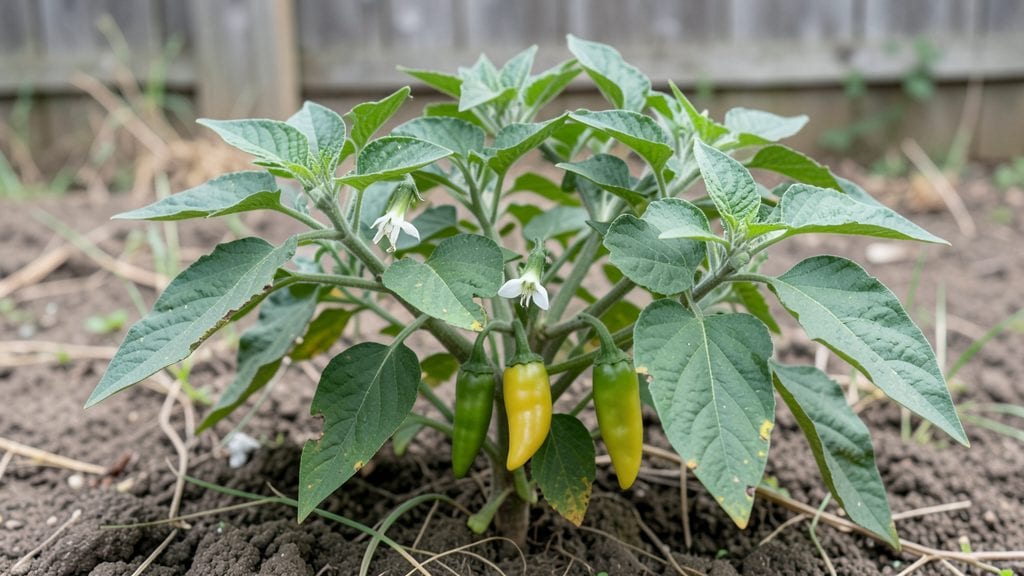
Growing salsa garden peppers in small spaces isn’t just possible—it’s the secret to restaurant-quality flavor in your kitchen. 🌱 I’ve packed my balcony with jalapeños, serranos, and habaneros that produce enough heat for dozens of jars each season, and the key isn’t space—it’s the right varieties and a few smart tricks.
Start with heat-loving varieties like ‘Apache’ jalapeños or ‘Carolina Reaper’ habaneros, which thrive in 5-gallon containers or raised beds just 18 inches wide. They need 6+ hours of sun daily, soil that drains fast (mix in perlite), and water only when the top inch feels dry—overwatering turns peppers bland.
A balanced fertilizer every 4 weeks keeps them firing on all cylinders.
By mid-summer, you’ll be harvesting peppers that pack 3-5 times the heat of store-bought, with glossy skins and walls thick enough for roasting. Prune aggressively to focus energy on fruit, and watch as your plants become heat machines instead of leafy bushes.
The first batch of salsa? It’ll change how you think about homegrown flavor.
Works in apartments, patios, or even sunny windowsills—just adjust varieties for your heat tolerance. Let’s turn that tiny plot into a spice powerhouse.
📚 In This Guide
- What you need
- Instructions
- Tips and common mistakes
- Wrapping up and next steps
What you need
- ● Salsa garden pepper seeds or seedlings: Choose compact varieties like ‘Apache,’ ‘Lipstick,’ or ‘Shishito’ (10–20 plants, depending on yield goals).
- ● High-quality potting mix: 5–10 gallons of well-draining, organic soil (e.g., Miracle-Gro Potting Mix or homemade blend with perlite).
- ● Containers or garden bed: Containers: 5–10 gallon pots (1 per plant) with drainage holes.
- ● Garden bed: Full sun (6+ hours/day) and raised beds or in-ground plots (12" spacing between plants).
- ● Fertilizer: Balanced organic fertilizer (e.g., Fish emulsion or 10-10-10 NPK) or slow-release granules.
- ● Watering can or hose with nozzle: For gentle, deep watering (1–2 inches per week).
- ● Hand trowel: For transplanting seedlings or loosening soil.
- ● Pruning shears: To trim leggy stems and encourage bushiness.
- ○ Glove: Protective (optional but recommended for handling spicy peppers!).
- ○ Support stakes or cages: (Optional) For taller varieties like ‘Jalapeño’ (3–4 ft stakes).
- ● Warmth: Peppers thrive in temps 70–90°F (start seeds indoors 8–10 weeks before last frost).
- ● Sunlight: Confirm your space gets full sun (no shade!).
- ● Patience: Harvest time: 60–90 days for compact varieties.
Step-by-Step instructions for growing salsa garden peppers in small spaces
Here's how to pack serious heat into limited square footage—my foolproof method for growing four high-yield peppers in a 4'×4' patch.
🌱 Step 1: Prepare Containers or Raised Beds
Use either the 4-foot square raised bed or individual 5-gallon fabric grow bags for drainage. If using the raised bed, fill it completely with the 1 cubic yard of potting mix mixed with the 5 pounds of compost. For grow bags, divide the potting mix evenly—about 1 gallon per bag—and add 1/2 cup compost per bag.
Break up any clumps in the potting mix with your hands to ensure even moisture distribution. The goal is a fluffy, aerated medium where roots can spread freely. For grow bags, make a small depression in the center of each bag to create a planting well—this prevents water pooling around stems.
🌱 Step 2: Plant Seedlings at the Right Depth and Spacing
Place each of the 4 pepper seedlings into the prepared containers, spacing them 12 inches apart in the raised bed or centered in each grow bag. Handle seedlings by their leaves to avoid damaging stems. Dig a hole just deep enough to accommodate the root ball—typically 1 inch deeper than the original pot—and gently tease out any circling roots.
Fill the hole with soil, pressing lightly to eliminate air pockets. Water immediately after planting to settle the soil around roots. For grow bags, add 1 tablespoon of balanced fertilizer to each planting hole before covering with soil. This jumpstarts growth without overwhelming young plants.
☀️ Step 3: Provide Consistent Heat and Light
Peppers thrive in full sun (6-8 hours daily) and 70-85°F soil temperatures. If your space gets afternoon shade, supplement with a 4-foot LED grow light positioned 12 inches above plants for 14 hours daily. I use a timer to automate this—peppers need predictable light cycles to set fruit.
Monitor soil temperature with a probe thermometer. If readings dip below 65°F, cover the bed with black plastic mulch during the day to absorb heat. Water only at the base using the 1-gallon watering can, avoiding wetting leaves to prevent disease. You'll know moisture is right when the top inch of soil feels dry to the touch.
💧 Step 4: Feed and Prune for Maximum Yield
After 4 weeks, when plants show 6-8 true leaves, apply the 1 pound of tomato and pepper fertilizer dissolved in 1 gallon of water. Split the solution evenly among all plants. Repeat every 4-6 weeks during the growing season. Prune suckers—the small shoots that form in the leaf axils—using clean sharp pruning shears to direct energy toward fruit production.
Remove any flowers that appear before 6 weeks after planting. Early blooms often drop off, but removing them ensures the plant focuses on establishing a strong root system first. You'll see the difference in fruit size and quantity—plants that skip early pruning often produce small, underdeveloped peppers.
✂️ Step 5: Harvest and Preserve for Salsa Season
Peppers are ready to harvest when they reach 3-4 inches long and develop vibrant color. Use the small pruning shears to snip stems just above a leaf node—this encourages bushier growth. For salsa, I harvest half the peppers green (for roasting) and let the rest fully ripen on the plant for fresh use.
Store harvested peppers in the mesh produce bags in the refrigerator for up to 2 weeks. When ready to make salsa, process peppers immediately or freeze in 1-cup portions for later use. The key to great salsa is freshness—peppers lose flavor within 3-4 days of picking, so plan your harvests around cooking days.
Tips & tricks for perfect salsa garden peppers
Transforming a tiny space into a pepper powerhouse takes more than just following the steps—it's about understanding the subtle details that make all the difference. Here's what I've learned after growing these fiery beauties in compact spaces year after year.
Soil Temperature Secrets: That 70-85°F range isn't just a suggestion—it's critical. I've seen peppers refuse to set fruit when soil temps dip below 65°F, even if air temps are perfect. Invest in a soil thermometer and check daily, especially in morning and evening. If your space gets chilly at night, consider using black plastic mulch during the day to absorb and radiate heat back to the roots. The difference in fruit production is night and day.
Lighting Strategy: Those 14 hours of light aren't optional—they're non-negotiable for pepper fruit set. If you're supplementing with grow lights, position them just 12 inches above the plants and use a timer. I've found that peppers need that consistent light cycle to trigger flowering. Pro tip: Adjust your light height as plants grow—keep it close enough to maintain intensity but far enough to prevent leaf burn. And remember, LED grow lights are worth the investment over cheaper alternatives.
Pruning Precision: When you're pruning those suckers in Step 4, don't just snip anything that looks odd. Focus on removing only the shoots that form in the leaf axils—the ones growing between the main stem and branches. These suckers compete with your fruit for energy. I've seen plants that were heavily pruned early produce up to 30% more peppers than those left to grow wild. And here's a secret: Save those pruned suckers! Root them in water to grow new plants for next season.
Harvest Timing: That 3-4 inch size guideline is your sweet spot for maximum heat and flavor. Harvesting at this stage gives you both the vibrant green peppers perfect for roasting and the chance to let some ripen fully for fresh eating. I like to harvest every 3-4 days during peak season to keep production going. Store any extras in mesh bags in the fridge—they'll keep their crispness and flavor better than plastic bags, which trap moisture and speed up spoilage.
Pro Tips for Salsa Garden Peppers
- Transforming a tiny space into a pepper powerhouse takes more than just following the steps—it's about understanding the subtle details that make all the difference.
- Soil Temperature Secrets: That 70-85°F range isn't just a suggestion—it's critical.
- Lighting Strategy: Those 14 hours of light aren't optional—they're non-negotiable for pepper fruit set.
Frequently asked questions
Got questions about growing salsa garden peppers?
You’re not alone! Whether you’re a first-time gardener or a seasoned green thumb, these are the most common queries—and we’ve got the answers to help you cultivate a fiery harvest.
How long does it take for salsa garden peppers to mature?
Most salsa peppers, like jalapeños or serranos, take 60–90 days from transplanting to harvest, depending on the variety. Start seeds indoors 8–10 weeks before your last frost to give them a head start. Patience pays off—hotter peppers (like habaneros) can take up to 120 days!
Can I grow salsa peppers in containers?
Salsa peppers thrive in 5-gallon pots or larger with well-draining soil. Choose compact varieties like ‘Apache’ or ‘Carolina Reaper’ (dwarf strains). Just ensure pots have drainage holes and place them in full sun (6+ hours/day). Containers keep roots cozy and make harvesting easier!
Why aren’t my salsa peppers turning red (or hot)?
Peppers change color as they mature—green → yellow/red/orange—but heat levels peak when they’re fully ripe. If yours stay green, check for:
- Sunlight: Need 6+ hours of direct sun daily.
- Water: Keep soil consistently moist (not soggy).
- Nutrients: Feed with balanced fertilizer (10-10-10) every 3–4 weeks.
- Patience: Some varieties (like jalapeños) turn red slowly—don’t harvest too early!
What’s a good substitute if my salsa peppers fail?
No worries! Swap salsa peppers with:
- Bell peppers: Mild but versatile (remove seeds for less heat).
- Chili peppers: Cayenne or Thai bird’s eye add spice.
- Tomatoes: Cherry or Roma tomatoes work in salsa (add lime + cilantro for zing!).
- Store-bought peppers: Jalapeños or serranos in jars (check for freshness).
Pro tip: Freeze extra peppers in oil or blend into salsa paste for future use!
How do I keep pests off my salsa peppers?
Peppers attract aphids, spider mites, and hornworms, but these tricks help:
- Neem oil spray: Natural repellent (spray leaves weekly).
- Encourage predators: Ladybugs and lacewings eat pests—plant marigolds nearby.
- Row covers: Lightweight fabric shields young plants.
- Water at the base: Avoid wetting leaves to prevent fungal issues.
If hornworms strike, handpick them (they’re camouflaged—look for black stripes!).
Wrapping up and next steps
Growing salsa garden peppers in small spaces is not just possible—it’s a rewarding way to spice up your meals while maximizing your harvest! 🌱 Whether you’re a beginner or a seasoned gardener, these compact-growing varieties and smart techniques will help you cultivate fiery flavors without sacrificing space.
Now that you’re armed with the best tips, why not start planting your own batch today? Grab those seeds, pick your favorite pot or vertical planter, and let your green thumb shine! 🌶️
Ready to dive in? Check out our recommended starter kits or explore more compact pepper varieties to kickstart your spicy adventure!